by

When you consider your pet to be an important part of your family, it makes sense that you want to consider its needs before you remodel your kitchen. Your remodeling project ideally should make it easier for all of your family members, including your cat, dog, or other fur companion to spend time in this room without being at risk of being hurt or inconvenienced. As you consider what ways you want to alter your kitchen, you can incorporate these pet-friendly ideas as you work.

Dogs in Kitchen Cabinets


Hardwood Flooring

One of the easiest ways you can make your pet feel at home in the kitchen is by installing flooring that will safe and comfortable for it to walk on every day. Carpeting, especially loose varieties like shag, can get caught on a pet’s nails and foot pads and cause it to get injured. However, hardwood flooring like wood or tile is easy to walk on, safe for your pet’s nails, and also easy to clean up if your cat or dog leaves dirty footprints behind it.

Sleep and Play Areas

People who own cats know how difficult it can be to keep their feline friends off the table and counters. Cats and even some dogs like to jump up on the counters and tables to take a nap or be closer to their humans. With that in mind, you can dissuade this behavior by designating pet sleep and play areas in your kitchen. Taking the door off a cabinet or siding off a kitchen island and putting a bed inside will give your pet a place of its own to sleep. Likewise, putting a cat tree or even shelves on the wall for your felines to climb and play on will keep them off your tables and counters.

Food Storage

If your pet genuinely is a part of your family, you will want to find a way to feed it along with your kids and spouse in the kitchen. While your family dines at the table, your pet can munch on its own food when you create a pet-feeding drawer just for its needs. This drawer can contain your pet’s food and water dishes and slide out during mealtimes. After it is done eating, you can slide the drawer back to keep the pet food out of sight.

Pet Safety

Of course, allowing your pet in the kitchen should entail some safety measures as well. Cats, for example, are often adept at opening cabinet doors that are not locked or hinged securely. Dogs can jump up and accidentally turn on loose stove burner knobs. You can prevent accidents and your pet being hurt by pet-proofing your kitchen. Installing catches on the cabinet doors, using knob covers on the stove, and even using small appliances that can be installed directly under your cabinets can keep your kitchen intact and your pet safe.

by Wade Shaddy

Create illuminated space in any bookcase using a light bridge. This type of lighting is installed below any shelf using simple ambient lights to add depth and character to the bookcase. Typical light bridges illuminate objects other than books such as vases, flowers pictures or keepsakes. They serve to open up the bookcase by providing light between rows of books on on either side. Typical light bridges are installed in bookcases that have three sections, with the middle section receiving the light bridge. It’s fine to add a light bridge to any shelf for the same effect.

1. Measure the length horizontally across the top shelf of the bookcase. Purchase a light bridge that will fit between the two vertical sides of the bookcase. The light bridge doesn’t need to fit tight flush on either end. For example, if the shelf is 48 inches wide, use any light bridge fixture measuring between 18 and 36 inches.

2. Stain and lacquer the front of the light bridge if needed. Lots of light bridge fixtures have a single piece of molding across the front. Choose a molding profile that matches your existing trim, and apply stain that matches the existing bookcase.

3. Locate the nearest power outlet. Use a drill/driver and 1-inch Forstner bit to drill a hole through the back of the bookcase on the side needed to access the power outlet. Drill the hole one inch diagonally from the back corner. If the bookcase is installed to the wall, it’s OK to drill the hole through the side of the bookcase, one inch diagonally from the back corner on the side needed.

4. Place the light bridge fixture under the top of the bookcase. Center it flush with the front edge.

5. Hold the light bridge with one hand. Use your other hand to place two 5/8-inch screws in drilled holes on either end of the light bridge. Screw the screws in tight to secure the light bridge to the bookcase.

6. Pull the cord straight back from the light bridge fixture to the point where the shelf contacts the back. Use a hammer to tap one horseshoe nail over the cord to secure it to the back of the bookcase. If the bookcase has no back, or the back is no thicker than 1/4 inch, tap the nail into the underside of the shelf to secure the cord.

7. Insert the end of the cord through the 1-inch hole. Pull it snug. Tap two more horseshoe nails into the cord to finish installing the light. Plug it in. The switch to turn the light off and on may be on the cord or the fixture itself, depending on the model.

Things You Will Need

  • Stain (optional)
  • Lacquer (optional)
  • Light bridge fixture
  • Drill/driver
  • 1-inch Forstner drill bit
  • 5/8-inch screws
  • Hammer
  • Horseshoe nails

You can also place the light bridge on the back of the shelf, which is not recommended because the light is dampened — or you can place it under any shelf to illuminate the shelf below it.

If the top of your bookcase has a decorative trim piece across the front that’s greater than 2 inches wide, you don’t need a light bridge. Purchase hobby lights to fit behind it for the same affect.

Warning: Be careful when drilling through finished wood. Drill from both sides to prevent splintering. Wear safety glasses.

by Lauren Frandsen

by

Kitchen Remodeling Trends Intro

Does your kitchen need an upgrade? Are you looking to remodel part of your home to increase its resale value? Good news, homeowners, you will probably recoup 74-83 percent of the cost when you upgrade your kitchen.

According to the annual cost versus value report for home remodeling found that a kitchen upgrade costs an average of $18,856 to $54,909; however, you can recover up to $40,000. Plus, in the past year, the value of a kitchen remodel increased by 7 percent, translates to an additional $2,000 return on investment for homeowners.

All of this data points to one conclusion: whether you’re making minor upgrades or breaking out the sledgehammer for a complete overhaul, 2014 is a great year to remodel your kitchen.

We asked 25 top kitchen designers in America what are the most common trends they noticed in kitchen remodeling for 2014 and compiled this guide. Below you’ll find the most popular responses in each category.

Sink Trends in 2014

The kitchen sink gets a bad rap; people associate it with germs and dirty dishes, but it has quickly become one of the most popular upgrades when homeowners start remodeling. In 2014, stainless steel is out, non-traditional materials are in.

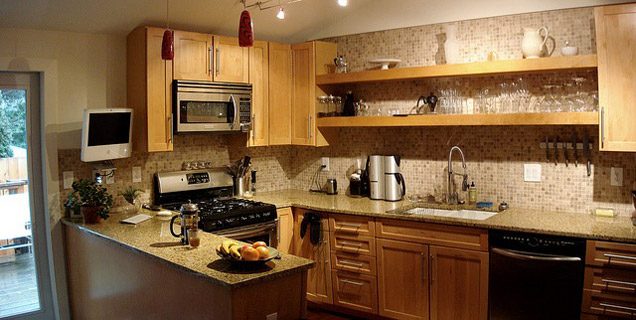
A beautiful, trendy kitchen sink not only complements a well-designed kitchen, but is also the foundation of function for cooks — everything from preparation to clean-up happens at the sink. A good sink has counter space on both sides, so the drying assembly line has ample room to work.

The following trending sinks fit different people with different tastes and lifestyles. One (or even a few) of these sink trends could inspire your next remodel!

Single-basin Sinks

Single Basin Sink

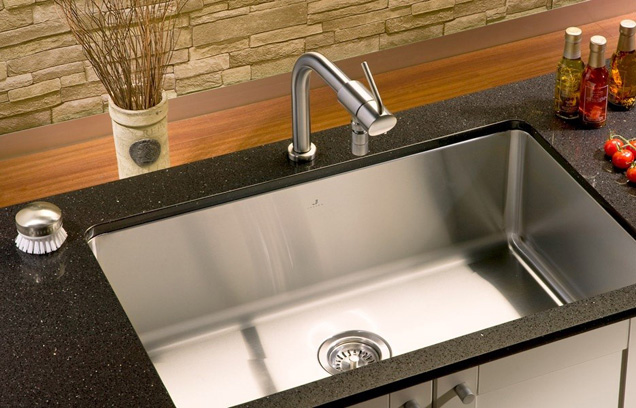
Many home cooks are ditching the standard two-basin sink for something more functional — the single basin sink. These sinks are typically the same size as a sink with two basins, which means there’s more cleaning room. You’ll now have the space shuck corn, clean the catch of the day, and wash berries to create the perfect summer meal.

Copper and Brass Sinks

Copper/Brass Apron Sink

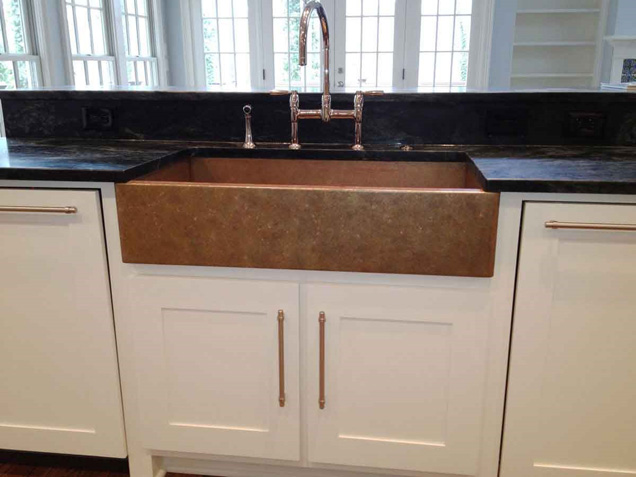
If stainless steel isn’t in style, what is? More homeowners are opting for copper or brass kitchen sinks. Often, this trend pairs well with the rustic farmhouse look that many homebuilders and trend-setters are opting for.

The different color of copper makes it a popular choice. You can choose a sink that looks like a new penny, or opt for a dark, antique color. For a minor remodel, leave your current sink, but change the faucets to a complementary brass color.
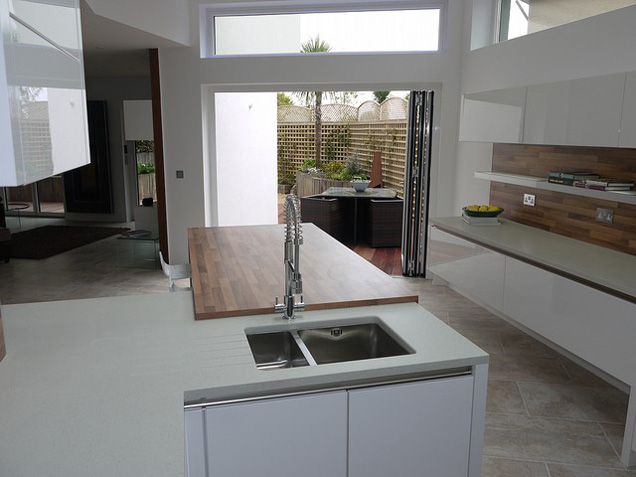
Integrated Sinks

Integrated Kitchen Sink

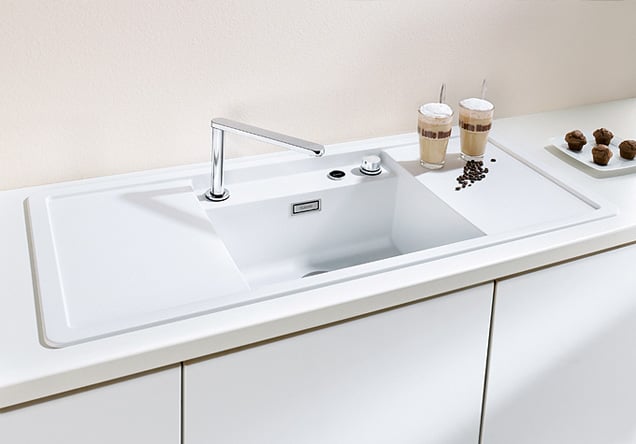
An integrated sink is made of the same materials found on your countertop, giving a sense of continuity with the rest of your counter. This design is a great option for homeowners who want to replace their countertops as well as their sink, and want a smooth, unified look. This also gives the homeowner flexibility with materials, allowing them to select from quartz, marble, and everything in between.

For those who love a modern, sleek look in their kitchen, choose an integrated sink. It makes your kitchen look high-end, but the cost won’t reflect that. Because this seamless design doesn’t create dips or crevices between the sink and the counter, there’s less room for gunk, dirt, rust, or mold to build up around the sink.

Prep Sinks

Stainless Steel Island Prep Sink

If one sink is good, two must be great! Prep sinks are becoming an increasingly popular choice. A prep sink offers more flexibility and space to budding chefs who can leave washed fruits and vegetables in it – conveniently near the stove – while dirty dishes rest in the main one.

Prep sinks also allow designers to get creative with sizes and shapes. Many people opt for a non-traditional shape, like a crescent or oval, for their prep sink; it’s a small, creative touch that all of your neighbors will be jealous of.

Apron-front Sinks

White Apron Front Sink

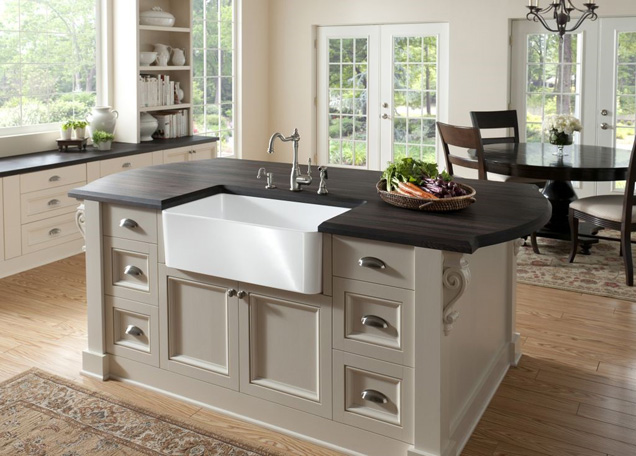
For a quaint finish to a charming kitchen, choose an apron-front sink. These sinks harken back to a quieter time. They’re sometimes described as farmhouse sinks as well. The basins sit lower than the counter and the front ends protrude off the cabinetry. The lower level makes it easier to clean and prep in the kitchen, because you can get closer to the sink. This country-style sink combines aesthetics and functionality. Look for it in classic materials like porcelain, stainless steel, and copper.

Countertop Trends in 2014

If one of the increasingly popular sink trends is integration with the countertops, then choosing the right material is twice as important. Skip the tile and go right for the meat: heavy stones like granite, marble, and soapstone are en vogue this year.

Creative Stone Choices

Engineered Stone Countertop

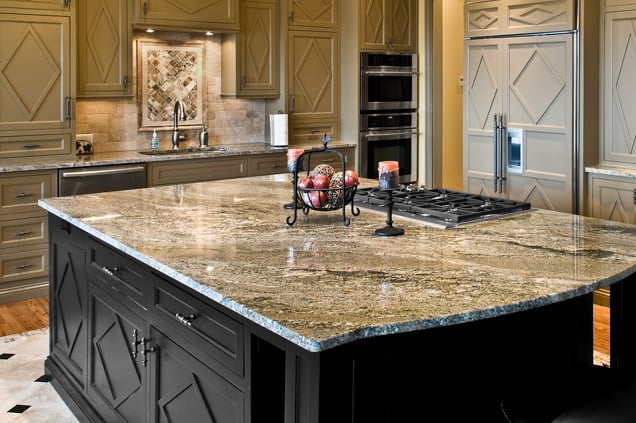
Decorators have started branching out into different stone types to work with the budgets and style preferences of home remodelers. While quartz and soapstone provide clean finishes, engineered stone is stain resistant, durable, and environmentally friendly. If you’re not afraid of heavy lifting, choose a heavy stone to set your countertops.

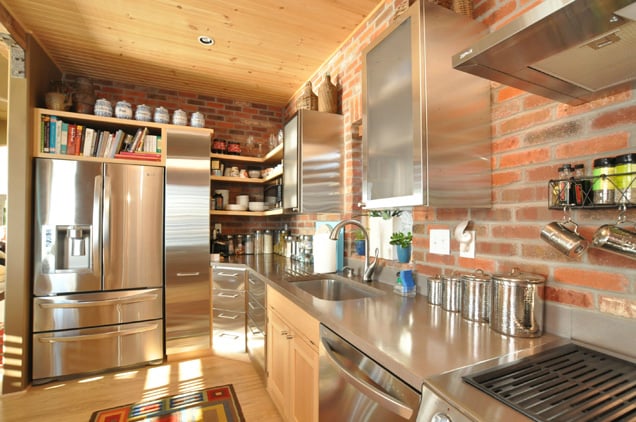
Stainless Steel Countertops

Stainless Steel Countertop

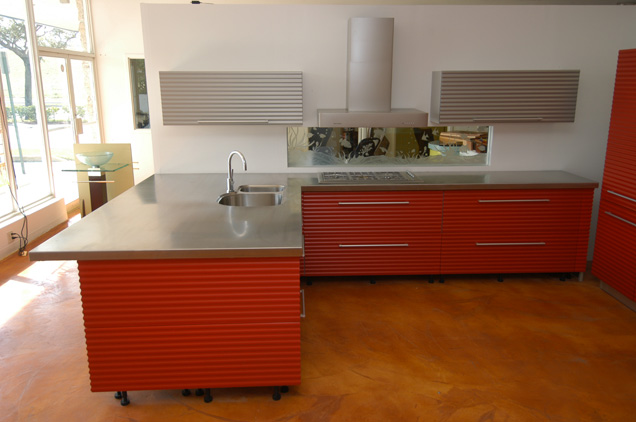
Stainless steel sinks by themselves are out, but integrated stainless steel sinks and countertops give your home a restaurant feel. These are one of the most durable countertop options, even though they can scratch and dent under pressure, and the reflection makes your kitchen appear larger. Choose this option if you’re looking to remodel your kitchen to sell your home; it’ll look large and modern, which is exactly what homebuyers look for.

Butcher Block Countertops

Butcher's Block Countertop
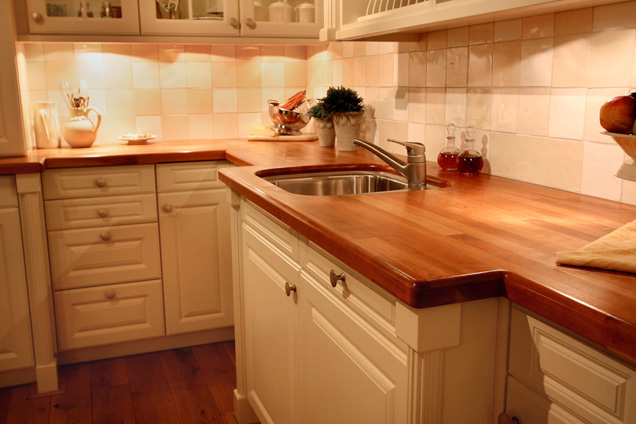
If you don’t want to go with granite and other heavy stones, another popular trend is Butcher’s wood. Butcher block is made of straight cuts of wood that are glued together for increased sturdiness. While these countertops require more maintenance than granite, they can be made to match or compliment your hardwood floors. They also come in a variety of wood including cherry, maple, and bamboo.

Flooring Trends in 2014

Wood is always in, and it’s the second most popular kitchen flooring choice after ceramic tile. In 2014, many designers are watching this material gun for first.

Obscure Wood Choices

Bamboo Kitchen Floor

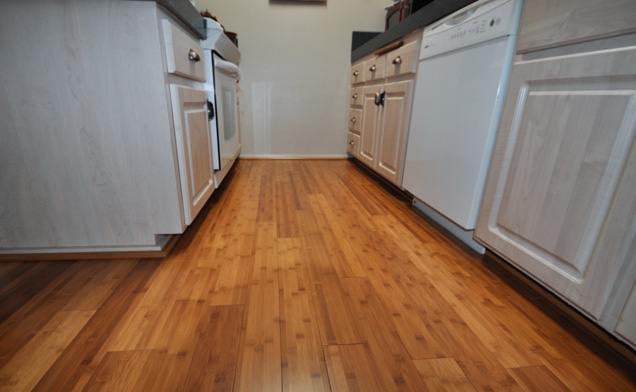
Two of the fastest growing wood choices for kitchen flooring in 2014 are bamboo and reclaimed wood. Bamboo is actually sturdier than most woods, especially engineered bamboo, and it grows twice as fast as most other wood options. Reclaimed wood comes from antique beams and old logs salvaged from rivers. With more designers opting for a rustic feel, it makes sense that this flooring choice is popular.

Wider and Longer Planks

Wide Plank Kitchen Floor

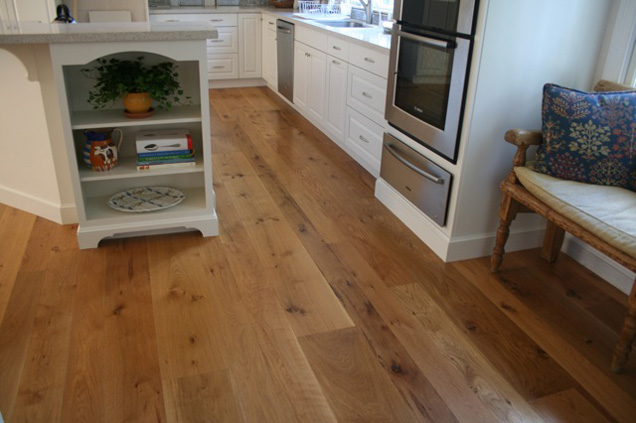
Ideal plank length is seven inches with an ideal width of six feet. Wider and longer planks of wood make a space look larger and smoother. Smooth wooden floors paired with flat (tile-free) countertops are one way to give your kitchen a finished look by just changing two elements.

Increased Color Variation

Gray Wood Kitchen Floor

You can use your hardwood flooring to anchor down your kitchen or lighten the room to contrast dark countertops. Different wood choices – from bright blonde woods to soft greys – turn your flooring into a statement piece. Hardwood floors aren’t something to be ignored; they’re a feature element.

Backsplash Trends in 2014

Backsplashes go in and out of style faster than other kitchen trends, but with a little elbow grease, it’s possible to stay up-to date on trends without breaking your bank. Check out these trends for 2014.

Rustic Brick Backsplashes

Rustic Brick Kitchen Backsplash

If you haven’t picked up on this trend already, the rustic farmhouse look is back with reclaimed wood and copper sinks. To add this element to your backsplashes, choose the rustic brick look. Brick is a challenge to install but will stay in style for several years. When done right, guests will ask if it’s the original brick from the building, even if you have a stucco home.

Use Tile Here

Tile Kitchen Backsplash

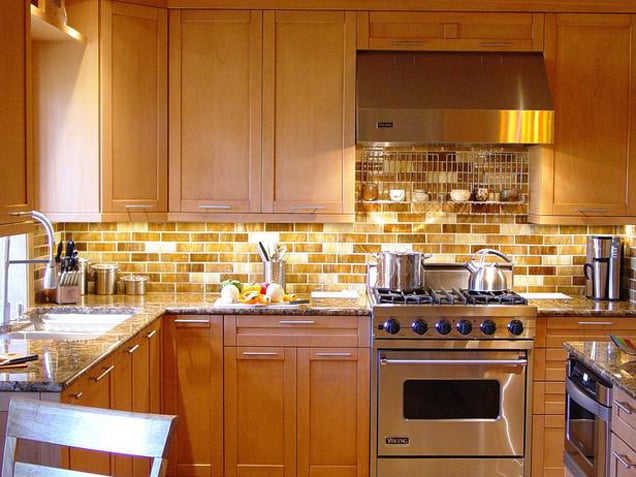
If you still want to incorporate tile into your kitchen without using it on the countertops or floor, then consider tiling your backsplash. This small space increases your options for size and color as you can create a water look with tiny blue squares or add an element of sand with large tan planks. Whatever element you’re missing in your major renovations, you can find in your backsplash.

Match the Countertops

Kitchen With Matching Backsplash and Countertop

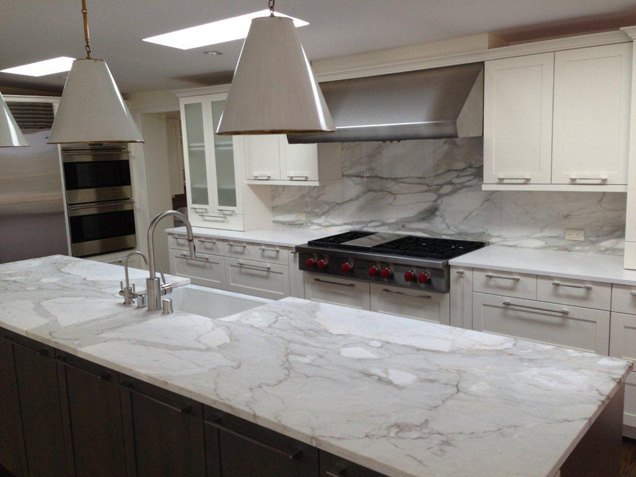
Be careful with this. If you have an incorporated sink that matches your countertops and you continue using marble or engineered stone for your backsplash, everything could start to blend together. Matching the backsplash to the countertops works well if there are enough differentiating elements – like the cabinets, stove, and flooring – to give each element its own flavor.

Kitchen Technology Trends in 2014

There’s an app for that! Chefs and tech geeks are coming together to incorporate smart technology into the kitchen. While many of the innovations are far from ready for public distribution, there are a few upgrades that can easily increase the value of your home.

Wi-Fi Enabled Refrigerators

Wi-Fi Enabled Refrigerator
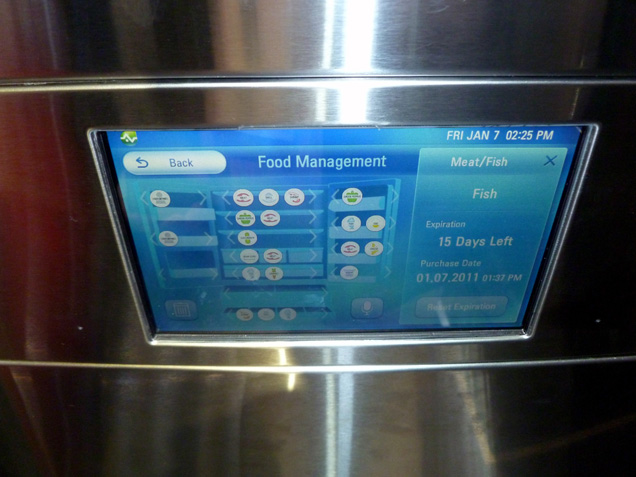
Image courtesy of en.wikipedia.org

There’s so much your refrigerator can do before you even open it. Smart refrigerators cost between $1,700 and $3,600; they come with an 8-inch LCD display that’s Wi-Fi enabled and comes with its own set of apps. These refrigerators can display photos, leave memos, create grocery lists, check the weather, and browse recipes based on the contents inside. Not only is it a fun tool to play with, but it also reduces the clutter of attaching memos and lists to your refrigerator.

USB Wall Sockets

USB Wall Socket Charger

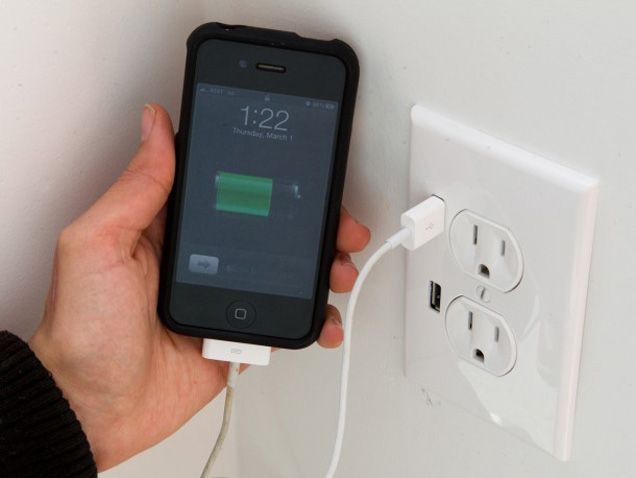
Homeowners looking to make small changes to upgrade the value of their home before placing it on the market should consider upgrading to USB wall sockets. Each socket costs about $30 and comes with two USB ports along with traditional wall plugs. Anything that charges when plugged in through a USB can go right into the wall; no adapter necessary.

Prep Pad

Wooden Prep Pad

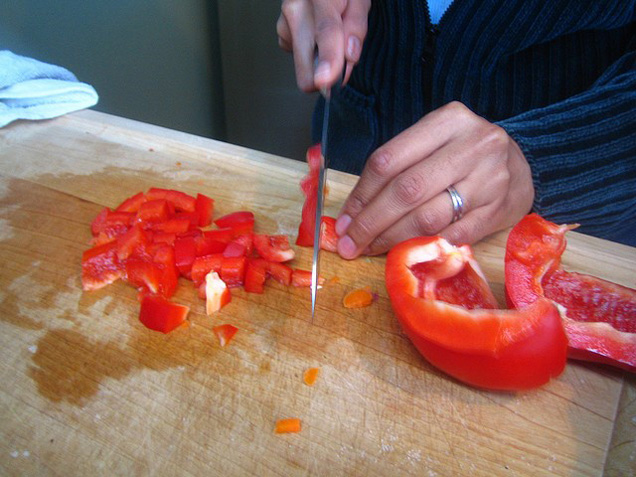
This is a smaller device that costs about $150, although it’s more of a gadget than an “upgrade” in the strictest sense of the word. The Prep Pad measures the appropriate serving size for the food and displays nutritional value and percent of your daily diet on your iPad. In layman’s terms, it’s a smart cutting board.

Kitchen Eco-Friendly Trends in 2014

Going green is always in style. Here are a few modern ways to decrease your impact on the environment through your kitchen remodel decisions.

Eco-Friendly Paint

Eco-Friendly Kitchen Paint

Paint is made up of VOCs, or Volatile Organic Compounds; these compounds keep the ingredients blended but have the nasty habit of releasing into the air when paint is applied. When combined with other pollutants, VOCs create smog.

Look for low-VOC paint (with 50 g/L) or certified green paint with zero VOCs. Not only are you helping the environment, you’re also keeping the air inside of your home clean.

Recycled Materials

Recycled Material Countertop

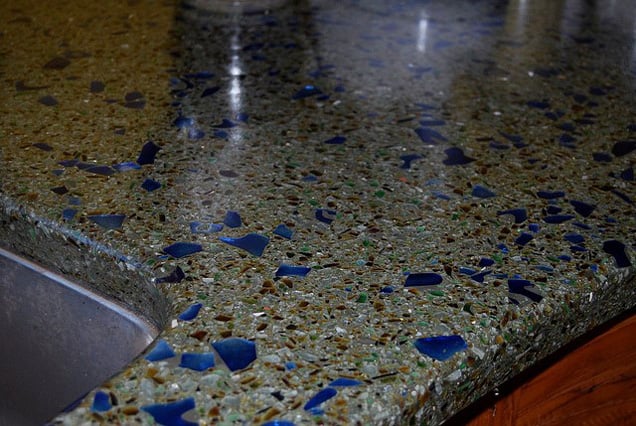
We’ve touched on recycled materials a bit throughout this guide, with reclaimed wood and bamboo as obvious eco-friendly materials. However, there are other options like 85 percent recycled glass and Squak Mountain Stone made up of recycled paper, recycled glass, and low-carbon cement.

Remember, knowledge is power. Ask where the materials came from and what they’re made of before you buy them.

Energy-Saving Appliances

Kitchen with Energy Saving Appliances

You probably know to look for Energy Star appliances, but do you know how the EPA awards that label? The product must contribute to significant energy savings nationwide and provide the same performance as its less-efficient counterpart.

Also, if the product costs more, the consumer must be able to make up the cost through decreased utility bills within a small period of time. This means that it’s worth paying more for an Energy Star appliance, because you’re guaranteed to get your extra cost back.

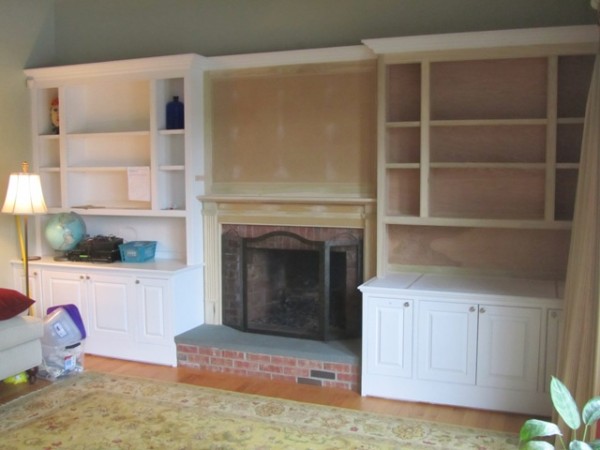
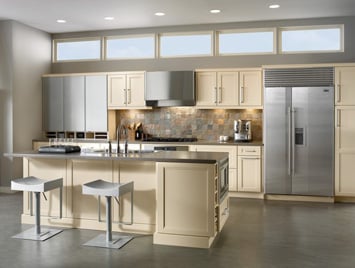
Cabinetry Trends in 2014

Image courtesy of kitchencabinetkings.com

Designers are thinking outside the box to make cooking easier with unique kitchen cabinets, from built-in space racks to roll-out trays. The name of the game in 2014 is efficiency.
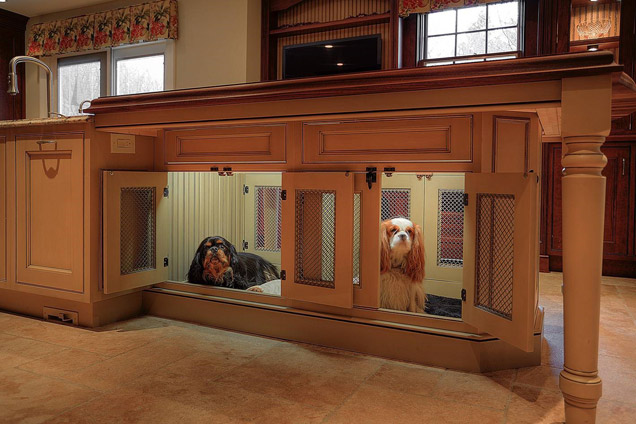
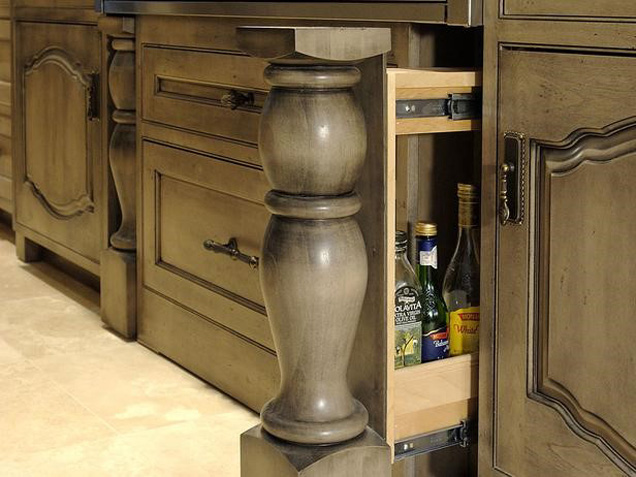
Specialty Cabinets

Pull-Out Spice Rack Cabinet

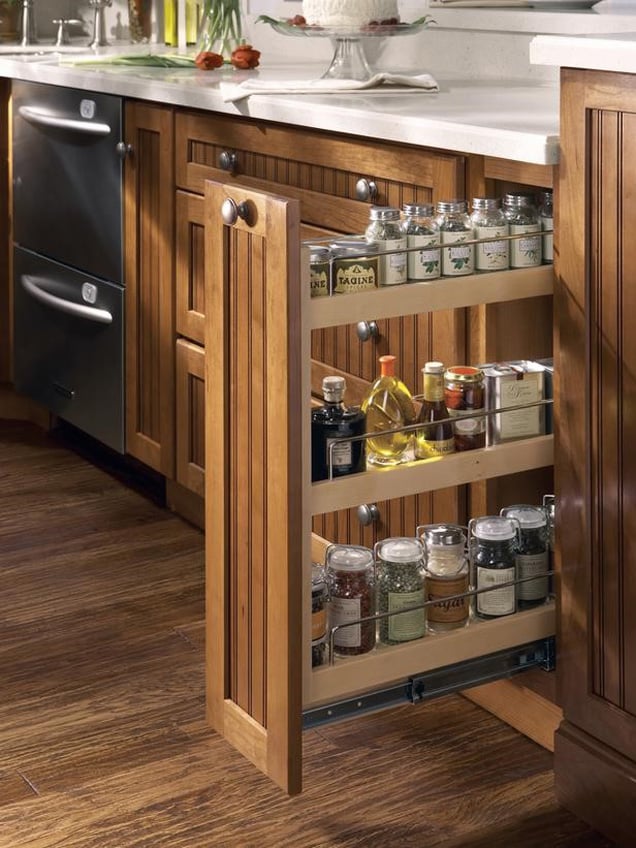
Instead of building a kitchen with cookie-cutter cabinets that can’t fit anything, consider trendier specialty cabinets. Look into hidden storage options like spice racks, inserts for hanging pots and pans, and multi-layered pull-outs for dry goods. This option is better for homeowners who aren’t planning to sell for a long time, as you can create the perfect layout and grab any gadget or tool you need on a moment’s notice.

You can also add built-in dividers to drawers to organize silverware and cooking utensils. These drawers keep more clutter off your counters and hide it away in an organized fashion.

Distressed Finishes

Distressed Leg Pull-Out Spice Rack

Popular finish choices for 2014 include – you guessed it – aged and distressed. Choose a cabinet finish that complements, but doesn’t match your floors and countertops. A distressed look is created when parts of the finish are rubbed away to expose the wood underneath, and they’re then refinished with a glaze to darken all of the grooves.

Pair distressed cabinets with a subtle marble or wood countertop and an integrated or apron-front sink. This style is both rustic and classic, and will handle wear and tear better than perfectly finished cabinets. Your cabinets are distressed, but you won’t be!
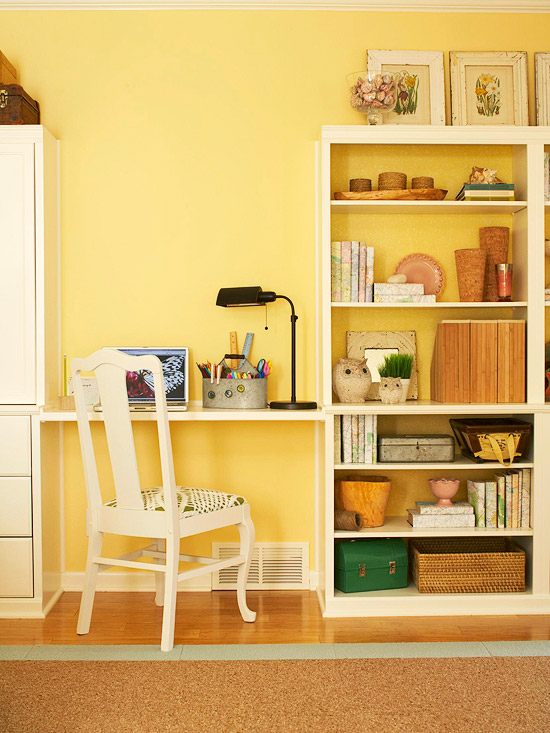
Color Schemes

Vibrant Yellow Kitchen

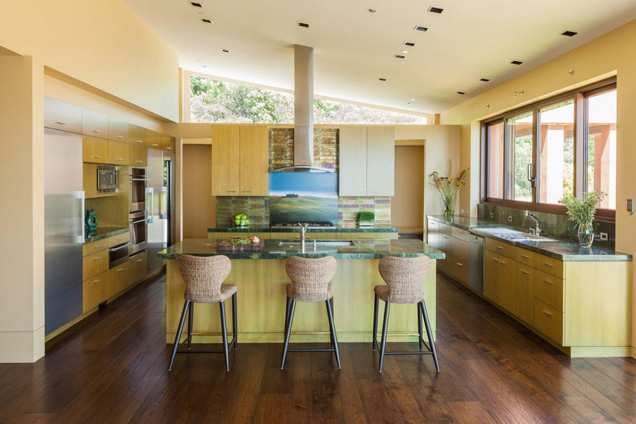
Instead of a wood finish, some people are grabbing a brush and adding a splash of color on their kitchen cabinets. Pastel blues complement the browns from your flooring, while a spicy red warms up the room.

One trend that we’ve seen more of is painting kitchen cabinets two different colors. For example, designers are painting the doors a different color than the trim or painting the top cabinets a lighter color than the bottom ones.

Because cabinets occupy most of your kitchen wall space, think of your cabinet designs like your wall color. They will affect the mood of the room and the way natural and artificial light fills the space. What feels do you want to evoke in your design?

Kitchen Appliance Trends in 2014

Aesthetic is important, but if your appliances are broken or outdated, you won’t spend much time in your beautiful kitchen. In 2014, homeowners are choosing restaurant-quality appliances. After all, everyone wants to be Gordon Ramsey in the confines of their home.

Chef’s Stove

GE Monogram Chef's Stove

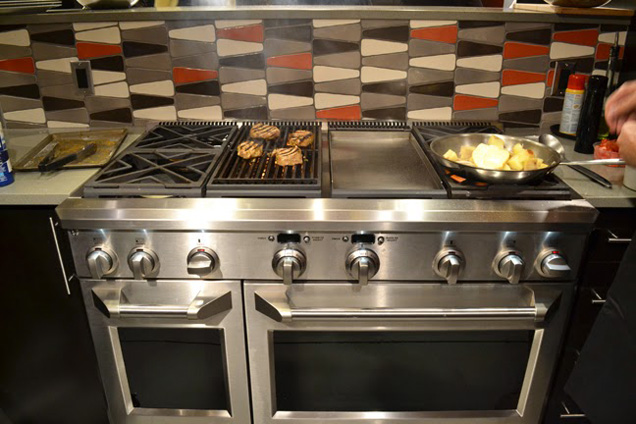
If you’re embracing the stainless steel design, then a chef’s stove is a must. In fact, 50 percent of homeowners said it was their dream kitchen appliance. These stoves can handle woks, griddles, and everything in between. Installing a professional grade stove means you’ll never blame the appliance for ruining your food.

Double Ovens

GE Monogram Double Oven

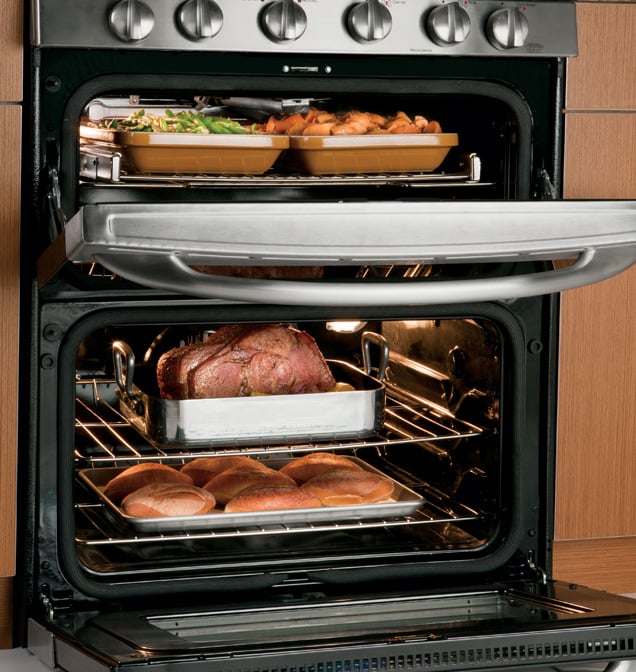
This one goes hand in hand with the prep sinks we discussed earlier. If you’re making a full Thanksgiving dinner, you can’t fit the turkey and the pumpkin pie in the same oven. Double ovens give you more space, options, and flexibility to create perfect meals.
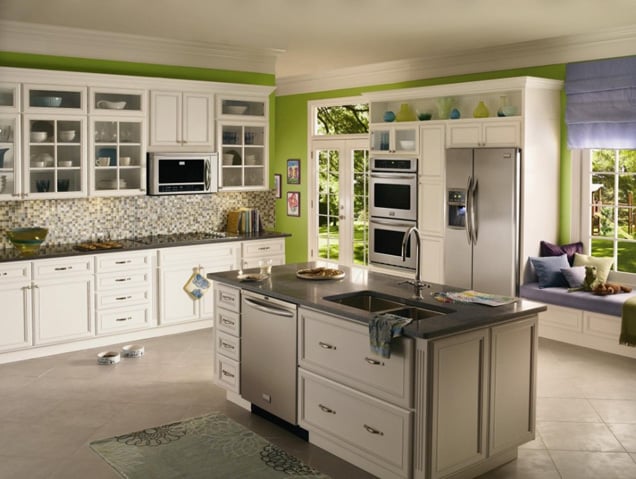
Refrigerators

Refrigerator with Integrated Wood Panels

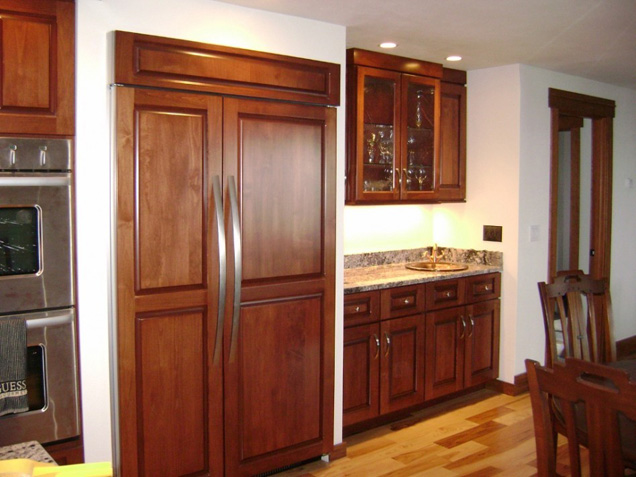
We’ve already touched on Wi-Fi refrigerators, but what about their design patterns? Some prefer to stick with the stainless steel, but designers tend to be split between hiding their refrigerators behind cabinet wood paneling or making them a focal point by choosing one in a non-conventional color like red.

In short, Instead of a bulky white or silver box, people are opting for furniture-like appliances that match their designs.

Dishwashers

Custom Panel Integrated Dishwasher

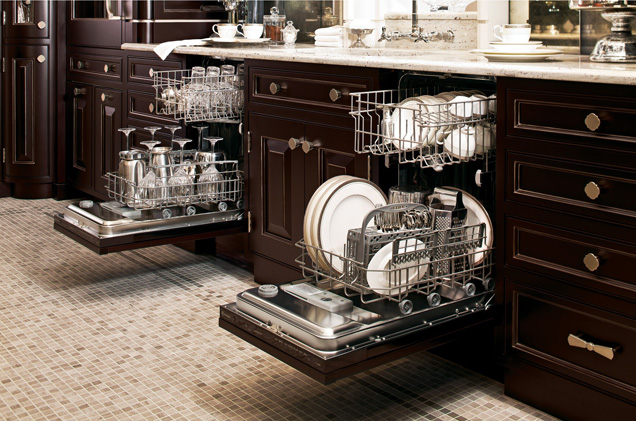
While stainless steel dishwashers are always going to be highly sought-after, many other dishwasher trends are beginning to make waves. For people looking to create a seamless look throughout their house with an integrated sink and a hidden refrigerator, they’re choosing a dishwasher that will also blend in with their cabinetry.

The standard one-size-fits-all dishwasher is quickly becoming a thing of the past. Many homeowners are choosing to fit double dishwashers into their kitchens. These dishwashers have full separate compartments that can run at different times. They let you wash delicate crystal and heavily soiled baking dishes separately.

There’s also in-sink dishwashers that let you run a small load in half the time it takes to clean them normally. Many internal dimensions are changing as well. Some dishwashers now allow for taller pots and pans on the inside while the outside remains the same size as a standard washer. Many people are also looking for more noise regulated dishwashers since more homes are embracing the open concept. No one wants to hear the noisy dishwasher while they unwind in the living room after a big meal.

What Do You Think?

Rustic and hyper-modern are two common trends in 2014. Homeowners are either investing in smart appliances and stainless steel restaurant-grade everything, or they’re going back to their roots with copper sinks and reclaimed wood. This combination has actually created a third option: the transitional kitchen, which walks the line between the two.

Which of these trends do you like? Do you love the look of copper? Does aged wood make you feel distressed? Your remodeling choices will keep a trend going or make it die, so tell us what works and what doesn’t!

Whichever path you choose to take, make sure it’s something you love. After all, you probably spend a lot of time in the kitchen.

I truly love to see bookcases in homes because they are the perfect solution for adding storage and style to your surroundings.  Books and collectibles on display add warmth and personality to any space, whether it’s a living or dining area, bedroom or home office.  To any visitor, a bookcase will communicate what you read, what you collect, and what you love.  Bookcases are a window into your passions and pursuits, and an opportunity for you to put your most favorite things on display.

The challenge for most people is how to style a bookcase well.  How do you maximize both utility and aesthetic appeal, but also avoid monotony and clutter?   Styling a bookcase is an art, but a job easily tackled if you study those done right.

It Starts with the Back

Simple inexpensive bookcases become stunners when their backs are dressed up with paint, fabric or wallpaper.  The bookcase below was brought to life with a pattern that accentuates the balanced display of books and collectibles. One of the bookcase options you can get at Highlands Designs is a beadboard back that adds character.

eddie ross billy bookcase styling for womans day 

When styled against a backdrop of robin’s egg blue, this collection from the home of model Coco Rochas has visual appeal, and showcases a love of books, antique coffeepots, vases, and glass bottles. Highlands Designs has partition bookcases like this that divides the space into multiple cubes.

vogue bookcase

via Vogue

Think in Layers

Here is a shelf masterfully styled by Emily Henderson.  Notice the balance achieved between the books alternating in placement from left to right with the ceramics poised on the opposite side.  The middle shelf repeats the books plus ceramics combination, and also provides the opportunity to display smaller collectibles.  Different heights and textures also add to the appeal.

emily henderson hgtv

via HGTV

Vary Book Placement

Did you know there are 7 ways to stack books?  Karen from The Art of Doing Stuff teaches us how she styled hers in her partition bookcases to break up the columns.  Notice how she doesn’t just stick to books, she adds art and natural objects too.  And don’t you love that reading chair?

art of doing stuff bookcase

via The Art of Doing Stuff

Arrange Books by Color

Inside this IKEA Expedit, the books are grouped by color, and also displayed both horizontally and vertically.  Practical baskets mix with glass bowls, vases and collectibles to form an aesthetically pleasing display on a brightly painted wall.

ikea bookcase style at home

via Style at Home

Hang Something

There’s no rule you have to keep it all inside.  Why not add one more layer of interest?  Consider using the framing of the bookcases to suspend a dramatic mirror, framed artwork, or sentimental photographs.

framed art on bookcase

House Beautiful; source unknown

bookshelf hgtv

via HGTV

It’s OK to be Single

Smaller cubbies look simply perfect with a textured or sculptural object placed all by itself.  Notice the use of a single vase or shell in the smaller spaces of John & Sherry’s bookcase, and the fantastic contrast with bold blue and crisp white.

yhl painted built in

via Young House Love

Think Oddly

Objects tend to look better when gathered in odd numbers, and the basic design principle of the rule of threes is cleverly applied in this bookcase featured in Lonny Magazine.  Notice how most of the books are stacked horizontally, but the bookcase becomes so stylish with the varied and perfectly placed decorative objects, prints, and forward facing book covers.

bookcase lonny

via Lonny

Varied groupings of three or five are always visually appealing.  This bookcase from the home of Lisa Martensen is an example of a well edited display from her treasure hunts and travels all around the world.

dmagazine lisa martensen

via D Magazine

Allow Room to Breathe

With airy shelving, it’s best to not overwhelm and allow for plenty of breathing room around objects.  Deliberate use of open space keeps the eclectic collection on this bookshelf from appearing too cluttered.

viva terra railroad bookshelf

via Viva Terra

With a little concentration, it’s possible to style a bookshelf well with both books and the things you love.  The secret to doing it successfully is truly all in the placement and editing of your favorite objects.

By Robert Robillard
Bookcase and Mantle

Installation

This post provides an example of how to install a bookcase, fireplace mantel and the panel above the mantel.

Earlier we prepared the blue stone fireplace mantel and brick corbel supports in order to install a shorter mantel to accommodate a flat screen TV. A new Somerset Mantel will cover and hide the torn off corbels and a larger panel will cover the exposed brick.

In order to get the panel to cover the brick we had to fur out the wall above 3-1/2″ to match the face of the brick. We used 2×4 lumber on edge and Timberlock type lag structural screws to lag the studs to the wall.

We took care to install all of the lags in the same spots on each stud.

The measurements were then recorded for when the TV wall mount is to be installed. There is nothing worse than drilling into a brand new piece of custom work and hitting a screw or lag.

Planning For A Flat Screen TV:Installing A Custom Bookcase And Fireplace Mantel

The electrician ran all of the HDMI, cable and power wires and we fished them to the top of our furring strips for easier access later. He will come back and mount boxes for all of the connections. These boxes will be hidden by the TV.

We purposely designed the new bookcase 3/4″ smaller than the one we were trying to match. We did this so we could fur out the wall behind the bookcase to accommodate future speaker or audio visual wires.

Prior to installing the bookcase we also cut out a rectangular slot in the base cabinet to make getting wires from the base cabinet to the rear of the bookcase.

Installing The Fireplace Mantel:

After furring the walls we set the mantel in place. We attached 3/4″ birch plywood scraps to the face of the brick with 2-1/2″ Tapcon screws. The plywood scraps will allow us to nail the mantle to the fireplace.Installing A Custom Bookcase And Fireplace Mantel

Both base cabinets had return molding touching the brick so we had to cut the mantle profile out in this molding.

We used a Japanese saw, utility knife and a sharp chisel to carve out the molding and then slid the mantel down.

With the mantle in place we cut installed the panel. Typically a panel this size would have been done as three smaller panels but it was decided that it would be better to have one panel since a large TV was being installed. The panel sits on top of the mantel shelf and was attached with finish screws.

Installing The Bookcase:

The bookcase was then installed. I purposely made the far right side of the bookcase trim larger to accommodate for an uneven or plumb wall. We scribed the wall and used a jigsaw to cut a bevel cut. Bevel cuts help the unit slid in place and are also a lot easier to make miner micro adjustments with a hand plane.

Once the bookcase was in place we secured it through the left side into the panel stud and along the top of the case, and through the back panel on the far right side. Pre-drilling and counter-sinking are important and We filled the screw holes when done.
Installing A Custom Bookcase And Fireplace Mantel

All nail holes are then filled and sanded, the entire project is vacuumed and then we caulked the seams. We then installed the shelves and re-installed the existing crown molding that we had saved.

Installing A Custom Bookcase And Fireplace Mantel

Installing A Custom Bookcase And Fireplace Mantel

By Robert Robillard

Bookcases and built-ins can transform a room.  Not only can they be aesthetically pleasing but also functional as well. Many times people choose to have a custom built in made to fit into a specific spot.
Bookcase Installation

In this case the homeowners had  a built in desk area that they wanted to transform into storage space. At the same time they wanted something that would add to the details of the room and not take away from them.  they decided that they wanted a deep bookcase in it’s place.

This desk area and closet also had an unfinished top and the homeowners wanted us to install finish plywood and a molding to clean up the top space. Once this built-in was in the room several things  needed to be done before it could “slide” into place.

Installing a built in cabinet:

1. Remove baseboard trim and any shield or desk trim that was in the way. One thing I’ve learned over the years to try not to

Bookcase Installation

destroy the trim during removal. Many times this trim can be used to tie in the new built-in to the existing trim.

2. Scribe the unit to fit or shim if needed.   Using a 24″ level I determined that the floor pitched back 1/2″ from the front edge of where the bookcase / built in would sit.  In order for the built in to sit plum I needed to cut the bottom to match this uneven floor.  I

3.  Using a jig saw I cut the built in bottom to match the 1/2″ out of level floor.

4.  I then slid in the bookcase until it touched the baseboard trim.  I used a sharp pencil to mark the baseboard and trim intersection and then used my Fein tool to cut the baseboard at that line.

Bookcase Installation

5.  I slide the built in cabinet into place and secured it to the surrounding framing with 2-1/2” nails using my Paslode 16 gauge, angled, finish nailer.

6.  Fill the nail holes with wood putty and sand flush.

7.  The closet top received finish plywood and some molding along the edge to clean it up

Bookcase Installation

Bookcase Installation

Bookcase Installation


Home Office Design

More people are working from home today and need a room dedicated to their business needs or just for hobbies. This means space for their computer, phone, fax, copier, etc., and plenty of storage. You may even need space for two adults and some extra room where the kids can do their homework or safely surf the Internet. To do this, you have several options. You can purchase desks, tables and bookcases, of course. But do you know that, with a few customizations, you can also use kitchen cabinets to build a beautiful and functional home office? Not only will it provide you with working desk, counter, and storage space, it will also dramatically add to the value of your home. Here are some examples:

Option 1: Purchase one or more desks, tables, file cabinets, and/or bookcases and place them where desired.

Option 2: Install desk-height base cabinets around the room and place hardwood counters on top. Leave open space in the comers or along each wall to provide desk space. Install wall cabinets above, leaving sufficient room above the desk areas for computer monitors.

Option 3: Install desk-height base and wall cabinets along one or two walls, with a hardwood counter on top. Purchase a desk to sit across from or between them. The cabinets will provide storage area and a counter for placement of equipment like fax and copy machines. The desk will be your primary workspace.

How to Order Office Cabinets

First, you have to plan your layout. Decide how many desk areas you want and if you want them in the comers or along the walls. The comers will give you more room for monitors or for desk space. However, since counters can only be ordered in rectangular shapes, this will require that you to cut a comer off your counter where you plan to have your desk. If you place the desk areas along the walls, the comers can either have rectangular or diagonal comer cabinets. Wherever you want the desk areas, you have to leave about 24-30″ of empty space for your chair and feet instead of putting a base cabinet there. The counter will have to sit on the adjacent counters.

Make sure your electrical outlets are moved so that they will be located under your desk areas (for your computers) and/or above the counter (for other equipment).

Most desks are about 29 inches high, so when you order base cabinets, select the option to “decrease 1 dimension” and note the exact height you want. If you make the base cabinet 28″ high and add a 3/4″ or 1-114″ hardwood counter on top, then your surface will be close to 29″ high.

For counters, you can select either 3/4″ or 1-1/4″ solid hardwood counters. You can also buy laminate, Corian, or granite counters from another source, but be prepared to pay a great deal more for them. For use with the standard 24″ deep base cabinets, add an extra 1-2″ of depth so that the counter will hang over the front edge plus another 1-2″ of width if it will hang over an end cabinet. Multiple counters may need to be placed together to make a counter longer than 96″ or to connect the cabinets on more than one wall.

When selecting wall cabinets, ensure there is enough room for placement of equipment, books, etc., above the counter. Consider leaving extra room above the desk areas for large computer monitors. Use different height wall cabinets to maximize your space and create a more interesting look. If you plan to install crown molding, make sure you take into account the fact that you will have to install the wall cabinets about 3″ down from the ceiling (depending on the width of the molding).

A standard 8- foot high room should have sufficient room for 28″ base cabinets with counters and 42″ wall cabinets with crown molding. To ensure plenty of room above the desk areas, use 36″ wall cabinets there. Mix and match cabinets with desks and bookcases to create a truly unique home office.

Sample Home Office


A corner desk area was created by attaching countertop to adjoining base cabinets and to the wall. A corner wall cabinet was used above the desk area with beadboard applied to the exposed side. Crown molding is attached to the top of wall cabinets. Electrical outlet was left below the countertop. Base cabinets were placed along wall with wall cabinets above. An electrical outlet was raised above countertop height. Cabinets were finished with a cream color paint, a dark brown glaze, and several coats of polyurethane for protection. Maple 3/4″ counters were finished with a Cherry stain and polyurethane.
Finished office with corner desk areas and a 29″ high countertop. Wall cabinets are 42″ high along the wall, but only 36″ high in the corners to ensure plenty of room for computer monitors and under-cabinet lighting, if desired.
Above: Diagram of a sample 12′ x 12′ room with a door and a window converted into a home office.
Above: Diagram of wall A with room for corner desks and raised corner wall cabinets.
Above: Diagram of wall B with room for a corner desk area.
Above: Diagram of wall C with room for a corner desk area.
Above: Diagram of wall D with cabinets under the window.


by

Are you curious about the latest kitchen design trends? If so, you’ll be interested to learn about this year’s biggest trend; it’s all about transitional design, which is helping people bridge the gap between traditional and modern style kitchens. Most people want simplified and streamlined kitchens, but not everybody wants to jump right into the modern style. If you’re wondering how to kick-start a transitional kitchen design, read on.

Blending Materials

Transitional Kitchen Design: Blending Materials
A telltale sign of transitional kitchen design is the blending of materials. In traditional kitchens, you usually find primarily wood and stone. In modern kitchens, you find a lot of steel and glass. Transitional kitchens have it all; you might encounter a wood floor, concrete and marble countertops, and a stainless steel fridge. It’s industrial, but still has a warm feel to it.

Neutral Color Scheme

Transitional Kitchen Design: Neutral Color Scheme
You don’t want to dull down your kitchen with bland wall colors, but you do want to go for mostly neutral colors in varying shades. Transitional kitchens have a feel of timelessness and sophistication and neutral colors tend to reflect that best. Of course, don’t be afraid to put in some popping colors here and there, especially if it doesn’t jar the senses. Different shades of brown probably offer the best start when trying to find the best colors for this style.

Good Texture

Transitional Kitchen Design: Good Texture
Taking liberties with texture can add to the fun of creating a transitional style kitchen. Transitional design still comes off as intriguing, despite its simplified nature. This can help make up for the seemingly subdued feeling of the colors at first. It’s part of what’s so special about transitional style kitchens; they don’t shock you at first, but the closer you get while inspecting them, the more impressed you become.

You can use cool tile surfaces with interesting patterns. Try putting polished stone surfaces in one area and rough stone in others. You’ll find endless possibilities.

Streamlined Cabinets

Transitional Kitchen Design: Streamlined Cabinets
You’ll generally notice low profile cabinets in transitional kitchens. There’s not an abundance of intricate design or fancy hardware on the cabinets in here. This sounds similar to modern style, but using materials like wood for all the cabinets helps keep you from getting too close to modern. The goal is to make things feel uncluttered by getting rid of the fancy, while also keeping your kitchen inviting by using warm, earthy materials.

Keeping the Balance of Old and New

Creating a balance between the old and new styles is key; you could even say it defines transitional design. It starts off by borrowing elements from past styles and mixes them with new, contemporary features to create something refreshingly different. The best part of the design is the freedom to choose where and how to mix these two to create your own unique balance. It’s a great way to express your lifestyle without feeling like you have to conform to one side or another.

Don’t fall out of the loop with design trends; if you like what you see, give this design a try. Whether you have a modern or traditional kitchen, a transitional kitchen design might be just a few steps away.

by Melanie Randall

When you’re shopping for new kitchen cabinets, start by trying to figure out what you like. I don’t care how good of a salesman you’re dealing with–no one knows your taste but you. It just might take a while to find examples that you like.

These are the steps you need to follow if you are looking to buy custom kitchen cabinets online. Online shopping can be much easier than going to a kitchen design shop or having a designer come to your home because you don’t have to deal with pushy sales people telling you what you like and don’t like or taking up hours of your valuable time.

Take look at your current kitchen first. Get a notepad and a pen and start writing down your dislikes about your kitchen and the things that you absolutely hate about the current kitchen and would like to change. Maybe you want to add a corner cabinet or some more drawer cabinets or completely change the style.

Next, try to visualize what would make those things more comfortable for you. For example, how would you change those things be more useful for you? Write them down. You don’t have to be a kitchen designer to know what you like.

Then get online and type in “buy custom kitchen cabinets online” or something similar. From there you’ll be able to narrow your search down to your exact taste in kitchen cabinets.

Number one “NO NO” is to avoid picking out too many styles and colors. This will just make your decision even harder. You’ll have too many things to choose from and you won’t know what to pick because you’ll be afraid of making the wrong decision. Keep it simple, if have a doubt about something than just don’t pick it.

Once you have a few things picked out, try to find a custom cabinet shop online that will let you design your own kitchen, with their help of course (most online shops will help you for free). They should help you with the design and show you how to measure and order.

You should start with the best of the best online cabinet shops, which is here!

How to measure before ordering custom cabinets online

1. Measure accurately. Start by noting the overall dimensions of your current room on a piece of paper, imagine you are looking down from the ceiling (top view). Be sure to indicate the overall wall length, floor to ceiling height and height/location of any soffits, doorways, windows and any other openings. Mark: the location and dimensions of all windows and doors including trim, indicating which way the doors swing. It might also be helpful to note size/location of your present cabinets for reference.

2. Note where the center of the sink is, either from left wall or right wall, appliances, water supply and gas lines are on your plan. And Don’t forget to indicate all electrical outlets, switches, heating and air conditioning registers too.

3. Write down model numbers and sizes of appliances: wall oven, cook top, range, dishwasher, refrigerator, microwave, sink(s), freezer etc, so you’ll know how much space they will take and how the doors open.4. After all the “un-movables” are noted on your plan, then begin with the main corner of the kitchen and determine cabinet placement for the rest of the room. Don’t forget to take door openings, windows (very important), appliances, access and traffic flow of the room into account.

You are almost ready to order custom made cabinets online. Now you should start picking out cabinet door styles and hardware. There are a million different styles, you’ll get lost, remember to keep it simple.

Most custom cabinet shops online will help you with the selection of door styles or hardware. If you have seen something at another website or HGTV you should look for that or just tell them exactly what is it that you are looking for.

How to choose a good reputable custom cabinet shop

First of all, look for any affiliation with the “BBB” or any other performance guarantee association that they might have, like “National Association of Remodeling Industry” (NARI), or”National Kitchen And Bath Association” (NKBA).

Having these types of associations with these types of performance-guaranteed companies is a MUST. This way you reassure yourself that the company you are dealing with is not a fluke, they will not run away with your money and they will deliver the purchased product with your satisfaction guaranteed.

Check for stats at the Better Business Bureau and if you do have any problems or issues, they will resolve them fast and in a courteous manner.