
Crown Molding Basics
Crown molding is a decorative trim piece the sits on an angle, and is used to cover transitions between walls, bookcases or cabinets and the ceiling for decoration. It can be installed where the walls and the ceilings meet, but it can also be used to fill the gap between the top of a bookcase or cabinet and the ceiling, or sticking up at the top of a row of wall cabinets or tall bookcases. They can either be plain or sprung.
Most of today’s interior designers agree that every room benefits from the use of crown molding treatment. It is one of most important architectural elements used to define interior spaces. Moulding is typically made from solid milled wood or plaster but may be made from plastic or reformed wood. Installing crown molding to a room, or to the top of your cabinets or bookcases, instantly adds an aesthetically pleasing and classy look.
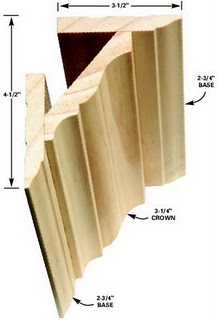
Varieties of common moldings include:
- Crown
- Cove
- Astra-gal
- Bead molding
- Bed molding
- Dentil
- Scotia
The installation of molding improves the transition from wall to ceiling or bookcase to ceiling and defines the architectural style of a room. The size and style of crown molding used may vary widely, from a simple coves in a farmhouse kitchen to large built-up cornice in a grand entryways.
The size and style of molding used may vary widely, from a simple coves in a farmhouse kitchen to open top crown with rope lighting to large built-up cornice in a grand entryways.
Installing Crown
Crown moulding, also known as ceiling trim, gives a wall depth and character. It’s a budget-friendly way to update the look of most any room. You can also use crown moulding to accent the style of your pantry or kitchen cabinets. Read on for the basic steps and tips on how to install crown moulding.
Plan Your Installation
Learning how to install crown moulding starts with careful planning. The moulding pieces need to fit seamlessly around your room. The first thing to do is determine which crown moulding to use. There are a number of different decorative styles that you can install based on the decor of your room. You can also opt for cove moulding if you are interested in a look that is not as fancy but still neatly finished.
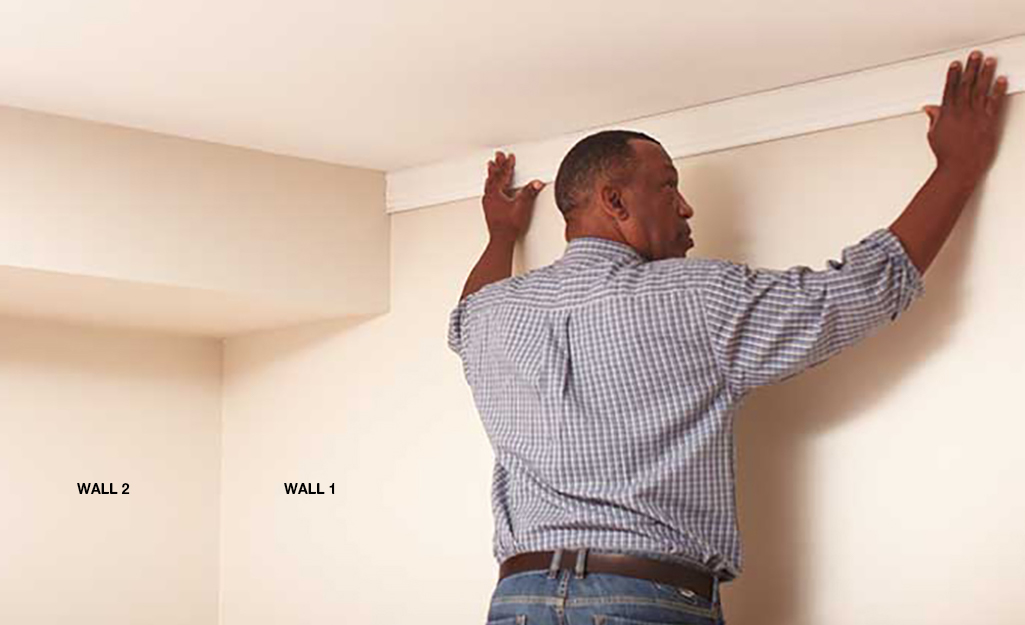
- Start your planning on the wall opposite the door (wall 1 in photo above). You want the first view of your crown moulding to be the best.
- Plan your way around the room. The moulding on wall 2 in the photo above will be coped, or cut to shape, where it meets the moulding on wall 1.
- The third wall is treated the same way as wall 2. The fourth wall is coped at both ends.
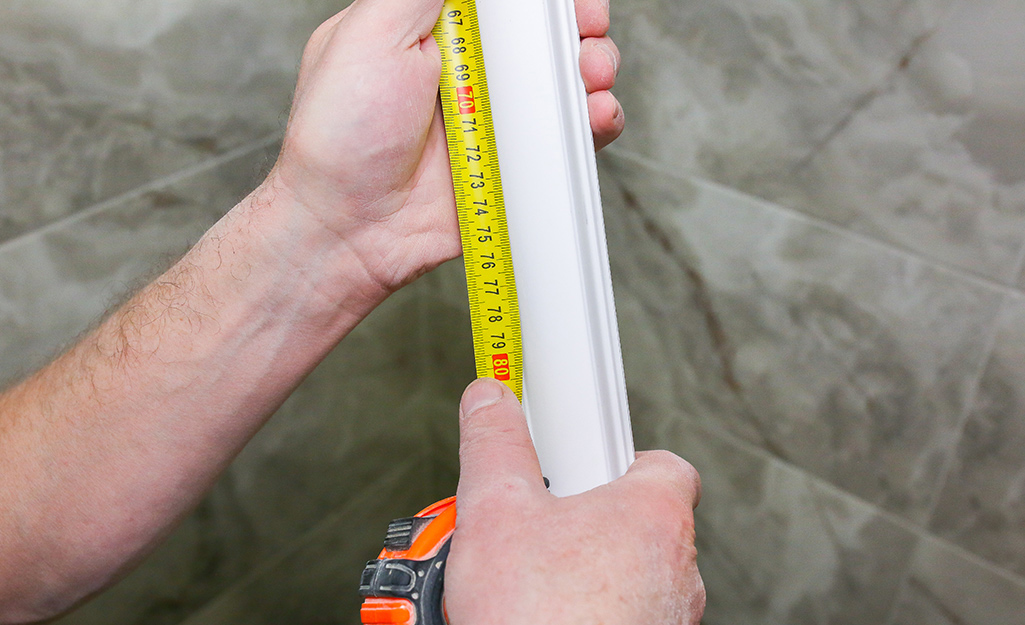
Measure the Room and Mark Studs
Each piece of crown moulding will need to be custom fitted to your wall and each other. No room is perfectly square, so measuring accurately is essential. You’ll also want to nail the crown moulding into a stud for a secure hang.
- Measure the wall from corner to corner. Draw a faint line where the bottom of the crown moulding will lay. This will help you keep the moulding straight. Write your measurement down to use when cutting your crown moulding.
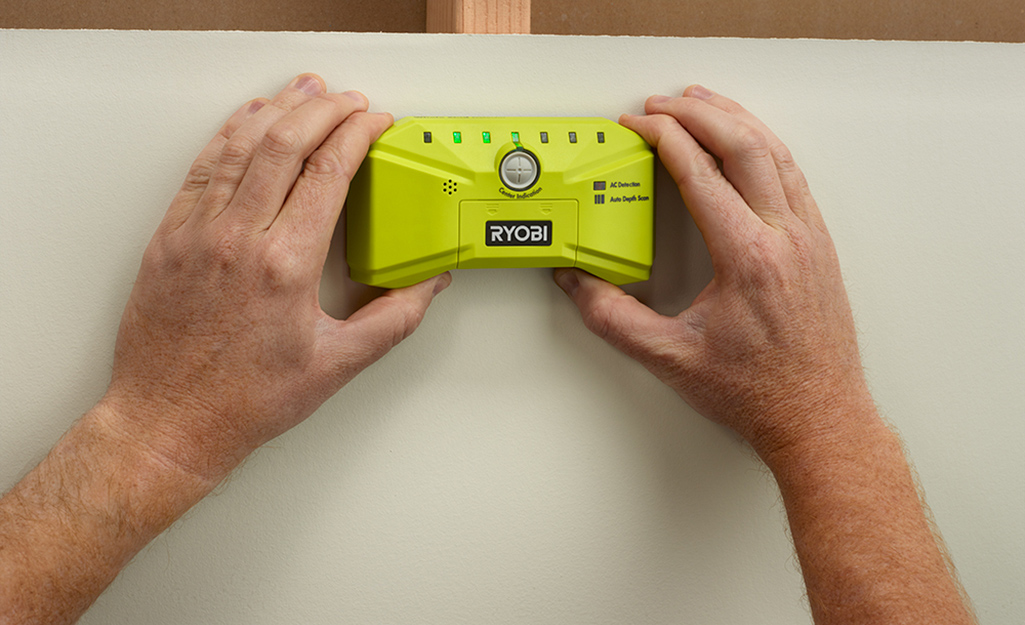
- Use a stud finder to locate the studs. Make faint pencil marks high on the wall to guide you as you nail.
Measure and Mark Moulding
- Put the moulding against a framing square, noting the distance between the face of the moulding edge and the corner.
- Cut a scrap of lumber to the correct dimension and draw layout lines on the wall and ceiling.
- When you install the moulding, align it with the layout lines.
- Begin placing moulding against the wall opposite the door.
- Mark the locations of the studs by holding the moulding in place. Transfer the stud marks onto the moulding.
Set up the Miter Saw
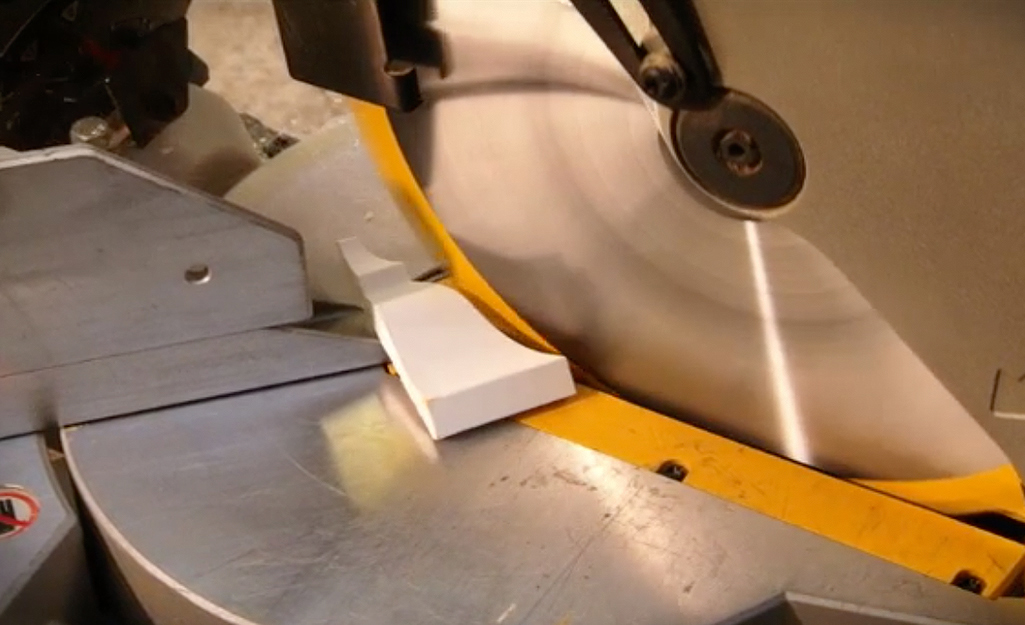
- When first learning how to cut crown moulding, position the moulding correctly on the saw.
- Set the miter saw to cut at 45 degrees in the general direction of the angle you need. See Step 5 below.
- Make sure the ceiling edge is flat on the bottom of the miter box. The wall edge should be tight against the fence.
- If the blade and cut line won’t align, try turning the moulding upside down and try again.
- Cut close to the end.
Tip: If you do not have a miter saw, cuts can be made with a hand saw and miter box.
Cut Crown Moulding
Part of learning how to install crown moulding is figuring out which cut to use. You will make inside corner cuts, outside corner cuts and sometimes scarf joint cuts. The most common types of crown moulding cuts are:
- Inside corner cuts have a long bottom edge and a short top edge. The cut on the left will angle left. The cut on the right will angle right.
- Outside corner cuts have a short bottom edge and a long top. The cut on the right will angle left. The cut on the left will angle right.
- Scarf cuts are used to join two pieces of moulding that meet on a wall. The cut will angle in the same direction on both sides of the moulding.
How you cut your crown moulding also depends on what kind of joints will work best. There are two kinds of joints: mitered and coped. Mitered joints meet at the corners in a perfect 90 degree angle. Coped joints work best when a corner isn’t squaring up or is not at 90 degrees.
A coped joint is when you cut the end of the moulding square and install it flush into the corner of a wall. You then cut the next piece of moulding to fit the profile of the first. Most corners are not perfect, so it’s good to know how to make a coped joint.
- Lay out the cope joint on a second piece of moulding. Start with a piece that’s a few inches longer than the finished length. Flex it in place.
- At the end of the moulding that you will cope, draw a line in the general direction you plan to cut. Cut at roughly a 45-degree angle.
Tip: Cut the inside corner and outside corner moulding upside down on the saw. Place the ceiling side on the bottom and the wall side on the top.
Test and Trim to Fit
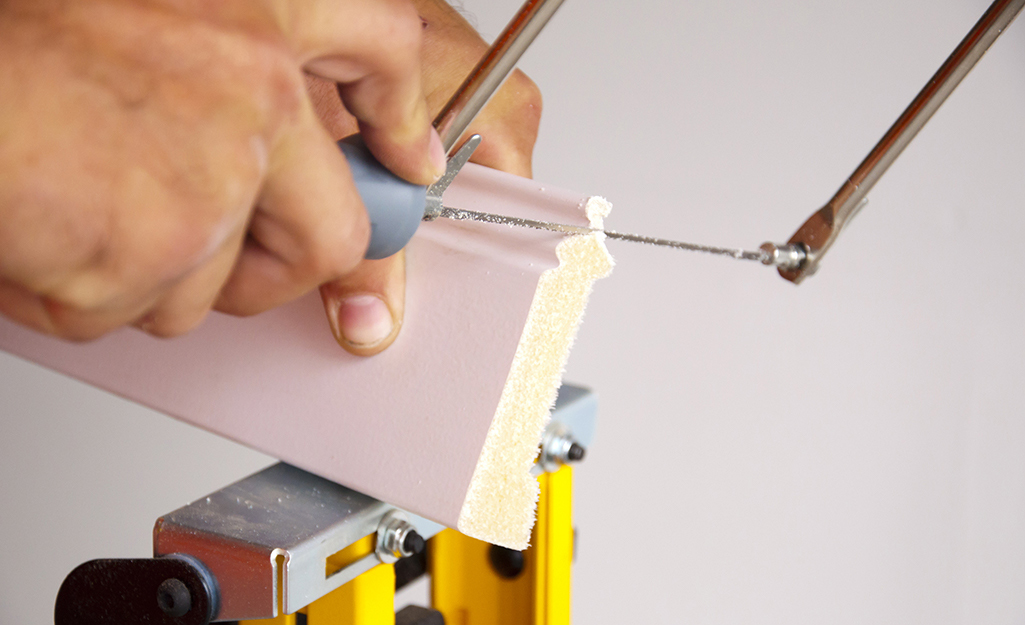
You want your cuts to fit snugly together. As you cut each piece of moulding, look closely at each one. See if there is the excess wood beneath the profile. Cut away any excess with a coping saw.
- Tilt the coping saw back at a 45-degree angle to create a razor-thin edge where the two mouldings will meet. You want the mouldings to overlap flat.
- Check the joint by fitting it against a cutoff.
- Be prepared for an imperfect fit. Fine-tune the joint until it fits.
- Sand and file any high spots to create a tight fit.
Installing Crown Moulding
Once you’re sure the joints fit, you’re ready to install the crown moulding.
- Measure the wall again.
- Cut the moulding 1/8-inch longer than measured. The extra length will help push the cope joint closed when installing crown moulding.
- Make a square cut on the uncoped end of the crown moulding.
- Flex the moulding in place.
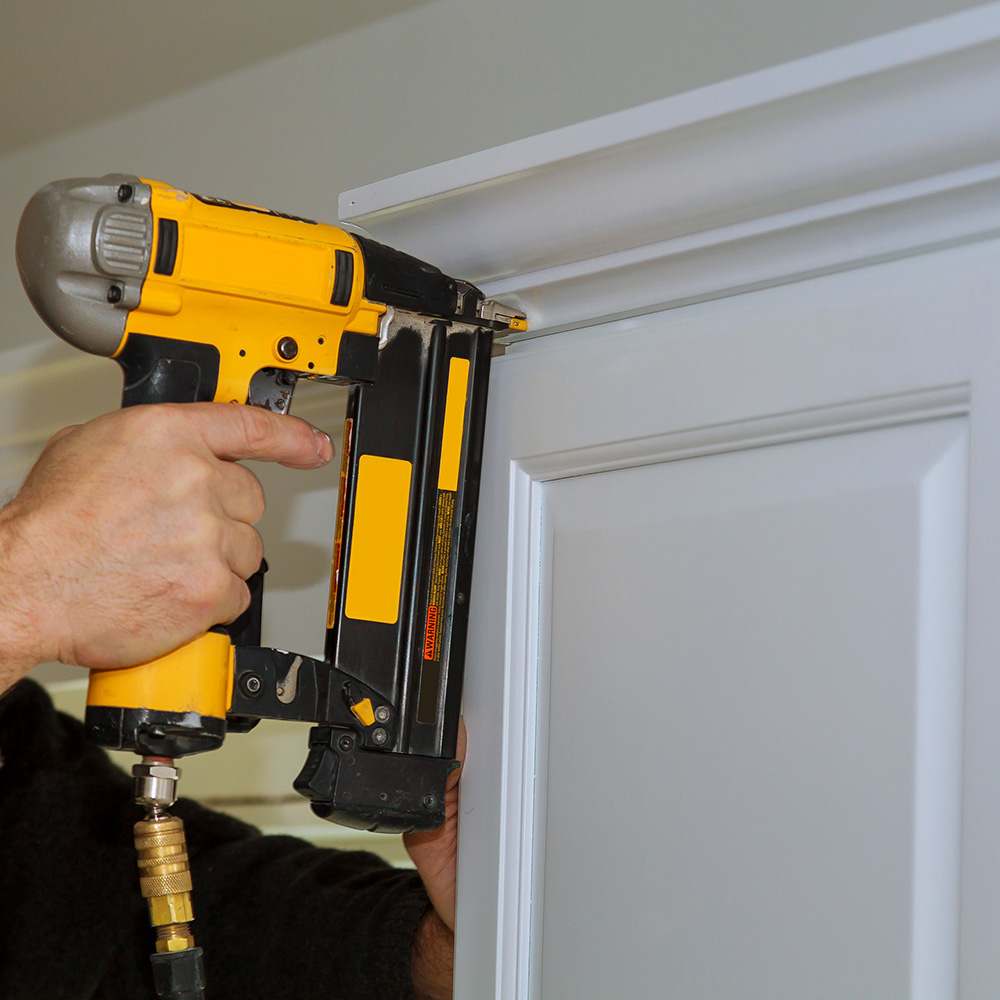
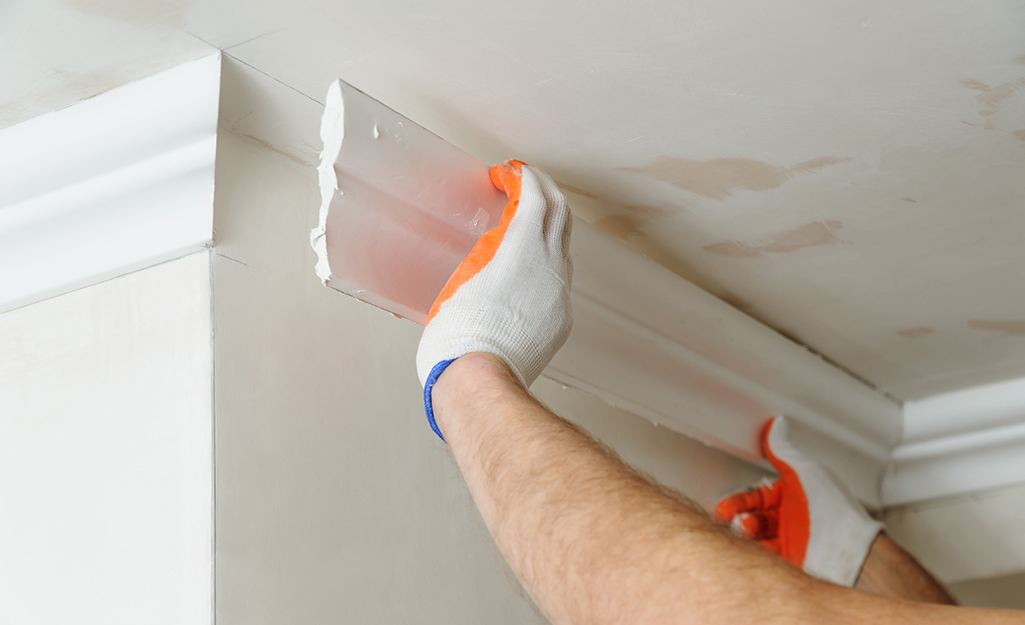
- Nail or glue the moulding to the wall and ceiling. To prevent splitting, drill pilot holes the diameter of the finishing nails. Drill holes at each mark at the top and bottom of the moulding and nail in place.
- Putty any nail holes.
Crown Moulding Installation Tips

- Purchase a few extra feet of your crown moulding to make practice cuts.
- Before you install it, prime and paint the sides and back of the moulding. This will keep your moulding from warping. You can use stain or varnish instead of paint.
- Wear appropriate hearing and eye protection when cutting your moulding.
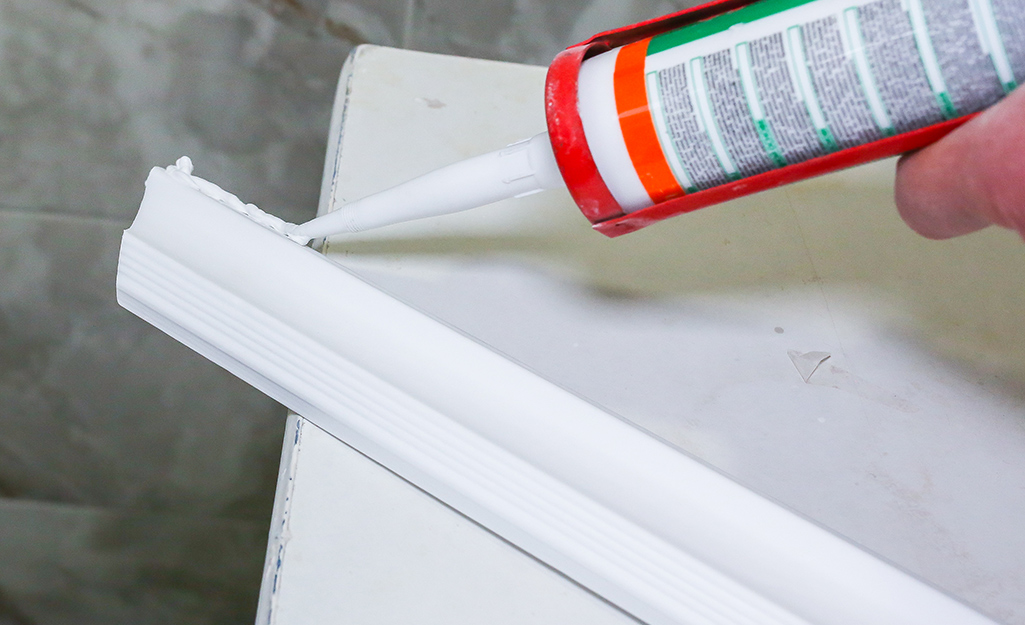
- If you’re painting the moulding after installation, run a bead of caulk in the seam. Wipe it smooth with a wet finger or damp rag.
- Don’t guesstimate, calculate. Know exactly how much you need with our project calculators.
Now that you know how to install crown moulding, you can improve the look of any wall. Try out different ideas: Use crown moulding to create a picture frame or to border a built-in bookshelf. Use a few different types of moulding together. Different combinations of moulding are called build-ups. Learning how to install crown moulding means you can install build-ups the same way.
Remember to measure and cut accurately for the best look. And don’t worry if you don’t own all of the tools needed to complete this DIY crown moulding project. Rent tools for any project at The Home Depot.