By Robert Robillard

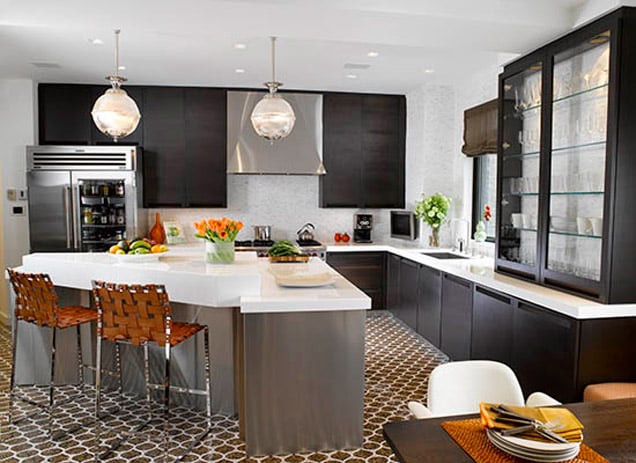
Bookcases and built-ins can transform a room.  Not only can they be aesthetically pleasing but also functional as well. Many times people choose to have a custom built in made to fit into a specific spot.
Bookcase Installation

In this case the homeowners had  a built in desk area that they wanted to transform into storage space. At the same time they wanted something that would add to the details of the room and not take away from them.  they decided that they wanted a deep bookcase in it’s place.

This desk area and closet also had an unfinished top and the homeowners wanted us to install finish plywood and a molding to clean up the top space. Once this built-in was in the room several things  needed to be done before it could “slide” into place.

Installing a built in cabinet:

1. Remove baseboard trim and any shield or desk trim that was in the way. One thing I’ve learned over the years to try not to

Bookcase Installation

destroy the trim during removal. Many times this trim can be used to tie in the new built-in to the existing trim.

2. Scribe the unit to fit or shim if needed.   Using a 24″ level I determined that the floor pitched back 1/2″ from the front edge of where the bookcase / built in would sit.  In order for the built in to sit plum I needed to cut the bottom to match this uneven floor.  I

3.  Using a jig saw I cut the built in bottom to match the 1/2″ out of level floor.

4.  I then slid in the bookcase until it touched the baseboard trim.  I used a sharp pencil to mark the baseboard and trim intersection and then used my Fein tool to cut the baseboard at that line.

Bookcase Installation

5.  I slide the built in cabinet into place and secured it to the surrounding framing with 2-1/2” nails using my Paslode 16 gauge, angled, finish nailer.

6.  Fill the nail holes with wood putty and sand flush.

7.  The closet top received finish plywood and some molding along the edge to clean it up

Bookcase Installation

Bookcase Installation

Bookcase Installation


Home Office Design

More people are working from home today and need a room dedicated to their business needs or just for hobbies. This means space for their computer, phone, fax, copier, etc., and plenty of storage. You may even need space for two adults and some extra room where the kids can do their homework or safely surf the Internet. To do this, you have several options. You can purchase desks, tables and bookcases, of course. But do you know that, with a few customizations, you can also use kitchen cabinets to build a beautiful and functional home office? Not only will it provide you with working desk, counter, and storage space, it will also dramatically add to the value of your home. Here are some examples:

Option 1: Purchase one or more desks, tables, file cabinets, and/or bookcases and place them where desired.

Option 2: Install desk-height base cabinets around the room and place hardwood counters on top. Leave open space in the comers or along each wall to provide desk space. Install wall cabinets above, leaving sufficient room above the desk areas for computer monitors.

Option 3: Install desk-height base and wall cabinets along one or two walls, with a hardwood counter on top. Purchase a desk to sit across from or between them. The cabinets will provide storage area and a counter for placement of equipment like fax and copy machines. The desk will be your primary workspace.

How to Order Office Cabinets

First, you have to plan your layout. Decide how many desk areas you want and if you want them in the comers or along the walls. The comers will give you more room for monitors or for desk space. However, since counters can only be ordered in rectangular shapes, this will require that you to cut a comer off your counter where you plan to have your desk. If you place the desk areas along the walls, the comers can either have rectangular or diagonal comer cabinets. Wherever you want the desk areas, you have to leave about 24-30″ of empty space for your chair and feet instead of putting a base cabinet there. The counter will have to sit on the adjacent counters.

Make sure your electrical outlets are moved so that they will be located under your desk areas (for your computers) and/or above the counter (for other equipment).

Most desks are about 29 inches high, so when you order base cabinets, select the option to “decrease 1 dimension” and note the exact height you want. If you make the base cabinet 28″ high and add a 3/4″ or 1-114″ hardwood counter on top, then your surface will be close to 29″ high.

For counters, you can select either 3/4″ or 1-1/4″ solid hardwood counters. You can also buy laminate, Corian, or granite counters from another source, but be prepared to pay a great deal more for them. For use with the standard 24″ deep base cabinets, add an extra 1-2″ of depth so that the counter will hang over the front edge plus another 1-2″ of width if it will hang over an end cabinet. Multiple counters may need to be placed together to make a counter longer than 96″ or to connect the cabinets on more than one wall.

When selecting wall cabinets, ensure there is enough room for placement of equipment, books, etc., above the counter. Consider leaving extra room above the desk areas for large computer monitors. Use different height wall cabinets to maximize your space and create a more interesting look. If you plan to install crown molding, make sure you take into account the fact that you will have to install the wall cabinets about 3″ down from the ceiling (depending on the width of the molding).

A standard 8- foot high room should have sufficient room for 28″ base cabinets with counters and 42″ wall cabinets with crown molding. To ensure plenty of room above the desk areas, use 36″ wall cabinets there. Mix and match cabinets with desks and bookcases to create a truly unique home office.

Sample Home Office


A corner desk area was created by attaching countertop to adjoining base cabinets and to the wall. A corner wall cabinet was used above the desk area with beadboard applied to the exposed side. Crown molding is attached to the top of wall cabinets. Electrical outlet was left below the countertop. Base cabinets were placed along wall with wall cabinets above. An electrical outlet was raised above countertop height. Cabinets were finished with a cream color paint, a dark brown glaze, and several coats of polyurethane for protection. Maple 3/4″ counters were finished with a Cherry stain and polyurethane.
Finished office with corner desk areas and a 29″ high countertop. Wall cabinets are 42″ high along the wall, but only 36″ high in the corners to ensure plenty of room for computer monitors and under-cabinet lighting, if desired.
Above: Diagram of a sample 12′ x 12′ room with a door and a window converted into a home office.
Above: Diagram of wall A with room for corner desks and raised corner wall cabinets.
Above: Diagram of wall B with room for a corner desk area.
Above: Diagram of wall C with room for a corner desk area.
Above: Diagram of wall D with cabinets under the window.


by

Are you curious about the latest kitchen design trends? If so, you’ll be interested to learn about this year’s biggest trend; it’s all about transitional design, which is helping people bridge the gap between traditional and modern style kitchens. Most people want simplified and streamlined kitchens, but not everybody wants to jump right into the modern style. If you’re wondering how to kick-start a transitional kitchen design, read on.

Blending Materials

Transitional Kitchen Design: Blending Materials
A telltale sign of transitional kitchen design is the blending of materials. In traditional kitchens, you usually find primarily wood and stone. In modern kitchens, you find a lot of steel and glass. Transitional kitchens have it all; you might encounter a wood floor, concrete and marble countertops, and a stainless steel fridge. It’s industrial, but still has a warm feel to it.

Neutral Color Scheme

Transitional Kitchen Design: Neutral Color Scheme
You don’t want to dull down your kitchen with bland wall colors, but you do want to go for mostly neutral colors in varying shades. Transitional kitchens have a feel of timelessness and sophistication and neutral colors tend to reflect that best. Of course, don’t be afraid to put in some popping colors here and there, especially if it doesn’t jar the senses. Different shades of brown probably offer the best start when trying to find the best colors for this style.

Good Texture

Transitional Kitchen Design: Good Texture
Taking liberties with texture can add to the fun of creating a transitional style kitchen. Transitional design still comes off as intriguing, despite its simplified nature. This can help make up for the seemingly subdued feeling of the colors at first. It’s part of what’s so special about transitional style kitchens; they don’t shock you at first, but the closer you get while inspecting them, the more impressed you become.

You can use cool tile surfaces with interesting patterns. Try putting polished stone surfaces in one area and rough stone in others. You’ll find endless possibilities.

Streamlined Cabinets

Transitional Kitchen Design: Streamlined Cabinets
You’ll generally notice low profile cabinets in transitional kitchens. There’s not an abundance of intricate design or fancy hardware on the cabinets in here. This sounds similar to modern style, but using materials like wood for all the cabinets helps keep you from getting too close to modern. The goal is to make things feel uncluttered by getting rid of the fancy, while also keeping your kitchen inviting by using warm, earthy materials.

Keeping the Balance of Old and New

Creating a balance between the old and new styles is key; you could even say it defines transitional design. It starts off by borrowing elements from past styles and mixes them with new, contemporary features to create something refreshingly different. The best part of the design is the freedom to choose where and how to mix these two to create your own unique balance. It’s a great way to express your lifestyle without feeling like you have to conform to one side or another.

Don’t fall out of the loop with design trends; if you like what you see, give this design a try. Whether you have a modern or traditional kitchen, a transitional kitchen design might be just a few steps away.