In September of 2018, I spent a week in Italy cooking for a yoga retreat. The retreat was housed on an old Tuscan vineyard in cottages that were originally built in the 1500s for farmhands and their families. I was immediately overwhelmed by the thought of all the women who, for hundreds of years, had prepared meals in that same tiny space.

The experience was humbling in the same way I feel humbled by travel itself. It connected me to the vastness of life on this planet beyond my little experience of what it means to be me.

The kitchen itself was about the size of a dining room table. It had a 2-burner stove and a finicky “RV-size” oven. It wasn’t the first tiny kitchen I’d cooked in, but it solidified a truth that would come in handy just a couple of years later:

The size of a kitchen has little relevance to the quality (or quantity) of the food that comes out of it.

Fast forward to April 2020. My husband and I had just sold our house of 16 years and moved into a 43-foot 5th-wheel toy hauler. In comparison to many RV kitchens, mine is humongous. But, compared to the kitchen in our former suburban house, it is absurdly tiny – especially for someone who makes a living as a recipe developer and food photographer.

RV living area, including kitchen cabinets and sink, and wall cabinets.

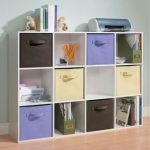
4 Creative storage solutions

Maximizing the use of space is something that RVers excel at. I am constantly learning from other nomads who post photos of their creative storage solutions on social media. Here are 3 ideas that have worked well in our tiny kitchen:

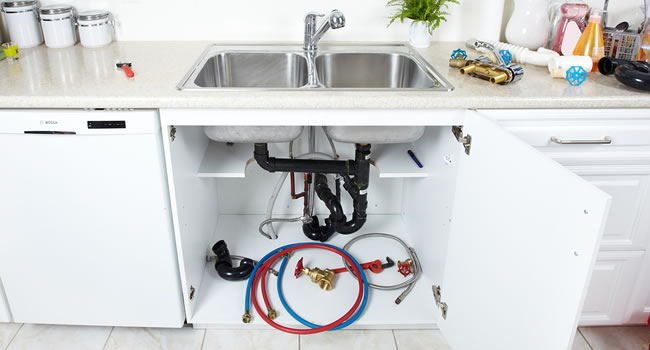
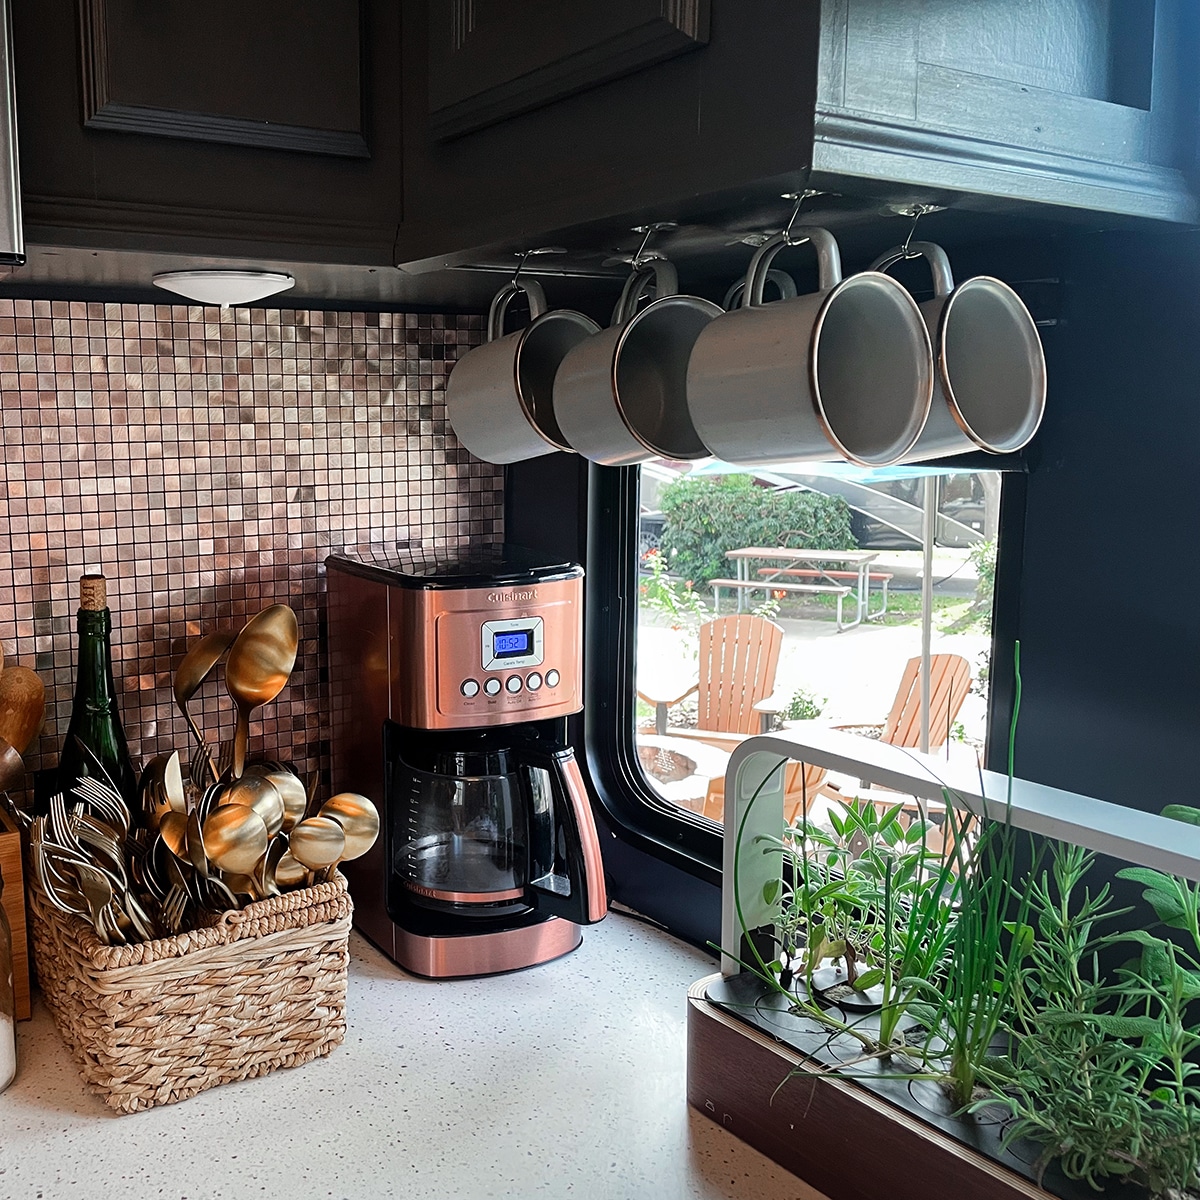
1. Utilize the space under cabinets. I didn’t want to give up mugs and wine glasses but didn’t have the cupboard space for either and wasn’t sure how to keep the glasses from breaking on travel days.

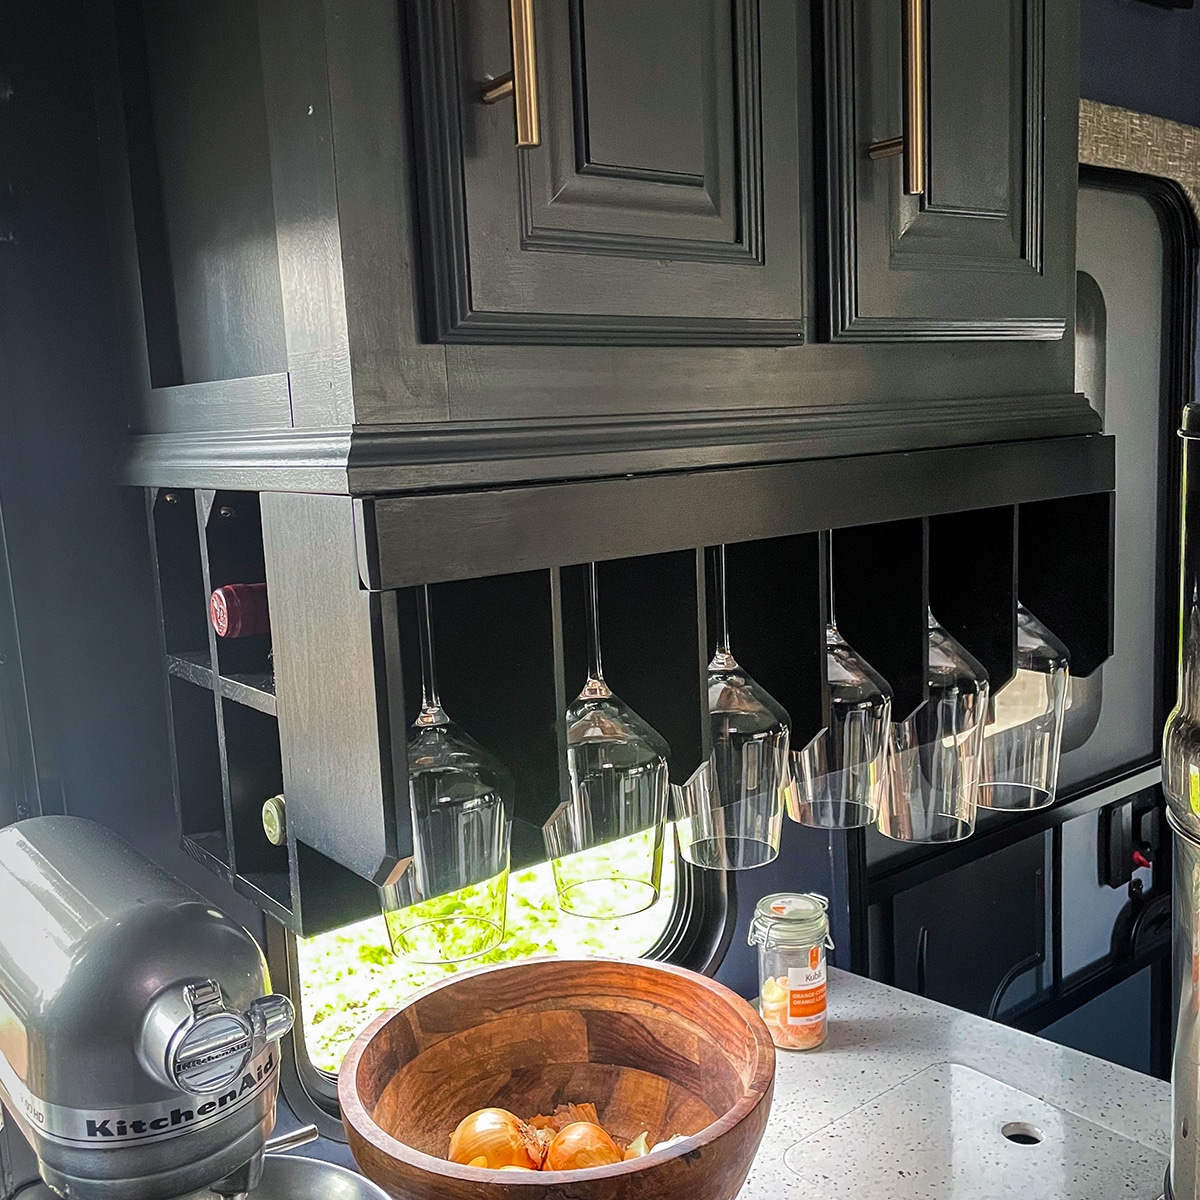
The solution was to hang them underneath our upper cabinets. The mugs are suspended on simple hooks. The wine glass rack is a genius design, created by my talented brother. The rack holds 8 bottles of wine and 6 glasses, all nestled in felt-lined compartments that keep them secure and protected during travel.

RV kitchen corner with hanging mugs
RV kitchen area with hanging glasses.

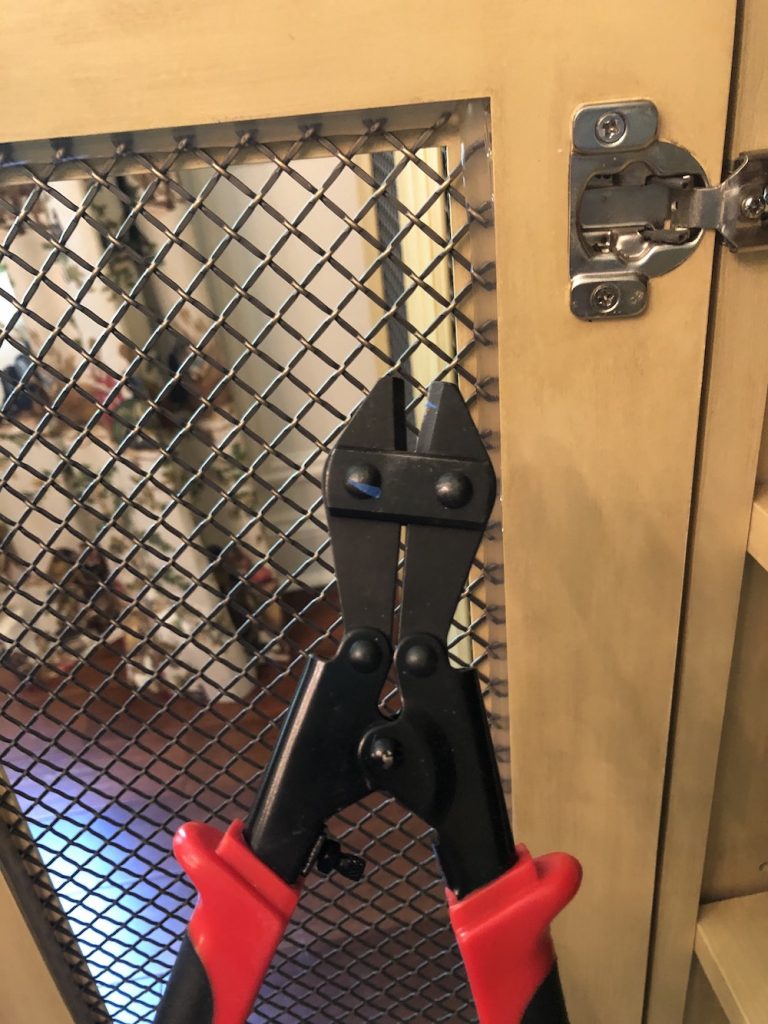
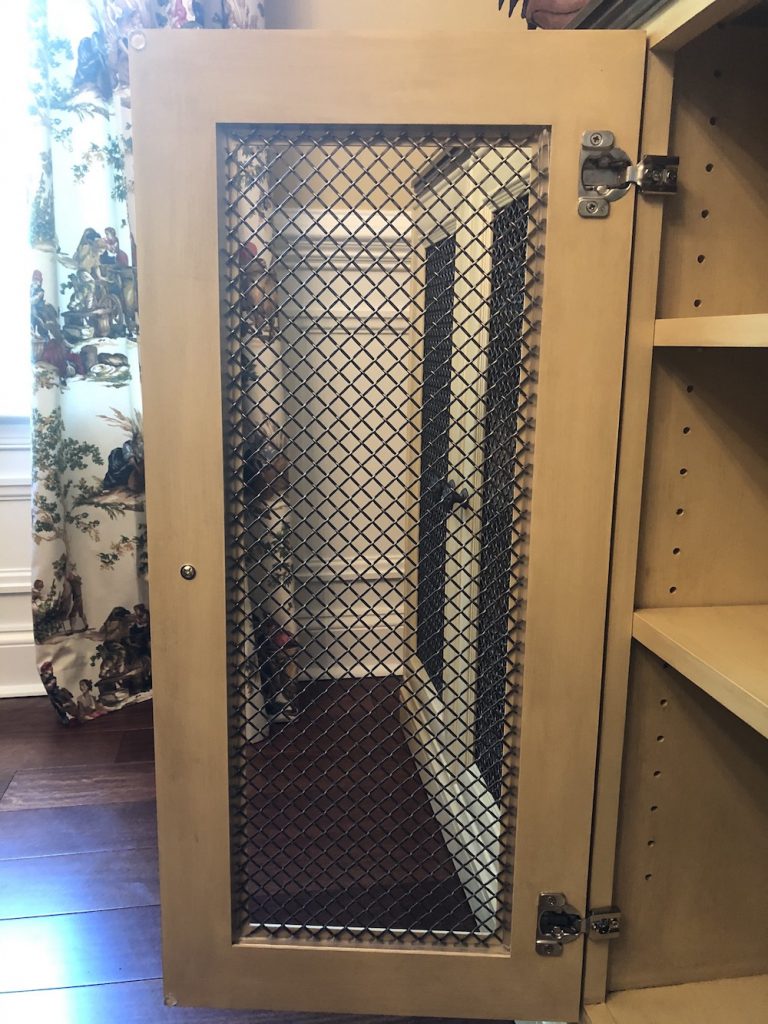
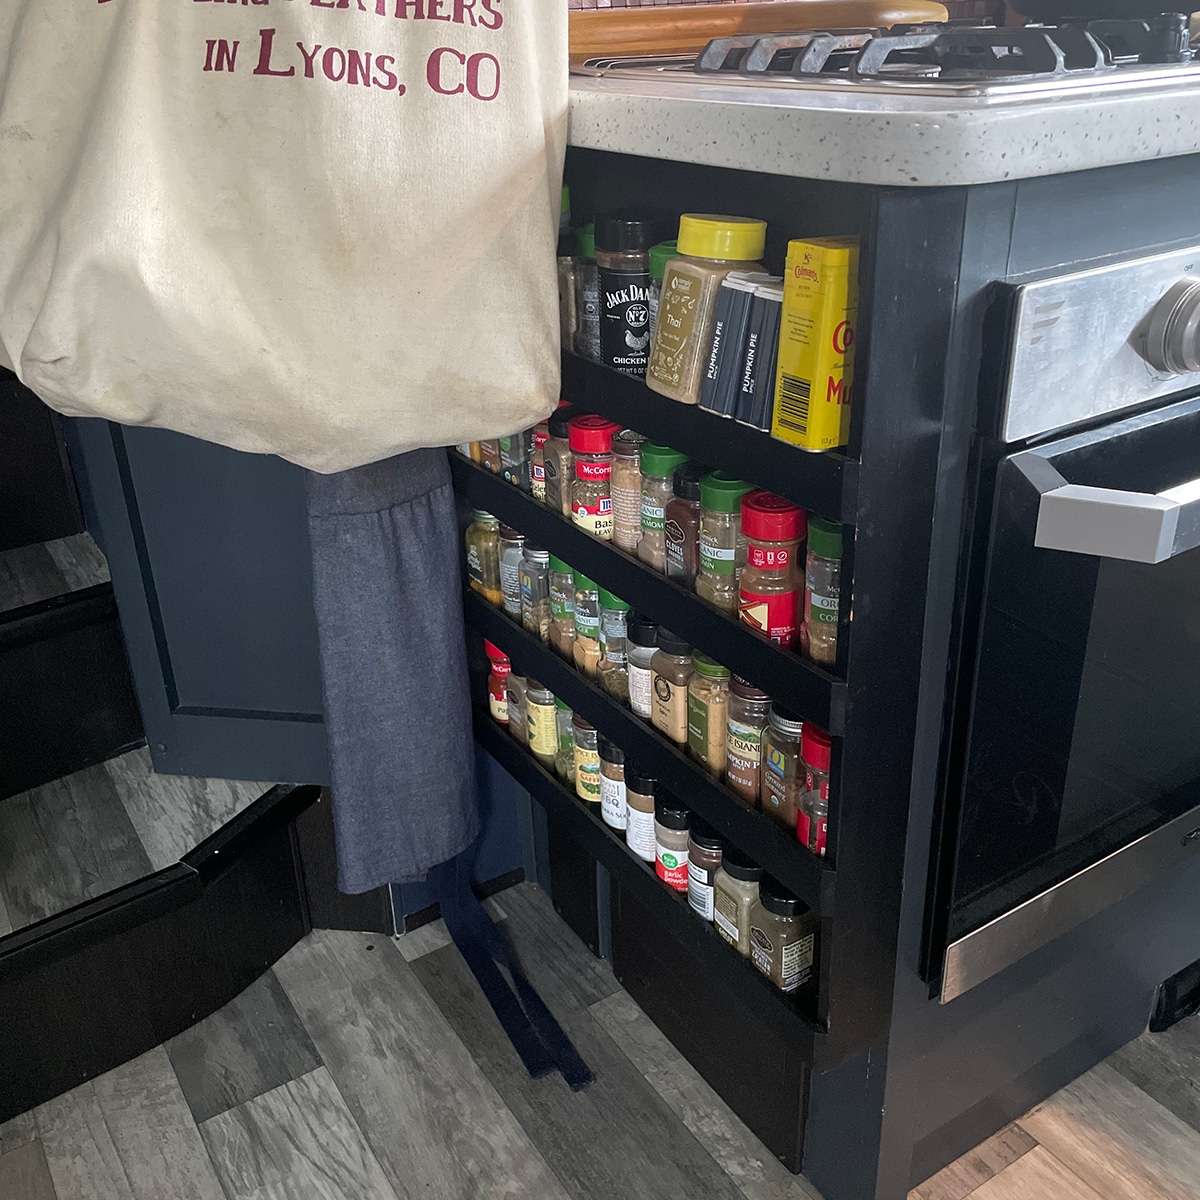
2. A flat spice rack built on the outside of one of the cabinets.

This is another genius design built by my brother that allowed us to take advantage of the cabinet wall next to our oven. Spices take up a lot of room and they are super difficult to organize (and keep organized) in a drawer or cupboard.

This simple spice rack makes them accessible and easy to keep organized.

RV kitchen area with built-in spice rack.

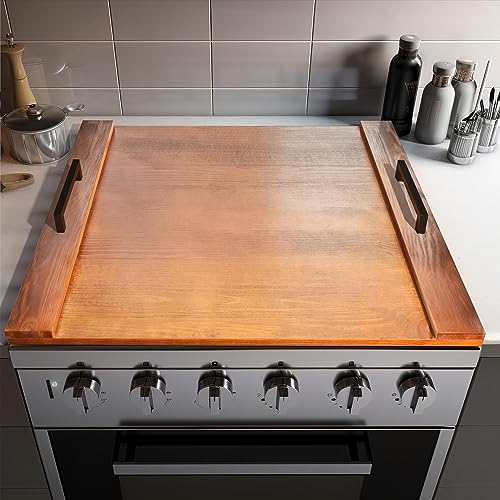
3. Use the top of your stove for extra counter space. If you have limited counter space it can be extremely helpful to have a wood stove. I like to use this for prep work before I start cooking. Anyone with a small kitchen knows that it’s more difficult to measure and chop as you go – there’s just not enough counter space to hold multiple ingredients.

Chopping and measuring in advance makes the process of cooking in a small kitchen so much less chaotic. And a stove top cover creates a significant amount of increased counter space.

RV kitchen stove with a wood cutting board.

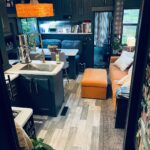
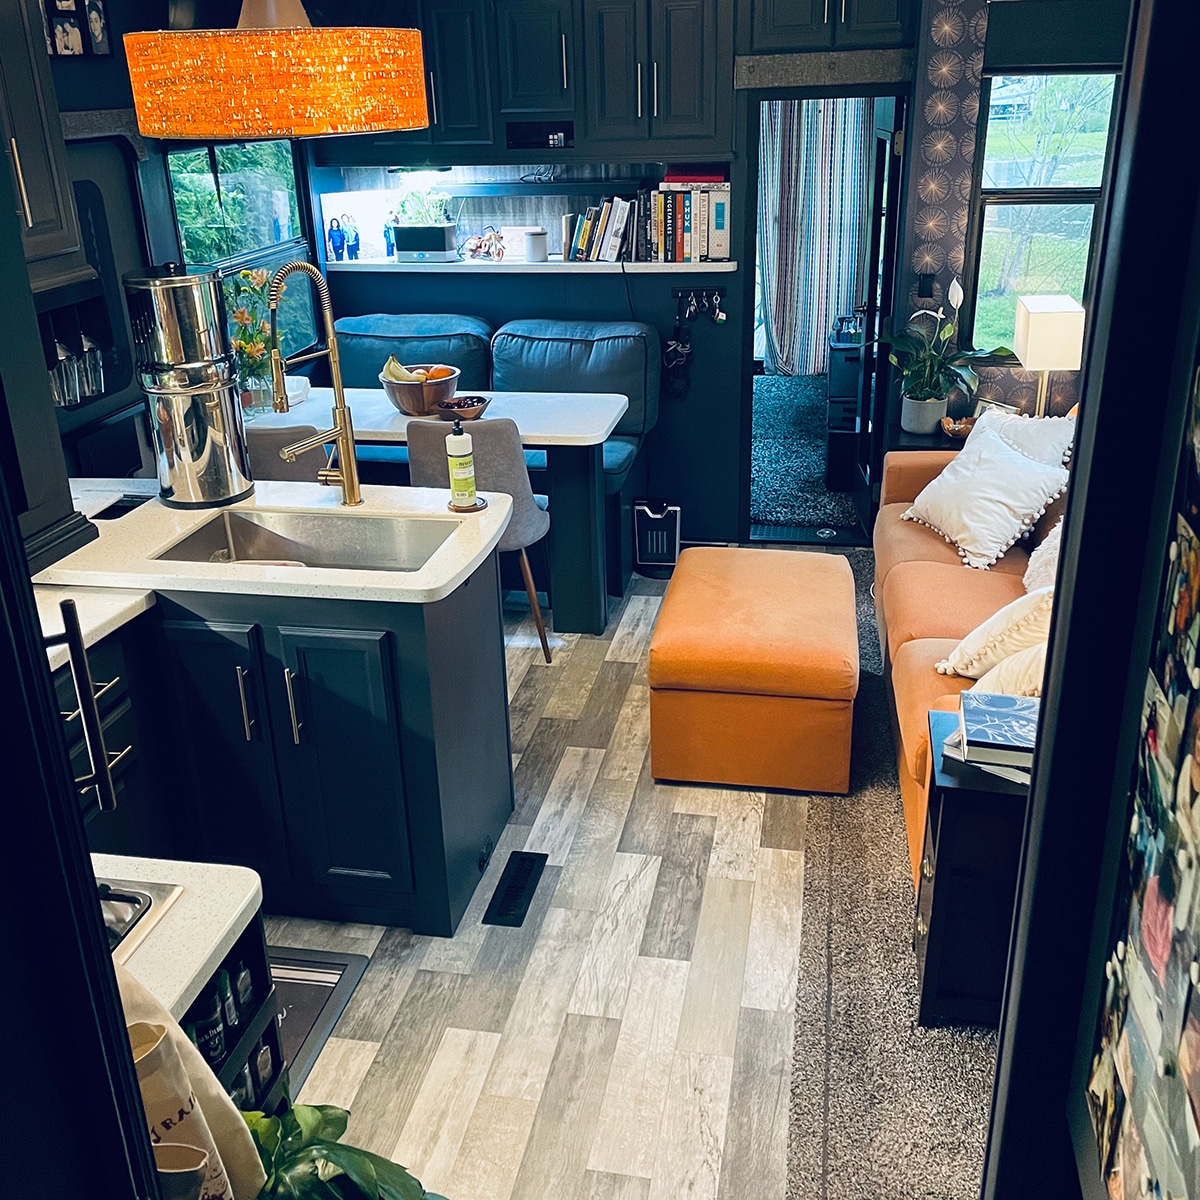
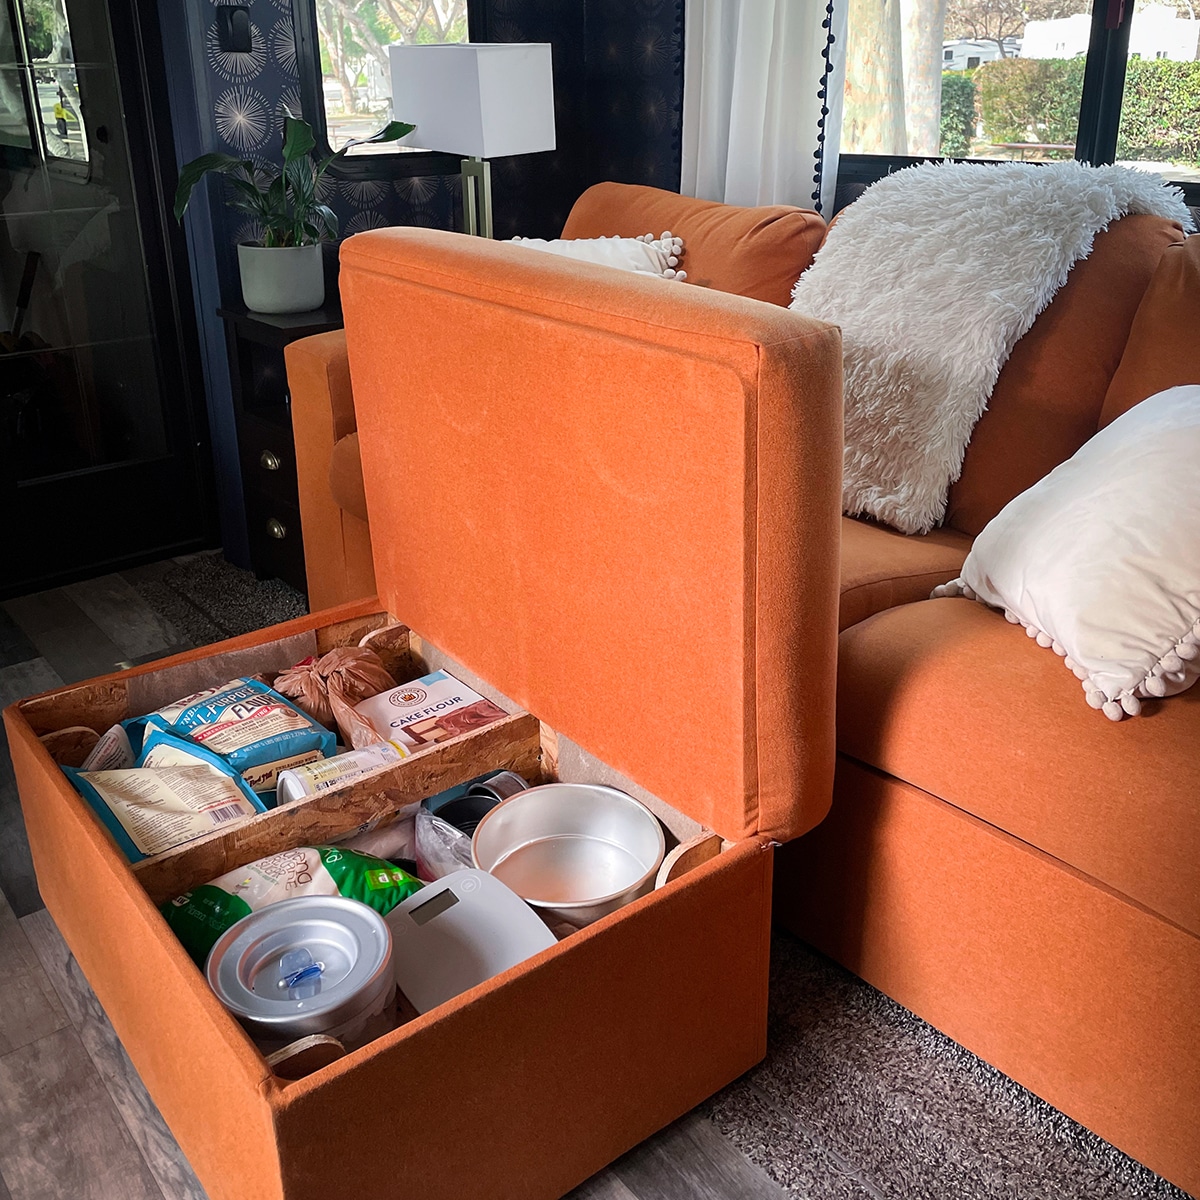
4. Adding a couch and ottoman with storage. Soon after moving into our 5th wheel, we removed the typical “RV style” couch and replaced it with a couch and ottoman from Home Reserve. Besides loving the look and feel of our new sofa, each seat, and the ottoman, includes storage.

People always laugh when I tell them that our ottoman is full of baking supplies, but it’s true.

RV Ottoman with storage space underneath.

Living in a small space does not mean we can’t entertain

Since moving into our 5th wheel, we’ve hosted many small and large gatherings, with as many as 40 guests. There’s been a substantial amount of trial and error in figuring out what works for larger groups, but here’s what I’ve learned so far:

  • When feeding a crowd, soups and stews, and casseroles are the way to go. They are easy to serve and keep warm, do not require separate serving dishes, and can be made ahead of time. Also, aside from maybe a salad and some bread, they don’t require a bunch of side dishes.
  • Stick to finger food for dessert – things like cookies, brownies, and cupcakes. Nothing that requires slicing, plating, and serving.
  • Paper plates are great, but plastic utensils suck. I opt for paper plates when entertaining a crowd but draw the line at plastic utensils. To save drawer space, I keep a container for utensils on the countertop with easy access to knives, forks, and spoons for 36 people.
  • Set up an outside drink station on a folding table. Food inside, drinks outside.

Yes – hosting a party in an RV is crowded and chaotic. So what? Everyone you invite knows what they’re getting into, and honestly, the sheer madness of all those people in a tiny space is part of the fun.

ClosetMaid makes some nice fabric storage cubes for storing all kinds of stuff. They are called ClosetMaid Cubeicals. But you don’t have to buy cheap bookcases from ClosetMaid too. You can have your own custom-sized unfinished or finished partition bookcase built to fit the 10.5″W x 11″H x 10.5″W cubes.

Below is an example of a frameless partition bookcase with cubbies sized to fit the storage cubes. Our Nola frameless bookcases are more sturdy than what you see here. Ours are built using 3/4″ thick Maple or Oak plywood with 2-3/4″H bases. So, they are much sturdier than your standard ready-to-assemble or particleboard bookcase.

Here is how to size your unfinished bookcase (also available stained or painted).

Width: A 3-cube high bookcase would need space for three 11″H cubbies, plus an extra 1/4″ per cubby to make sure they fit easily, plus a 2-3/4″H base and three 3/4″ shelves (including the top).

Height: A 4-cube wide bookcase would need space for four 10.5″W cubbies, plus an extra 1/4″ per cubby to make sure they fit easily, plus five 3/4″W vertical separators. That would make it about 39″H and 47″W.

Overall: Since the cubbies are 10.5″D, the overall dimensions could be 47″W x 39″H x 12″D. Now, just buy some cubbies to fill it in!

So you want to save money by buying our unfinished or custom-finished kitchen cabinets. Can you also save money on the installation, which often doubles your overall costs? There are many projects and do-it-yourself (DIY) jobs in the average home that do not require bringing in a professional. Who doesn’t like saving money when we can successfully accomplish a project on our own, on our own schedule?

However, there are home projects that require the services of a trained, experienced, and licensed contractor. A project in the hands of someone that is not qualified could end up costing much more than hiring the correct professional in the first place. You can almost always save time (and possibly money) when the job is done correctly the first time. And you are better off handling dangerous or risky conditions with an expert. 

This rule of thumb is a good basic starting point: Do you have mechanical, electrical, or plumbing issues in your project? You might be skilled and knowledgeable enough to tackle one or more of these issues, and perhaps bring in a professional for the other items. 

I just need kitchen cabinets, do I need a contractor?

If you are only removing and replacing your existing cabinets, you might not need a contractor. This is often the case with very simple kitchen renovations. For example, if you can disconnect and reconnect the plumbing under your sink, your electrical outlets are staying and you’re not adding any new ones, you’re not changing your type of range, not adding a dishwasher, then you might not need a contractor.

Why would my renovation affect anything mechanical, electrical, or involve my plumbing?

Are you considering taking a wall down in your kitchen to create more space? Does your kitchen design include a new island that will need an electrical outlet? Are any of your appliance locations changing? At the very least, your plumbing will need disconnecting and reconnecting. While some of these items are usually straightforward tasks, there can certainly be more involved things that come up. 

If mechanical, electrical, or plumbing issues are involved, the rule of thumb is that these concerns should be handled by an expert who knows how to tackle any issues that may arise. Investing in this particular aspect of your project can avoid major costs required to fix DIY mistakes or gaps. And we are talking about your home, where your family lives; another reason your investment is well spent.

Kitchen Plumbing

What exactly is a contractor?

A contractor is an individual who helps you with either part of your new construction/remodeling project or who coordinates every aspect of your project. A contractor has knowledge of town permit requirements, available tradesmen for the particular jobs to be done, or may have his/her own skill set to accomplish your project.

As you approach your project in the planning stages, it’s a good idea to prepare a list including:

  1. Your project goals from top to bottom, ceiling to floor
  2. Your timeline, ideal start and finish dates
  3. Budget
  4. DIY items you would like to keep for yourself

Hiring a contractor for your kitchen project may save a significant amount of time and money in reaching your ultimate goal, leaving you to finish other projects in your home that are perfect for your level of DIY expertise.

Are you thinking about incorporating a custom bookcase into your home? These units are versatile and multifunctional, adding character and functionality to your space. We’ll discuss the various ways these units can enhance your living space.

Office

Do you need a home office with custom office furniture to work at home or just to have a place to set up a desktop computer? Custom bookcases are ideal for such workspaces, especially to homeowners who own a significant number of books. These shelves can hold more than books and offer the perfect way to display collectibles and memorabilia. Our bookcases can also be made with doors or drawers to serve as concealed storage units or file drawers.

Living Room

Floor-to-ceiling units are particularly attractive and provide significant display and storage space in the living room. You can also choose to design your shelves with fluting, arched tops, and even lighting, making the pieces part of this location’s architecture. Bookcases can flank an entertainment console to create a larger entertainment system.

Nursery

More and more parents are also deciding to incorporate custom bookshelves into a child’s nursery. This is largely because the cases offer plenty of space for storing and displaying items. They often remain a key room feature as children grow. Be sure to secure it to the wall to make sure a toddler does not climb up and tip it over!

Basement Pantry

Basements are good for just about anything, but they are especially good for storing extra packaged food items, holiday dishes and servers, and kitchen equipment that is not currently in use. Why cram your kitchen full with items you only use a couple of times a year?

Interested in a Custom Bookcase?

Now that you’ve thought about some of the common locations for these units, browse our selections online or contact us to discuss your unique needs with a professional. We’ve served the thousands of customers for many years and our highly-trained contractors always deliver expert design advice, quality workmanship and seamless installation. Big job or small, you can expect us to have the knowledge, skills and equipment we need to complete it quickly and efficiently. You can also count on us for built-in entertainment centersstorage systems and kitchen/bathroom cabinets.

Are you remodeling your kitchen, bathroom, or other rooms with new cabinets or bookcases? Installing them yourself can save money and allow you to spend your money on even better products. If you buy unfinished cabinets and paint or stain them yourself, you can save even more. Here is what you need to get the job done.

Depending on your level of carpentry skills and how many home improvement projects you do, you may already own some of the tools in this list. Not all items will be needed but many will be helpful depending if you are working alone or have assistance.

It is also important for your budget to consider the cost of the needed tools over hiring a professional. If the rate to hire is less than or equal to the cost of new tools, it may be worth it to leave the job to the pros.

Investing in the right tools will enhance the quality of your installation, reduce debris, and save you money. All of which every Do-It-Yourselfer is looking for.

Required Tools


Tool or supply

Purpose/Reason for Tool or Supply
Cabinet claw/clamps A cabinet clamp is a helpful tool that will hold the face frame together securely while you are assembling your cabinet. It also keeps everything in place while screws are installed.
Tape Measure A tape measure will be needed to identify several measurements for your installation including where the cabinets will be hung, openings for appliances, distances between structures, locations of outlets, etc.
Pencil A pencil will be needed to mark measurements taken while installing, and maybe to take notes as you go.
Printed Layout Print your Prime Cabinetry design, provided by our design team, for ease of installation. Having the layout to work from will ensure you remember exactly where each cabinet is meant to be installed while you are working.
Power Drill A power drill is commonly used for assembling cabinets, hanging cabinets, installing knobs and pulls on cabinet doors, etc.

Laser Level or standard 72” level
A level or laser level is a control tool that provides a reference for ensuring your cabinets are perfectly horizontal to the floor. This is needed for countertop installation to run smoothly as well.
Stud Finder As the name implies, this handheld device helps you locate the framing studs behind the drywall. It can also help you locate plumbing and electric lines in some cases so you avoid running into those.
Touch Up Kit/Putty A touch up kit can be purchased from Prime Cabinetry when you order your cabinets. It is used to cover any small dings that occur during assembly and install and nail holes.
Trim Nailer A trim nailer is most often used to install crown molding, toe kick, scribe molding, light rail molding, base moldings, etc. You could use brads and a hammer but most installers would say this tool is a necessity for cabinet installation.
Miter Saw A miter saw is required to cut cabinet trim and crown molding at precise angles. It is also used to cut filler strips and some skin panels.
Wood Block A wood block is used for installing crown molding. When working with full overlay cabinets the ¼” reveal of the face frame is not enough for the crown to be nailed to. The wood block is installed first, then the crown is nailed to the block.
Table Saw A table saw is an electric woodworking tool with a circular blade mounted on an axel. The blade protrudes through the top of a table and provides support for the wood being cut.
Philips Screwdriver A screwdriver designed to to be used with a phillips-head screw. This type of screw has an X shaped top and is what we use most in our cabinet assembly.

Optional Tools

Tool or Supply Purpose/Reason for Tool or Supply
Jigsaw A jig saw is ideal for cutting curves and complex shapes into wood or drywall. For cabinet installation it is commonly used for cutting outlet and plumbing holes, modifying universal cabinets, making short crosscuts on a board, etc.
Cabinet Jack
A cabinet jack is made for holding upper cabinets in place while hanging. This is an ideal tool to have on hand if you are limited on manpower or are working alone. If you have a crew installing the cabinets one may not be needed.
Cabinet Hardware Jig A cabinet hardware jig is a great tool that helps you install your cabinet knobs or pulls to the doors perfectly every time. This tool is not required as there are other tricks out there to install your cabinet hardware but it is certainly useful.
Hearing Protection Avoid ear damage from saws and nailers. Noise reducing headphones or earplugs are nice to have because construction sites are always loud.
Shop Vac Anytime you are removing cabinets and sawing wood there is bound to be dust. A shop-vac is simply more durable for this type of use and with its five gallon size tends to clean debris best.
Wood Glue Wood glue is a great option for assembling your cabinets. However, it is not required for assembly because our cabinets are sold with the needed brackets and screws.
Staple Gun Staples and a staple gun is another great option for assembling your cabinets. However, it is also not required for assembly because our cabinets are sold with the needed brackets and screws.
Crown Moulding Jig A crown molding jig is used to simplify difficult inside and outside crown molding cuts. Angles are tough so this handy tool really helps you master mitered corners and other angles.
Multitool/Oscillating Tool A multitool is a power tool that oscillates allowing you to sand, saw, and cut different materials. It is helpful for a number of tasks with cabinet assembly and installation including trim cutting, grout removal, cabinet modifications, drywall cutouts, etc.
Shims Cabinet shims are slender pieces of wood, cut into a wedge shape, that are used as a solution for things like leveling base cabinets on an uneven floor or flushing side panels for decorative door application.

What is a Blind Corner Base Cabinet?

If you buy our unfinished or custom cabinets online and plan to install them yourself, you need to know how to handle the corners where two rows of cabinets meet. One option is to install a diagonal corner cabinet, such as a Lazy Susan, with a door in the corner. However, a more standard approach is to have the two rows meet at a 90 degree angle. With this approach, a blind corner base cabinet is installed such that a portion of the corner cabinet is hidden by the one adjacent to it. The hidden section provides storage without giving up space in a corner.

What is the Cabinet “Pull”?

Blind base corner cabinet installation requires a minimum and maximum “pull.” You must “pull” the blind cabinet a certain number of inches from the wall to create proper clearance for the door and drawer to open without interfering with the adjacent cabinet.

Measure the pull distance from the wall to the opposite edge of the blind corner base. The number of inches left over between the wall and the cabinet is known as dead space. The need to pull a blind base cabinet from the wall is what makes it unique in how it functions, since no other cabinet type requires this.

Cabinet pull diagram

In addition, you usually need to add a 3” filler strip to join an adjacent cabinet to the blind corner base while leaving enough room for the doors and drawers to open properly. Without this filler, the doors and drawers that meet in the corner may be too close and will hit each other when opening.

Attach the filler to the stile of the blind corner cabinet. The stile is the vertical strip of wood that extends beyond the door and drawer in the direction of the open blind side.

In the aerial view below, you will see an example of a blind base cabinet installed and labeled with what is required for it to function properly. Here we have shown both the minimum and maximum pulls.

Blind cabinet layout.

Minimum vs Maximum Pull

The amount of stile that is visible depends on how far the corner cabinet is pulled from the wall. See below a visual of how much stile will be seen based on the respective minimum and maximum pulls applied. If the blind base is installed at minimum pull, you will see less of the stile. Alternatively, if it is installed at maximum pull, you will see more of the stile.

Blind cabinet at minimum and maximum pull distance.

In the images below you will see examples of blind bases with built in clearance installed and what is required for them to function properly. Most blind base cabinets are not made this way, but it is possible to have them made to extend all the way to the wall to make maximum use of corner storage space. However, it may be hard to reach all the way into the corner.

Diagram of blind cabinet with filler strip.
Blind base cabinet installation layouts.

If you’re a kitchen contractor or homeowner who has tried to order cabinets for a remodeling project, it’s no surprise these days to see lead times of months instead of what used to be weeks. Why this big change? Over the past 18 months, the pandemic wreaked havoc up and down the supply chain for raw materials. Lockdowns led things off, leading to labor shortages and shipping problems that are still causing problems today.

The cabinet industry and other manufacturers have been working with government officials to address these supply chain issues. Still, the web of interdependency across all industries means that any solution will require slow and steady collaboration. There’s no quick fix even as demand for kitchen cabinets continues to rise.

How a raw materials supply chain works

Whether we’re contractors or homeowners, most of us have had little reason to pay attention to how the finished products we purchase off the retail shelf or from a warehouse get there in the first place. The supply chain for raw materials has to connect four links before the final product is available for purchase and installation.

Steps in the supply chain of a kitchen cabinet

  1. Lumber suppliers source wood from a reliable source.
  2. Lumber suppliers purchase wood and ship the lumber from its source location to their warehouses.
  3. Cabinet manufacturers purchase wood from lumber suppliers and have it shipped to their factories for construction.
  4. After the cabinets are built, they are sold and shipped to contractors or directly to consumers.

At every point along the way, a shortage of some or all raw materials and/or labor or transportation will cause a delay at the next point in the chain.

What’s going on with the cabinet manufacturing supply chain today?

Economics 101 tells us that rising demand causes prices to go up too. A surge in demand has driven up the cost of raw materials for cabinets. With people at home during the previous year’s lockdowns, many homeowners decided to make changes to their living spaces, and kitchen remodels are consistently high on the priority list. If you look around, it seems like everyone is building or remodeling!

Employee shortages are another significant piece of the puzzle. There are employee shortages at shipping ports, transportation hubs, trucking companies, and factories. Demand means there’s plenty of work to do, but not enough of the right people – in the right places – to do the work.

Today, kitchen cabinet manufacturers must somehow solve the problem of more expensive materials and harder to procure, as well as a lack of workers. Some manufacturers have managed to mitigate shortages on the materials front by finding different suppliers, but high costs remain an issue.

Near the end of the chain, kitchen cabinet contractors experience a shortage of cabinet parts and longer lead times for delivery, making it challenging to complete a project on time. And homeowners are unhappy because their kitchen renovation, which would have taken approximately eight weeks total in 2019, could now take months just for the cabinets to arrive.

How cabinet manufacturers are navigating supply disruptions

Cabinet manufacturers faced drastic increases in the expense of importing materials. Swings in the supply and demand for shipping containers have caused shipping prices to rise. Most manufacturers have had to increase product costs or shipping fees as high as 20% to continue supplying products, switch to lower quality lumber and parts to keep costs down, or some have completely been unable to keep up with providing cabinets to their contractors.

Only cabinet suppliers with extensive manufacturing and warehousing capabilities or local sources for material have maintained strong inventory or production levels despite all the current industry challenges.

Types of wood for furniture.
This is a guide to help you decide what types of wood to choose for your cabinets, bookcases, or other furniture.

Maple

Maple is one of the hardest wood types for furniture or cabinetry. It’s often used for heavy-use items like dressers and dining sets, as it can take a beating. It is almost always used for painted kitchen cabinets since it does not have very pronounced grain, which can show through light-colored paints if you use other types of wood. If you want unfinished cabinets and plan to paint them, order Maple. It is also more affordable than many other hardwoods. This, combined with its durability, makes it ideal.

Maple is found primarily in the Great Lakes region. Its color ranges from cream to reddish-brown, but it takes dark stains especially well. So, maple wood can easily be stained to resemble more expensive wood like mahogany. Maple wood has a straight, fine grain with occasional bird’s-eye or fiddleback patterns. Hard maple usually has a lighter color while soft maple tends to be slightly darker.

Oak

Oak is a durable and long-lasting wood type. Because of the trees’ slow growth, the wood is extremely dense, adding to its quality. The wood adapts to a variety of finishes. This makes it ideal for both modern and traditional furniture. It’s also often used for Mission/Arts & Crafts furniture design.

Most oak lumber comes from the eastern and central United States. Many American antiques are constructed of oak wood. Oak furniture will last centuries with proper care. The color ranges from light brown to pinkish-red with a swirling or striped grain. Oak furniture is often known as a scratch- and stain-resistant wood, if properly finished.

Pine

Pine is popular with rustic and farmhouse design. It is a lightweight wood, making it great for families that move frequently. Pine is an inexpensive wood and is a good option for those who aren’t quite ready for the investment of other wood types. Pine paints well and painted pine furniture is often used for kids’ rooms because of the fun colors.

Pine is found throughout the Northern Hemisphere. Its color ranges from white to light brown with yellow or red tones, and it’s known for its beautiful knots. The knots are what add character and rustic charm to the finish. Pine wood furniture resists shrinking and swelling, maintaining its shape for years.

Cherry

Cherry wood is known for its extremely straight and uniform grain. The wood polishes well and has a beautiful finished look. Also known for its popularity use for antique furniture, cherry is last centuries with the proper care. It is considered a prized hardwood among craftsmen. Cherry wood furniture is often an investment that will pay off long-term.

Cherry is found in the eastern United States. Its distinctive color starts as a pinkish-brown and darkens to a deep red with a straight grain and some rippling. Like most wooden furniture pieces, cherry becomes more beautiful as it ages. Cherry is the best wood for furniture that’s designed to last for years and stay in your family.

Mahogany

Mahogany is a durable hardwood that’s often used for investment, intricate pieces of furniture. The wood species has a pleasingly fine, straight grain. Because of the trees’ large size, mahogany is produced in large boards. This makes it perfect for focal point furniture. Mahogany has a timeless look and adds warmth to the room. Any mahogany wood furniture will last generations with proper care.

Mahogany is native to Mexico, Central and South America, but it’s grown throughout the tropics and Africa. African mahogany has become more popular than South American mahogany. However, antique pieces are most often made of South American mahogany. Its color varies from pale to pink to reddish-brown with a straight grain. Mahogany is the best wood for furniture that is elegant and timeless, especially large pieces like dining tables.

Walnut

Walnut is a hard, strong and durable wood for furniture. It carves well and holds its shape for years. This makes it perfect for ornate furniture that requires a high level of craftsmanship. This wood is ideal for investment pieces and furniture you want to stay in your family for generations. Think Amish Heirloom furniture.

In North America, walnut grows from Vermont to the Great Plains and south through Louisiana and Texas. Its color varies from white to dark brown, and it’s known for its large burls. Common types include Brazilian walnut, Caribbean walnut, black walnut and North American walnut wood. Walnut’s grain is typically straight, but some waves appear closer to the roots. Walnut is the best wood for furniture that is ornate and requires a lot of detail.

Birch

Birch is an extremely strong and durable hardwood that grows abundantly in North America. The species’ beautiful appearance and blond color make it a great wood type for modern furniture. It has an elegant, clean-lines grain that complements simplistic interior design.

Birch grows in the Northeast and Great Lakes regions and along the Appalachians. Its color ranges from cream to light reddish-brown with a fine grain. The wood’s strong, durable nature makes it great for woodworking and detailed craftsmanship.

Bamboo

Bamboo is known for its eco-friendly nature and beautiful blond coloring. The species is actually a grass, rather than hardwood. Because of this, bamboo grows rapidly. It grows about 10-times faster than hardwoods do. Bamboo also resists swelling and shrinking.

Bamboo grows in every continent except Europe and Antarctica. Its color varies from very light to a warm medium tone, but naturally, it boasts a soft blonde color. Bamboo furniture is versatile for design but is most common in contemporary interior design. Bamboo is the best wood for furniture made for environmentally-conscious families and modern design.

This is a quick article on kitchen layout design, assuming you are lucky enough to be able to plan your own kitchen layout or redesign a poorly laid out kitchen. Where your appliances are located will determine how easily you can work in the kitchen or how crowded it will feel if too many people are in there at the same time. If you have the flexibility, separate your kitchen space into three sections. Place your food storage (refrigerator, freezer and pantry) apart from your cooking appliances (range, oven, cookware), and apart from your clean-up area (sink, dishwasher and dish storage). See below for some common examples.

Also consider the symmetry of your layout and select base and wall cabinets that align with each other vertically as much as possible. For instance, place a 36-inch wall cabinet directly above a 36-inch base cabinet. Try not to choose too many different sizes of cabinets or it will look more like a puzzle than a well laid out row of cabinets.

Many kitchens or wall units include glass doors for places where you may want to display your kitchenware, photos, or other objects, but don’t want them completely exposed. Bookcases can also have glass doors to cover electronic components without interfering with the infra-red remote control signal. An alternative is wire mesh, which allows you to see what is inside, but provides a more decorative appearance.

We added some custom doors to one of our Traditional bookcases by replacing the glass with oil-rubbed bronze wire mesh.

Bookcase with glass doors converted to wire mesh

To install the mesh, the glass was first removed and replaced with a custom-cut piece of wire mesh. Most glass doors have clips that hold the glass panel in place, but we use plastic material that is inserted into a slot along the inside edge of the door frame. The plastic strip can hold either a glass panel or the wire mesh, or probably any other kind of thin panel.

Plastic strip used to hold panel in door frame (back view of door).

The wire mesh used in this piece is a 1/4″ thick round wire that has been crimped and has an opening size of 1/2″, which makes it fairly easy to see through without making it too open.

Wire mesh is generally sold in sheets that are at least 36″ x 48″, so you would need to cut it to fit your door openings with a good wire cutter.

Wire cutter to cut 1/4″ wire mesh.

Adding a good quality wire mesh to a door isn’t cheap, but it can dramatically enhance the look of your cabinets or bookcases!