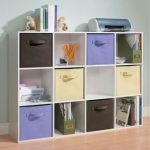
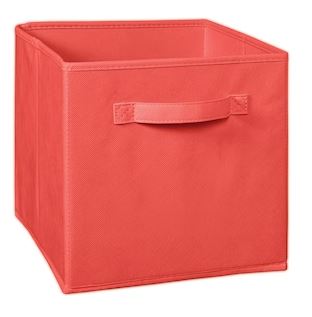
ClosetMaid makes some nice fabric storage cubes for storing all kinds of stuff. They are called ClosetMaid Cubeicals. But you don’t have to buy cheap bookcases from ClosetMaid too. You can have your own custom-sized unfinished or finished partition bookcase built to fit the 10.5″W x 11″H x 10.5″W cubes.
Below is an example of a frameless partition bookcase with cubbies sized to fit the storage cubes. Our Nola frameless bookcases are more sturdy than what you see here. Ours are built using 3/4″ thick Maple or Oak plywood with 2-3/4″H bases. So, they are much sturdier than your standard ready-to-assemble or particleboard bookcase.
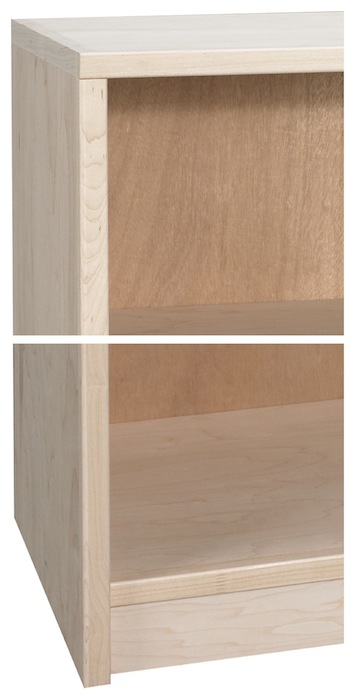
Here is how to size your unfinished bookcase (also available stained or painted).
Width: A 3-cube high bookcase would need space for three 11″H cubbies, plus an extra 1/4″ per cubby to make sure they fit easily, plus a 2-3/4″H base and three 3/4″ shelves (including the top).
Height: A 4-cube wide bookcase would need space for four 10.5″W cubbies, plus an extra 1/4″ per cubby to make sure they fit easily, plus five 3/4″W vertical separators. That would make it about 39″H and 47″W.
Overall: Since the cubbies are 10.5″D, the overall dimensions could be 47″W x 39″H x 12″D. Now, just buy some cubbies to fill it in!
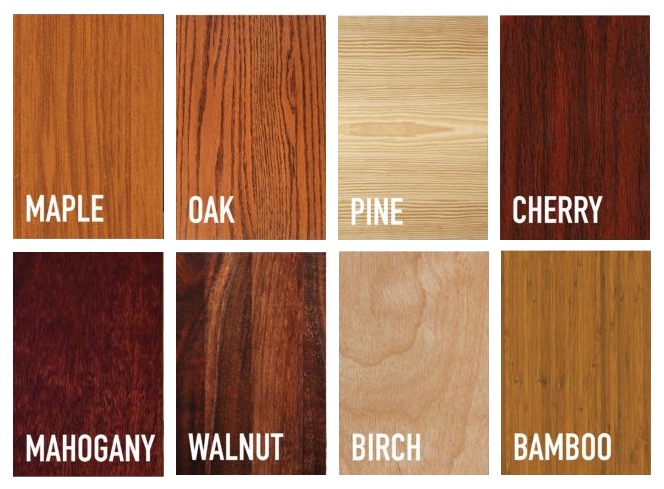
This is a guide to help you decide what types of wood to choose for your cabinets, bookcases, or other furniture.
Maple
Maple is one of the hardest wood types for furniture or cabinetry. It’s often used for heavy-use items like dressers and dining sets, as it can take a beating. It is almost always used for painted kitchen cabinets since it does not have very pronounced grain, which can show through light-colored paints if you use other types of wood. If you want unfinished cabinets and plan to paint them, order Maple. It is also more affordable than many other hardwoods. This, combined with its durability, makes it ideal.
Maple is found primarily in the Great Lakes region. Its color ranges from cream to reddish-brown, but it takes dark stains especially well. So, maple wood can easily be stained to resemble more expensive wood like mahogany. Maple wood has a straight, fine grain with occasional bird’s-eye or fiddleback patterns. Hard maple usually has a lighter color while soft maple tends to be slightly darker.
Oak
Oak is a durable and long-lasting wood type. Because of the trees’ slow growth, the wood is extremely dense, adding to its quality. The wood adapts to a variety of finishes. This makes it ideal for both modern and traditional furniture. It’s also often used for Mission/Arts & Crafts furniture design.
Most oak lumber comes from the eastern and central United States. Many American antiques are constructed of oak wood. Oak furniture will last centuries with proper care. The color ranges from light brown to pinkish-red with a swirling or striped grain. Oak furniture is often known as a scratch- and stain-resistant wood, if properly finished.
Pine
Pine is popular with rustic and farmhouse design. It is a lightweight wood, making it great for families that move frequently. Pine is an inexpensive wood and is a good option for those who aren’t quite ready for the investment of other wood types. Pine paints well and painted pine furniture is often used for kids’ rooms because of the fun colors.
Pine is found throughout the Northern Hemisphere. Its color ranges from white to light brown with yellow or red tones, and it’s known for its beautiful knots. The knots are what add character and rustic charm to the finish. Pine wood furniture resists shrinking and swelling, maintaining its shape for years.
Cherry
Cherry wood is known for its extremely straight and uniform grain. The wood polishes well and has a beautiful finished look. Also known for its popularity use for antique furniture, cherry is last centuries with the proper care. It is considered a prized hardwood among craftsmen. Cherry wood furniture is often an investment that will pay off long-term.
Cherry is found in the eastern United States. Its distinctive color starts as a pinkish-brown and darkens to a deep red with a straight grain and some rippling. Like most wooden furniture pieces, cherry becomes more beautiful as it ages. Cherry is the best wood for furniture that’s designed to last for years and stay in your family.
Mahogany
Mahogany is a durable hardwood that’s often used for investment, intricate pieces of furniture. The wood species has a pleasingly fine, straight grain. Because of the trees’ large size, mahogany is produced in large boards. This makes it perfect for focal point furniture. Mahogany has a timeless look and adds warmth to the room. Any mahogany wood furniture will last generations with proper care.
Mahogany is native to Mexico, Central and South America, but it’s grown throughout the tropics and Africa. African mahogany has become more popular than South American mahogany. However, antique pieces are most often made of South American mahogany. Its color varies from pale to pink to reddish-brown with a straight grain. Mahogany is the best wood for furniture that is elegant and timeless, especially large pieces like dining tables.
Walnut
Walnut is a hard, strong and durable wood for furniture. It carves well and holds its shape for years. This makes it perfect for ornate furniture that requires a high level of craftsmanship. This wood is ideal for investment pieces and furniture you want to stay in your family for generations. Think Amish Heirloom furniture.
In North America, walnut grows from Vermont to the Great Plains and south through Louisiana and Texas. Its color varies from white to dark brown, and it’s known for its large burls. Common types include Brazilian walnut, Caribbean walnut, black walnut and North American walnut wood. Walnut’s grain is typically straight, but some waves appear closer to the roots. Walnut is the best wood for furniture that is ornate and requires a lot of detail.
Birch
Birch is an extremely strong and durable hardwood that grows abundantly in North America. The species’ beautiful appearance and blond color make it a great wood type for modern furniture. It has an elegant, clean-lines grain that complements simplistic interior design.
Birch grows in the Northeast and Great Lakes regions and along the Appalachians. Its color ranges from cream to light reddish-brown with a fine grain. The wood’s strong, durable nature makes it great for woodworking and detailed craftsmanship.
Bamboo
Bamboo is known for its eco-friendly nature and beautiful blond coloring. The species is actually a grass, rather than hardwood. Because of this, bamboo grows rapidly. It grows about 10-times faster than hardwoods do. Bamboo also resists swelling and shrinking.
Bamboo grows in every continent except Europe and Antarctica. Its color varies from very light to a warm medium tone, but naturally, it boasts a soft blonde color. Bamboo furniture is versatile for design but is most common in contemporary interior design. Bamboo is the best wood for furniture made for environmentally-conscious families and modern design.
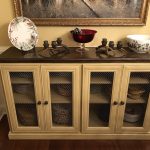
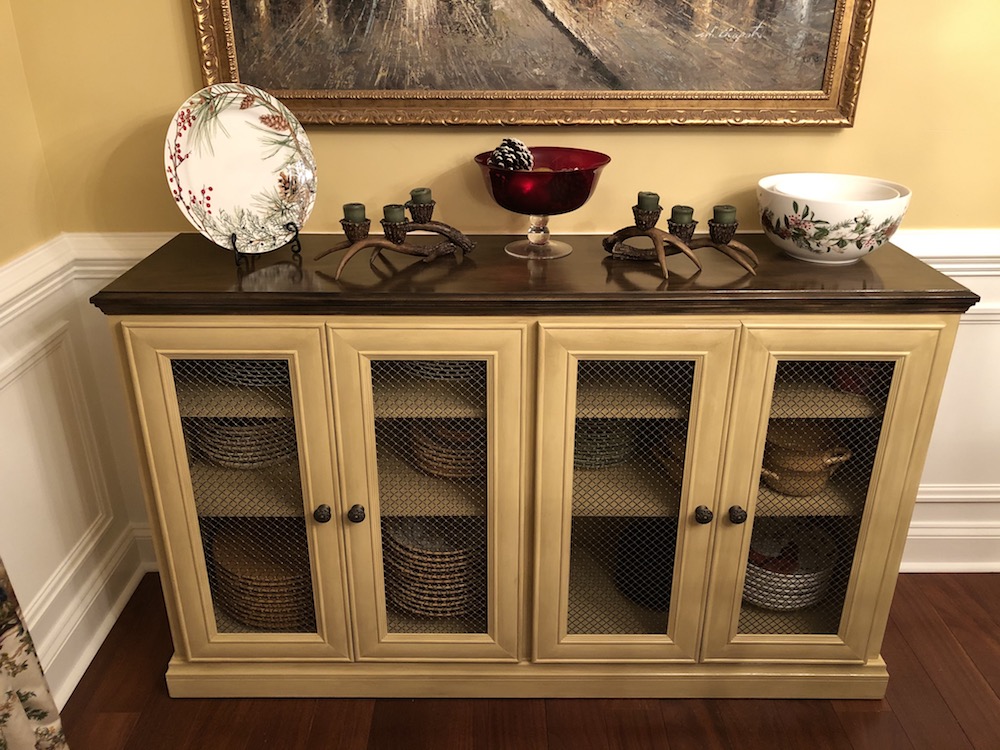
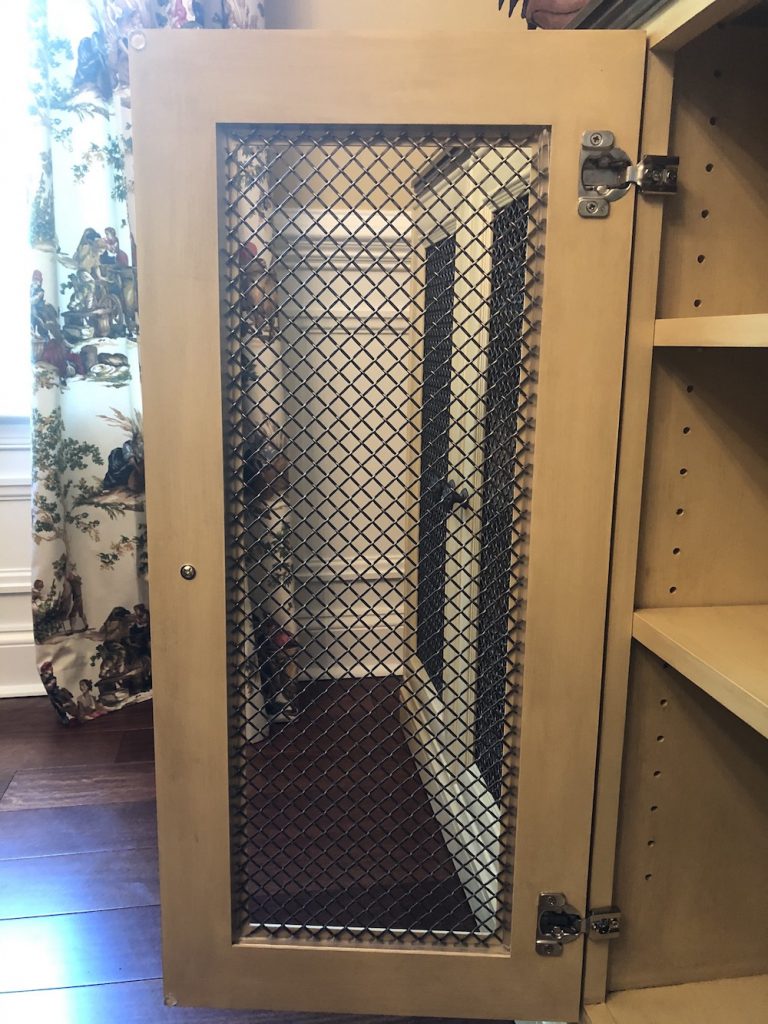
Many kitchens or wall units include glass doors for places where you may want to display your kitchenware, photos, or other objects, but don’t want them completely exposed. Bookcases can also have glass doors to cover electronic components without interfering with the infra-red remote control signal. An alternative is wire mesh, which allows you to see what is inside, but provides a more decorative appearance.
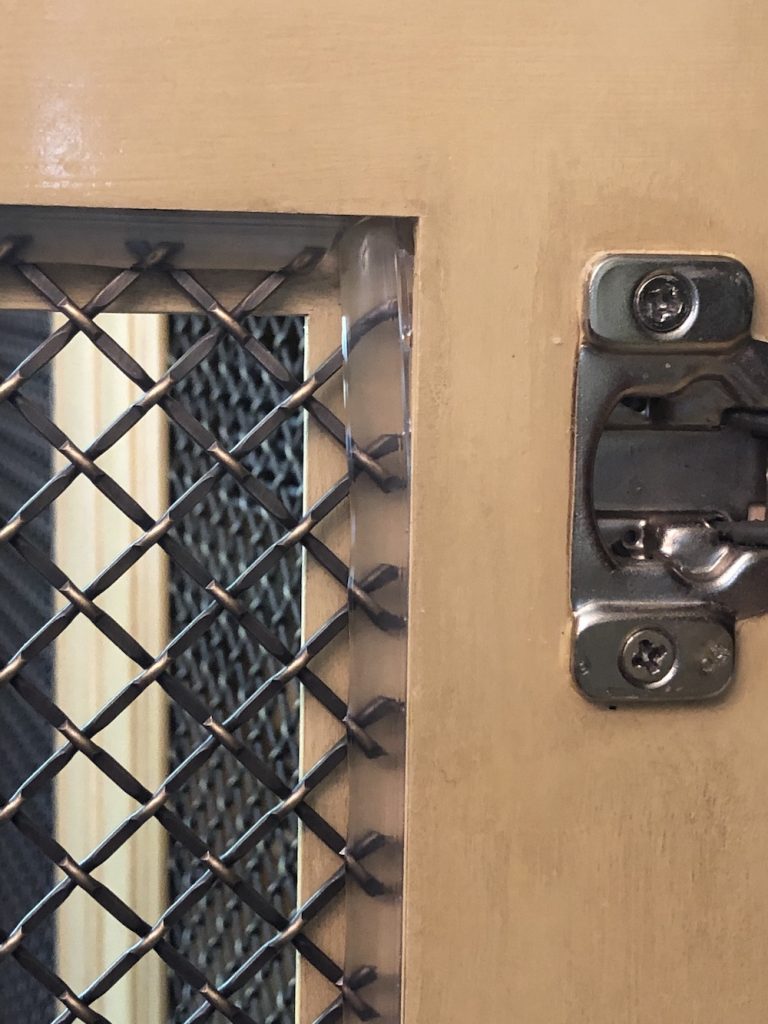
To install the mesh, the glass was first removed and replaced with a custom-cut piece of wire mesh. Most glass doors have clips that hold the glass panel in place, but we use plastic material that is inserted into a slot along the inside edge of the door frame. The plastic strip can hold either a glass panel or the wire mesh, or probably any other kind of thin panel.
Plastic strip used to hold panel in door frame (back view of door).
The wire mesh used in this piece is a 1/4″ thick round wire that has been crimped and has an opening size of 1/2″, which makes it fairly easy to see through without making it too open.
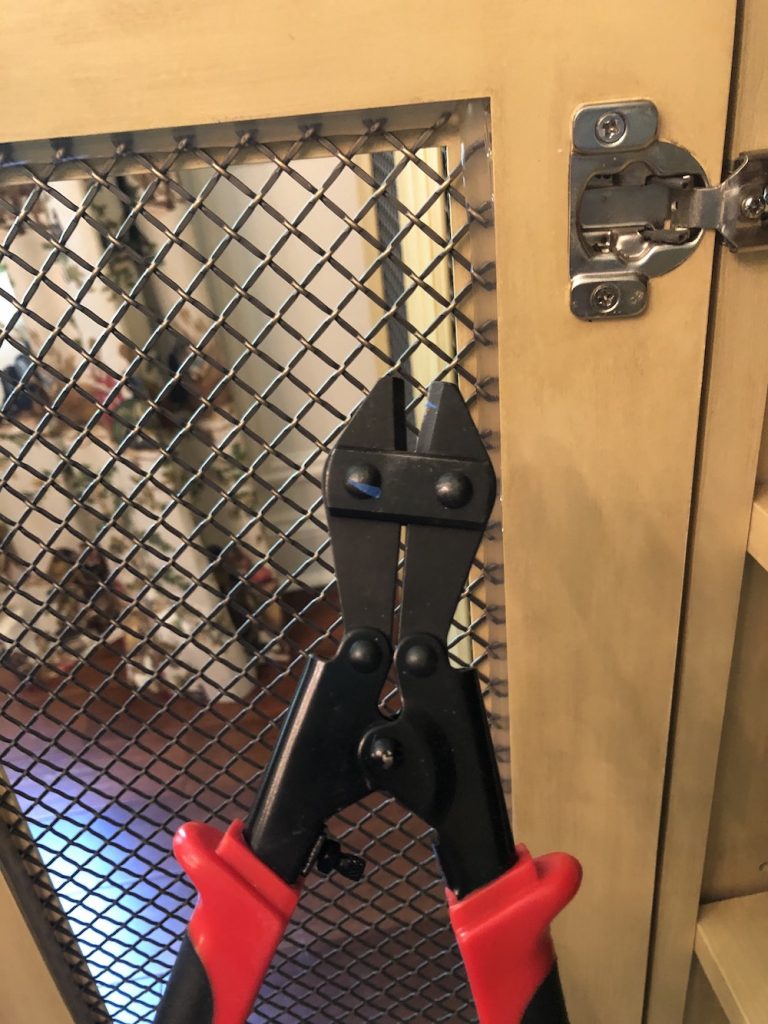
Wire mesh is generally sold in sheets that are at least 36″ x 48″, so you would need to cut it to fit your door openings with a good wire cutter.
Wire cutter to cut 1/4″ wire mesh.
Adding a good quality wire mesh to a door isn’t cheap, but it can dramatically enhance the look of your cabinets or bookcases!
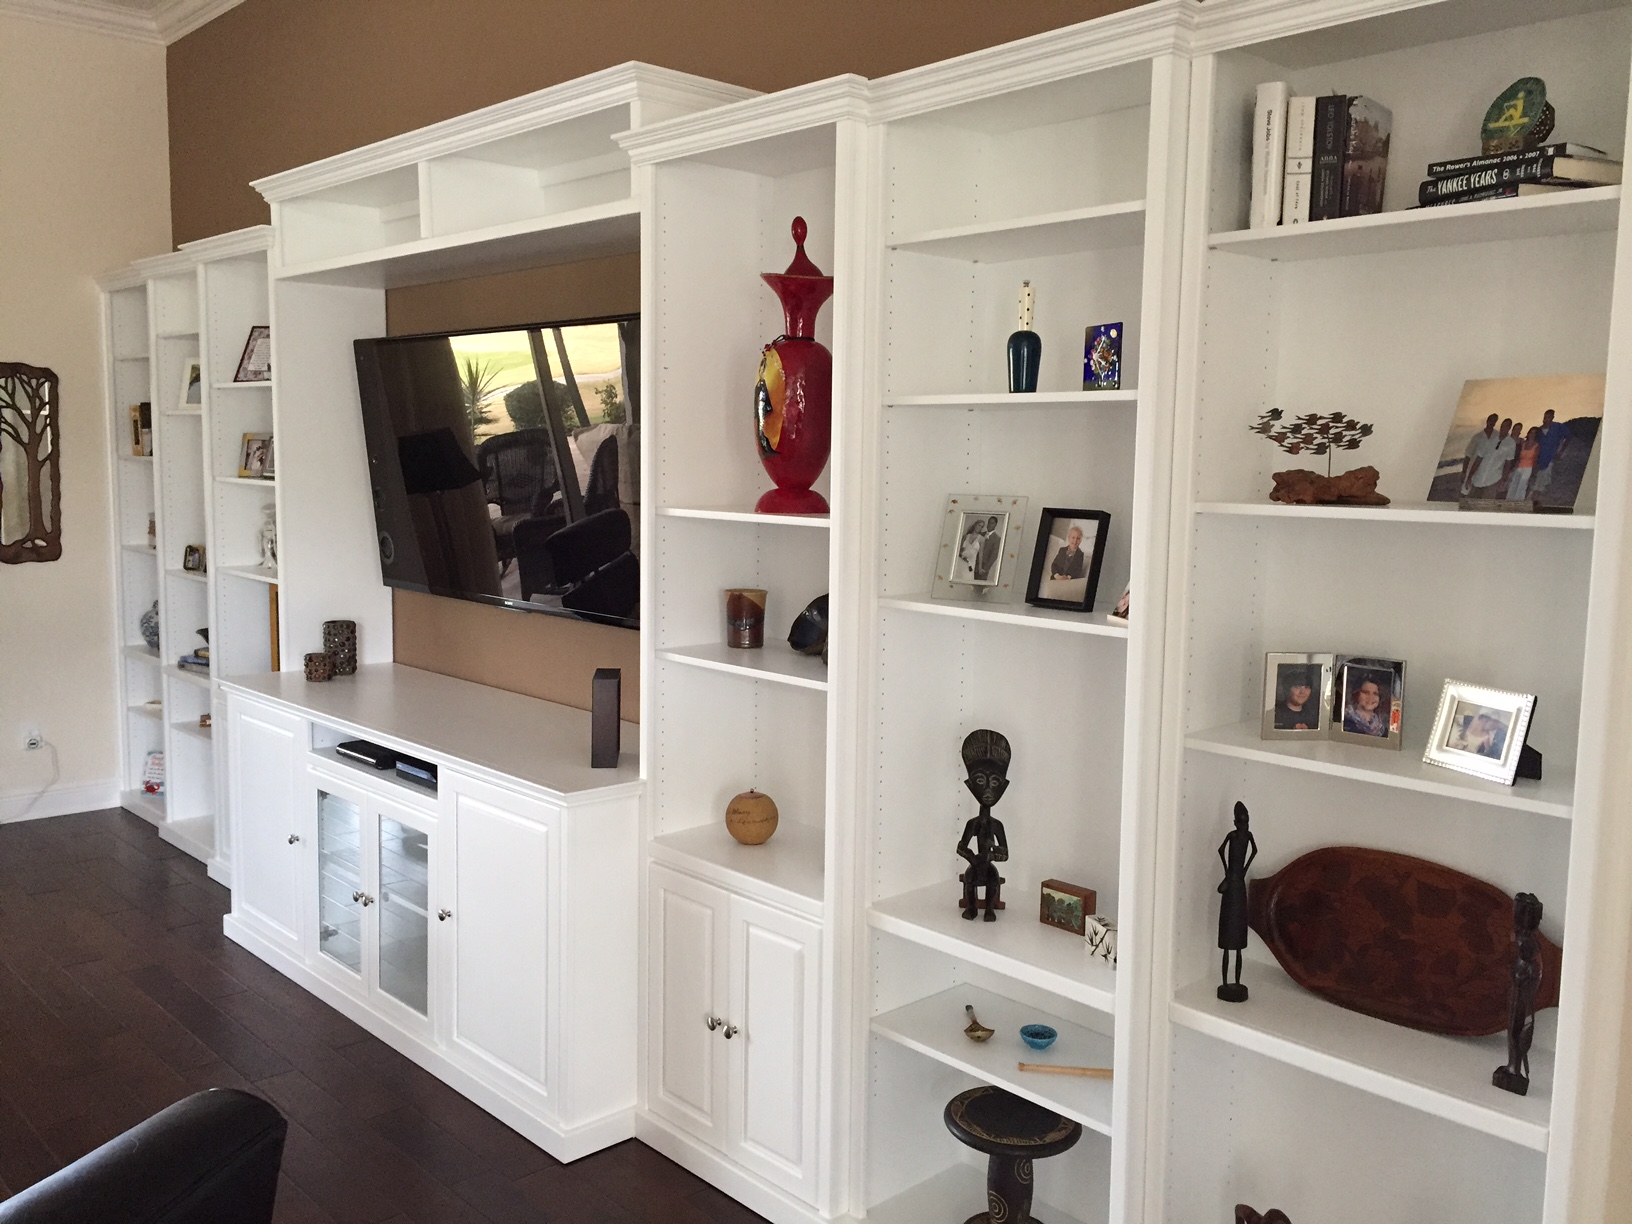
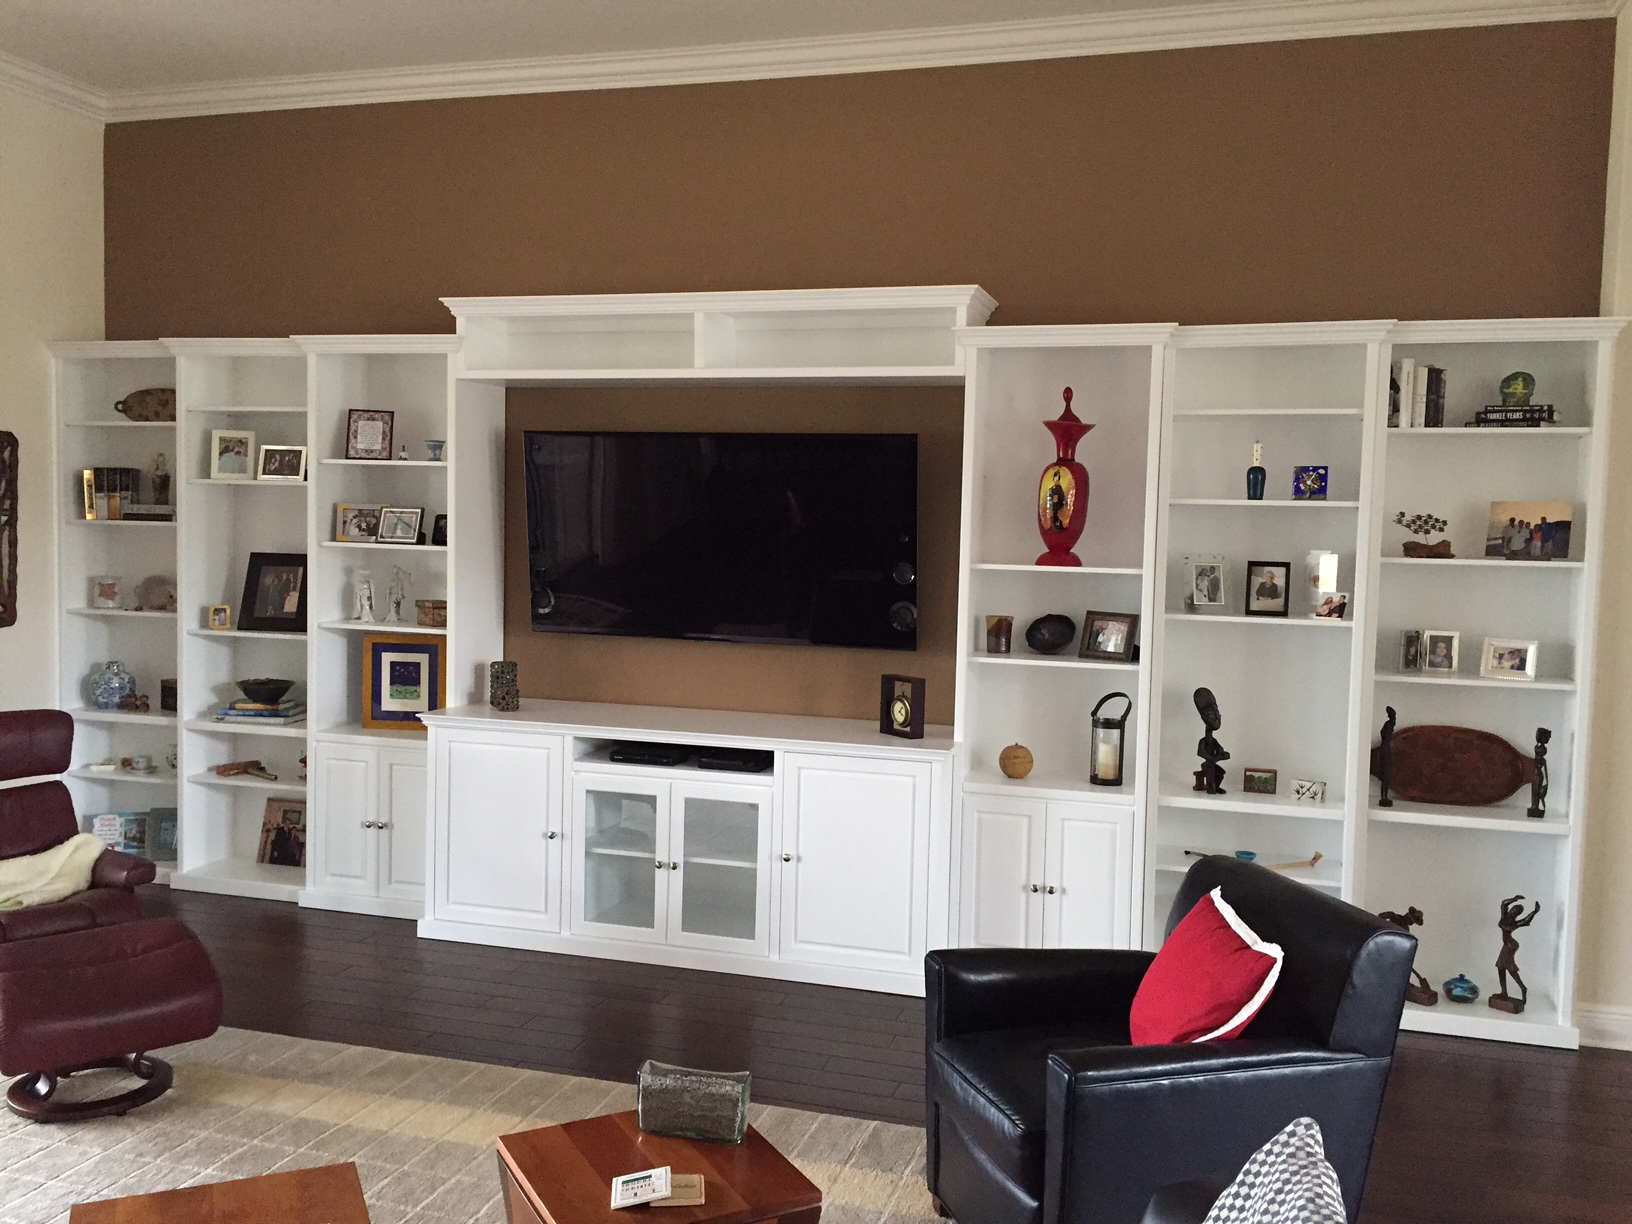
This great Maple, Face Frame Crown style, white entertainment system was put together using a combination of bookcases, a center entertainment console, and a bookcase bridge. Here is how this was put together to create a cascading wall unit with varying depths and heights.
Design Elements
Entertainment System
The central piece is a CN4 entertainment console 84″W x 36″H x 24″D, painted white with raised-panel doors. It has deluxe base moulding that wraps around the sides and is mitered to meet the moulding on the adjacent units.
The piece above the TV is a BR2 bookcase bridge 84″W x 12″H x 16″D set above the other bookcases with deluxe crown moulding wrapped around each side.
The bookcases on each side are stepped back, with the first 16″D, then 14″D, then 12″D. They have deluxe crown moulding that is wrapped around to meet the bookcase next to it. The pieces next to the center have a mini-miter so that the crown moulding overlaps the face frame of the bookcase bridge. On the outer side, they have a partial wrap with a mitered cut to meet the moulding on the next piece. The next piece has an inside miter cut to meet that crown, and so forth. The result is a seamless flowing sequence of moulding that appears built-in and connected. In reality, these were ordered pre-built to fit the design.
Had the homeowner wanted to go all the way to the ceiling, we could have used base units with tall hutches, but since this is a very tall ceiling, it probably would have been overkill.
Diagrams
The diagram below was used to specify how everything would fit together.
Entertainment System Diagram
Final Overview
Entertainment System
This large custom entertainment system is nothing more than a collection of pre-built units designed to fit together as a seamless unit. All that you need is the ability to envision your project and measure the space. Then, just order bookcases and cabinets sized to fit, pre-assembled, and ready to put into place. The center pieces are deeper, with the end units the shallowest of all. There is plenty of hidden storage in the middle, where media, and other items can be placed. The electronics area is in the opening just below the TV shelf or behind glass doors so that the remote controls will still work.
“There is no furniture so charming as books, even if you never open them or read a single word,” said the nineteenth-century writer Sydney Smith. A shelf full of books adds instant appeal to any room, whether in the form of bespoke joinery or stand-alone shelves. We’ve looked for the most inspiring designs for bookshelves in the living room, bedroom or study. From modern designs, to mid-century classics and spy novel numbers which conceal hidden doors, there are bookshelves of every type in this gallery to inspire something as intriguing as the tomes that fill them.
Once you’ve decided on the bookshelf for you, have a think about how best to organize your books. Are you someone who likes them color-coded? Or by size? Take a look at our piece on how to arrange your bookshelf for more advice.
Entryway Bookcases
In the library at Wolterton Hall in Norfolk, two panels of faux book spines, on either side of a door, drop down to reveal a drinks area hidden behind – aperitif bottles are on the left and digestifs on the right. Once closed, they are indistinguishable from the other shelves and you would never know they are there. woltertonpark.co.uk
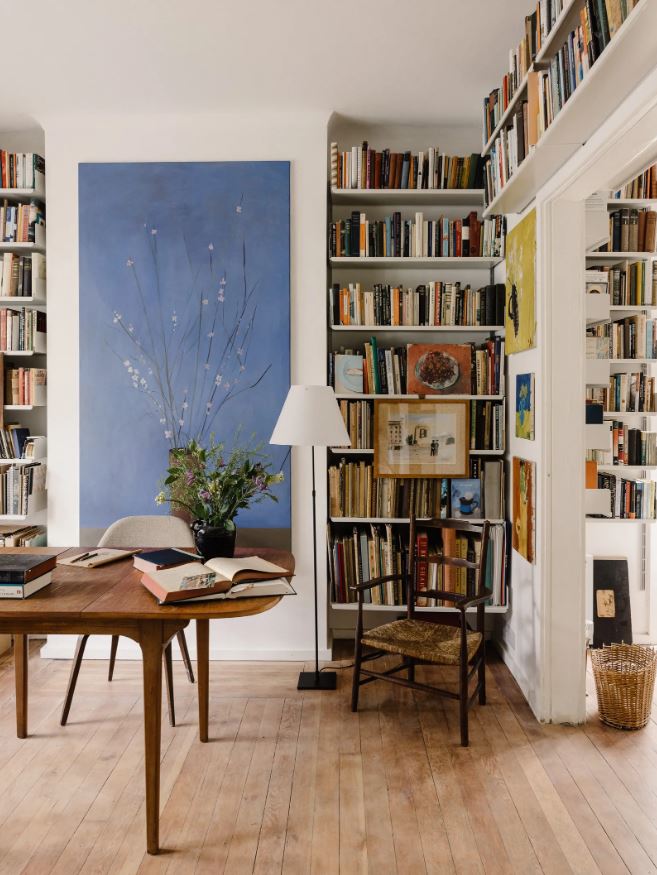
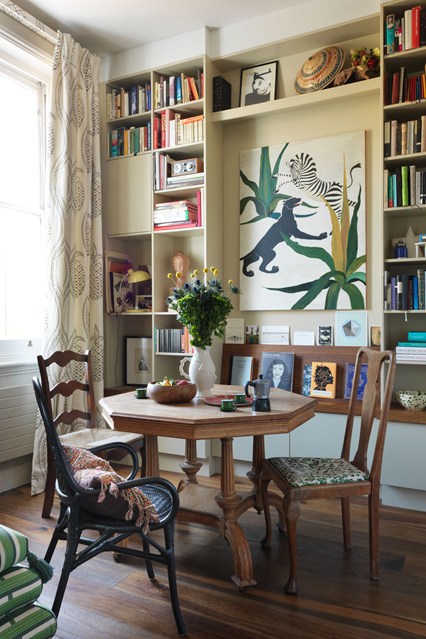
In the painter Haidee Becker’s north London house, bookshelves have been built into the recess of the wall and along the top of the archway. In the fairly neutral space, the addition of hundreds of books adds color and texture.
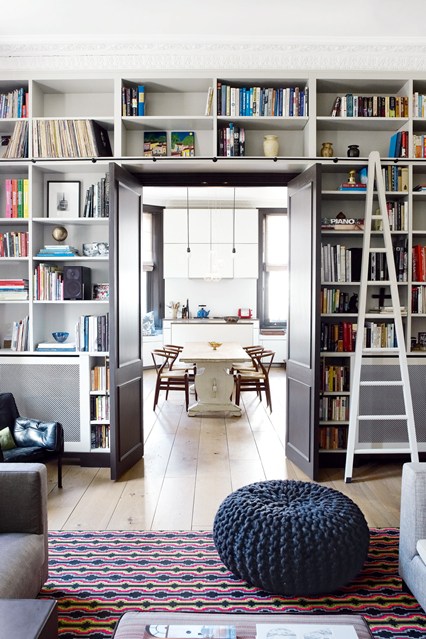
Floor-to-ceiling bookshelves, in a bespoke green, frame the doorway with a view across the hall to a bedroom beyond in Thomas Dane’s Gloucestershire house.
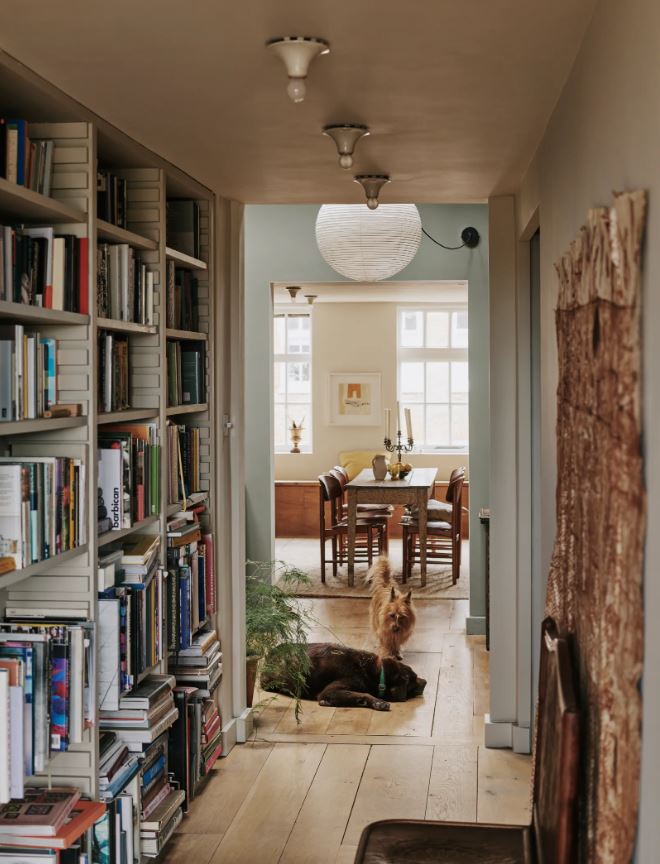
If you happen to have a reasonably wide hallway or landing, adding bookshelves can be a brilliant way to add interest (and storage). At her converted schoolhouse in Battersea, Atelier Ellis founder Cassandra Ellis has created a library with floor-to-ceiling shelves in the hallway.
Stepped Library Bookcases
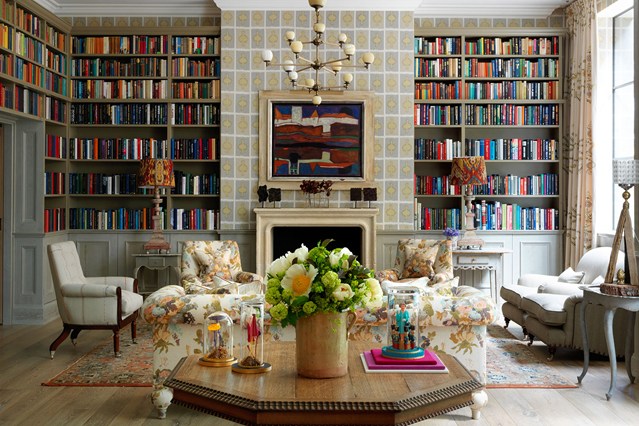
Work with the architecture of your room. The alcoves to either side of a fireplace are the ultimate spot for built-in bookshelves. In Kit Kemp’s new hotel Ham Yard, the designer has carried them round the wall and over the door-frame, (a trick also favored by our editor Sue Crewe in her home) and teamed them with a chic patterned paper in muted colors.
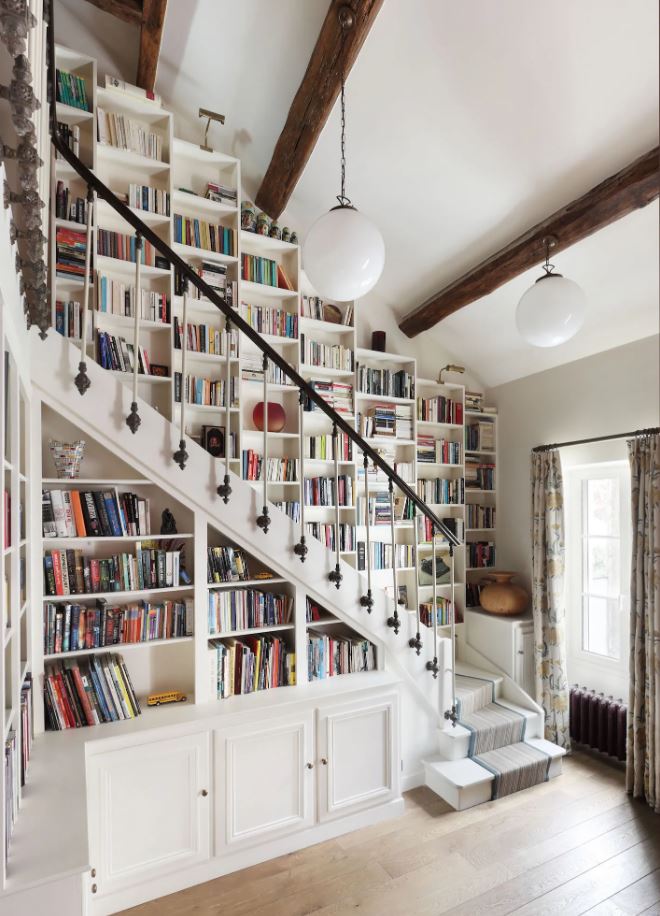
Kate Aslangul of Oakley Moore decorated this light-flooded library on the second floor of a Parisian home, in which architect Pascal Collange incorporated a bookshelf into the staircase, a signature style. The room is painted in Farrow & Ball‘s ‘New White’ while the pendant lights are from Mullan. Bespoke metal spindles create an arts and crafts feel together with a striped runner from Hartley Tissier, an Anglo-French carpet company.
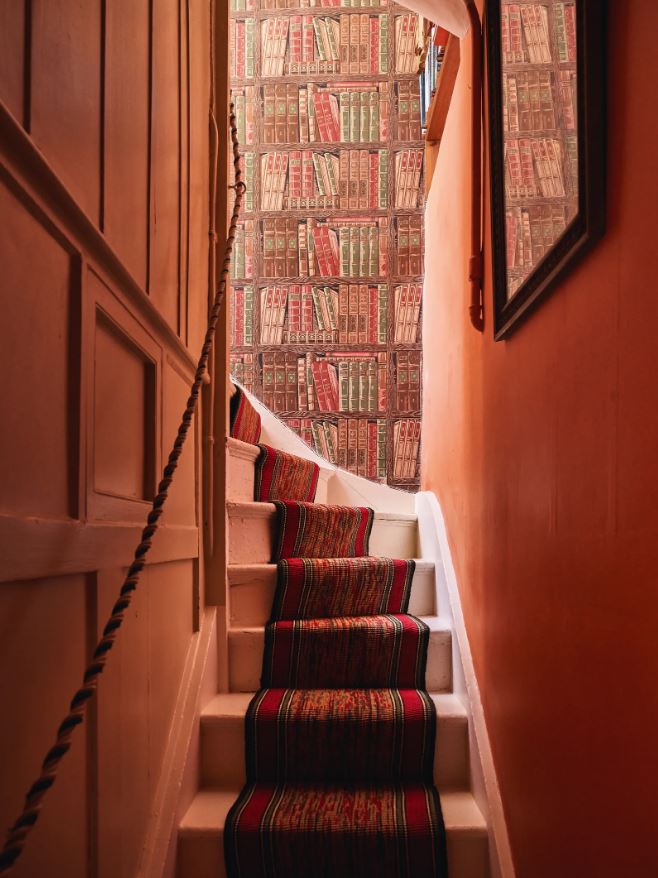
In lieu of an actual bookcase, antiques dealer Sarah Fenwick installed this Cole & Son wallpaper in the stairwell of her London home. The effect is playful and adds a sense of depth to the space.
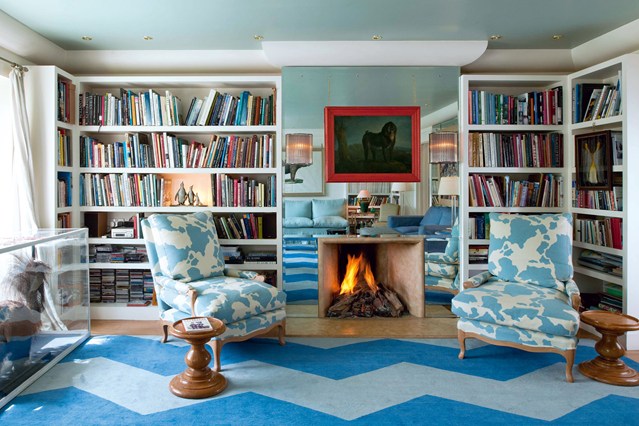
Fireplace Bookcases
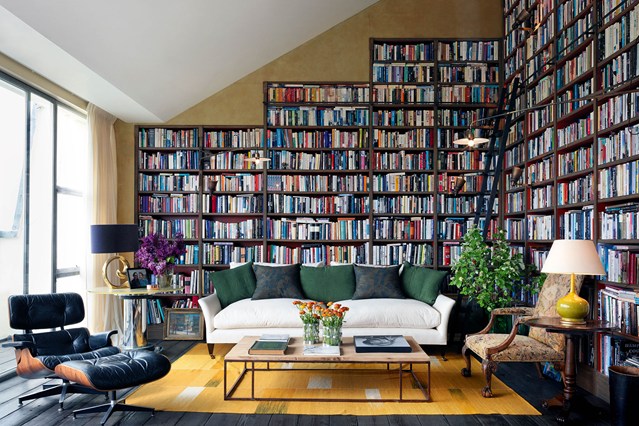
Floor to ceiling bookshelves add visual impact and character in the home of designer Beata Heuman.
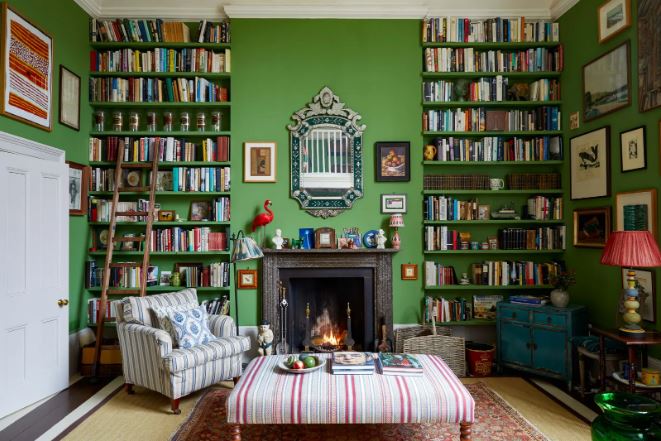
Green covers both the walls and bookshelves in the eclectic, colourful London house of a novelist and lifelong collector. A vintage Venetian mirror from Tarquin Bilgen is flanked by paintings by Anne Rothenstein and a pink lamp by Cressida Bell. A flamingo from Graham & Green is beside an armchair in an Ian Mankin blue stripe, next to which is a statue of a boy from Bora Bora.
Try combining books with mirrors. Lulu Lytle, owner and director of the interiors shop Soane, uses mirrors on the walls that are not shelved to ‘maintain the feeling of open skies in our sitting room’. The clever use of storage, wrapped beautifully around the Peter Twining designed chimney wall makes the room feel lighter than air.
Breakfast Room Bookcases
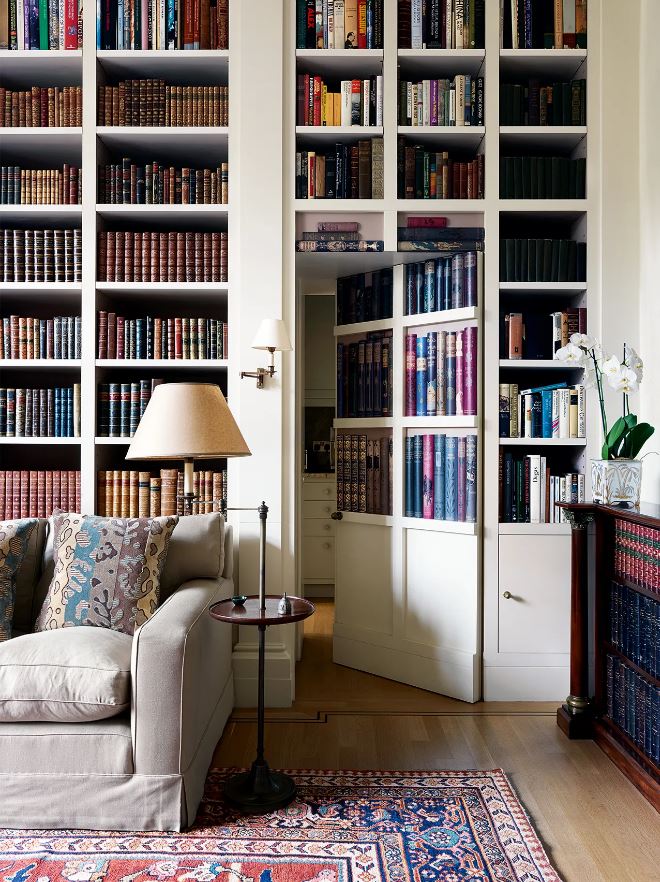
Hidden Door Bookcases
This eighteenth-century barn has been converted into a stylish sitting-room-cum-guest-cottage, by its owner Emma Burns, managing director at Sibyl Colefax & John Fowler. Emma adapted the internal configuration to create a striking way of displaying her book collection. The built-in bookcase equipped with a ladder also acts as a secret door to a hidden bathroom.
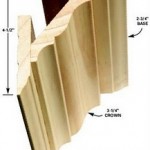
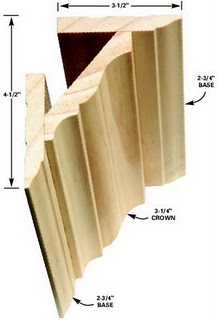
Crown molding is a decorative trim piece the sits on an angle, and is used to cover transitions between walls, bookcases or cabinets and the ceiling for decoration. It can be installed where the walls and the ceilings meet, but it can also be used to fill the gap between the top of a bookcase or cabinet and the ceiling, or sticking up at the top of a row of wall cabinets or tall bookcases. They can either be plain or sprung.
Most of today’s interior designers agree that every room benefits from the use of crown molding treatment. It is one of most important architectural elements used to define interior spaces. Moulding is typically made from solid milled wood or plaster but may be made from plastic or reformed wood. Installing crown molding to a room, or to the top of your cabinets or bookcases, instantly adds an aesthetically pleasing and classy look.
Varieties of common moldings include:
Crown
Cove
Astra-gal
Bead molding
Bed molding
Dentil
Scotia
The installation of molding improves the transition from wall to ceiling or bookcase to ceiling and defines the architectural style of a room. The size and style of crown molding used may vary widely, from a simple coves in a farmhouse kitchen to large built-up cornice in a grand entryways.
The size and style of molding used may vary widely, from a simple coves in a farmhouse kitchen to open top crown with rope lighting to large built-up cornice in a grand entryways.
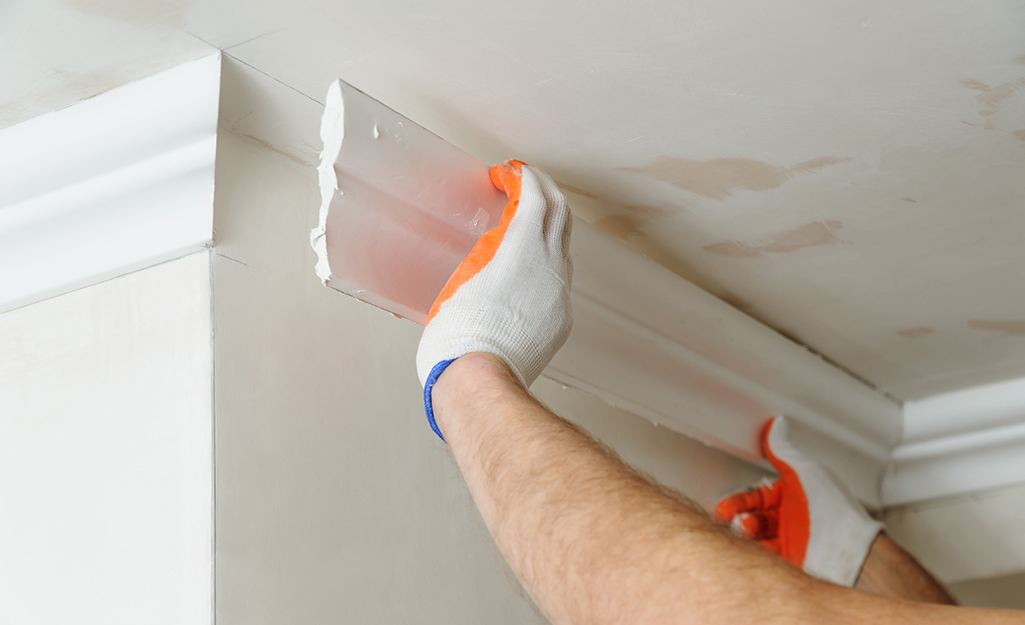
Installing Crown
Crown moulding, also known as ceiling trim, gives a wall depth and character. It’s a budget-friendly way to update the look of most any room. You can also use crown moulding to accent the style of your pantry or kitchen cabinets. Read on for the basic steps and tips on how to install crown moulding.
Plan Your Installation
Learning how to install crown moulding starts with careful planning. The moulding pieces need to fit seamlessly around your room. The first thing to do is determine which crown moulding to use. There are a number of different decorative styles that you can install based on the decor of your room. You can also opt for cove moulding if you are interested in a look that is not as fancy but still neatly finished.
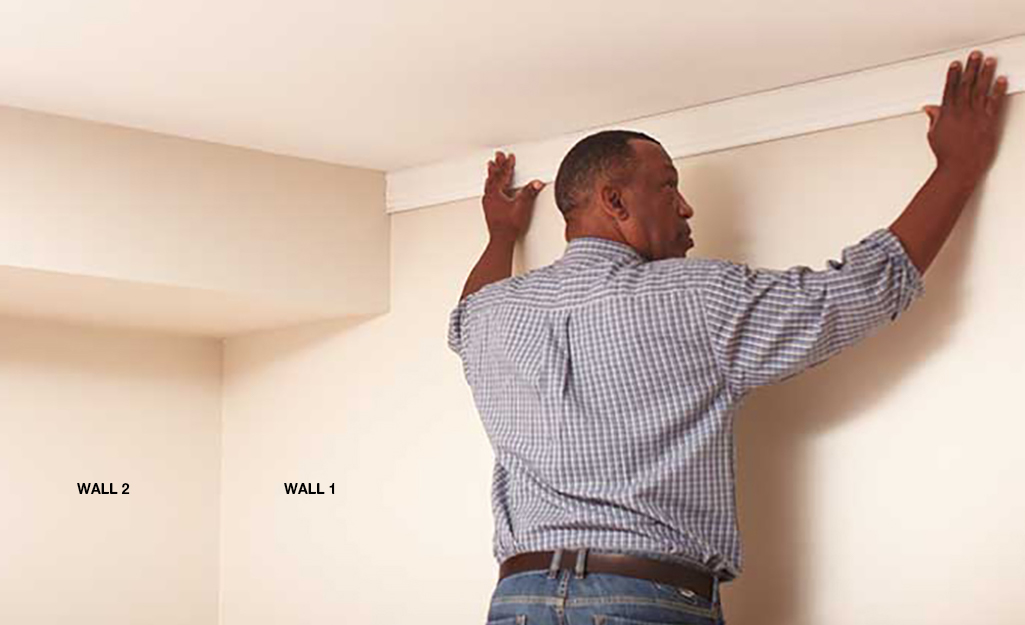
Start your planning on the wall opposite the door (wall 1 in photo above). You want the first view of your crown moulding to be the best.
Plan your way around the room. The moulding on wall 2 in the photo above will be coped, or cut to shape, where it meets the moulding on wall 1.
The third wall is treated the same way as wall 2. The fourth wall is coped at both ends.
Measure the Room and Mark Studs
Each piece of crown moulding will need to be custom fitted to your wall and each other. No room is perfectly square, so measuring accurately is essential. You’ll also want to nail the crown moulding into a stud for a secure hang.
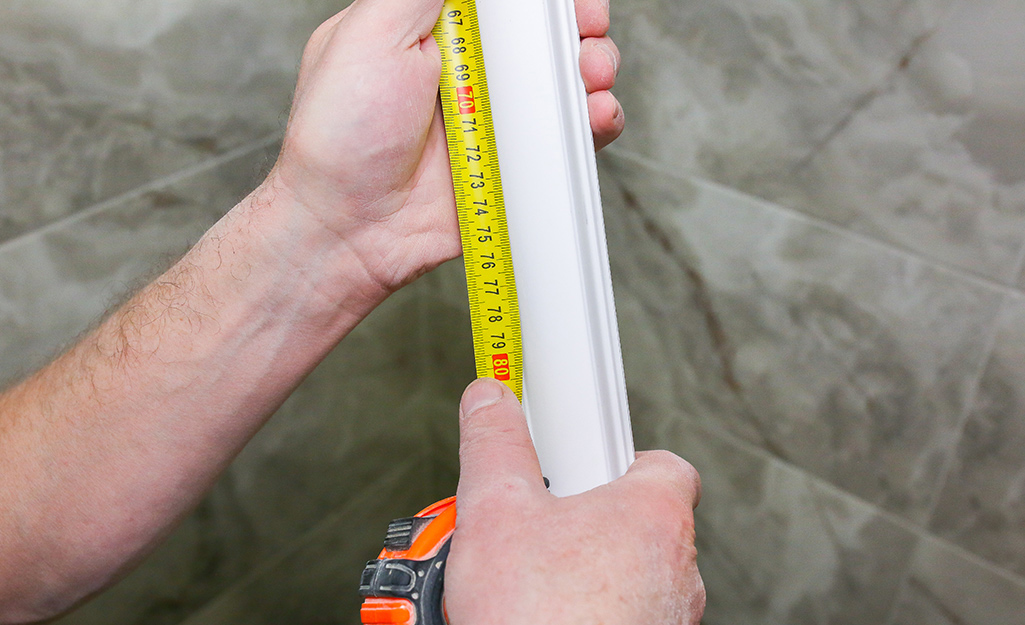
Measure the wall from corner to corner. Draw a faint line where the bottom of the crown moulding will lay. This will help you keep the moulding straight. Write your measurement down to use when cutting your crown moulding.
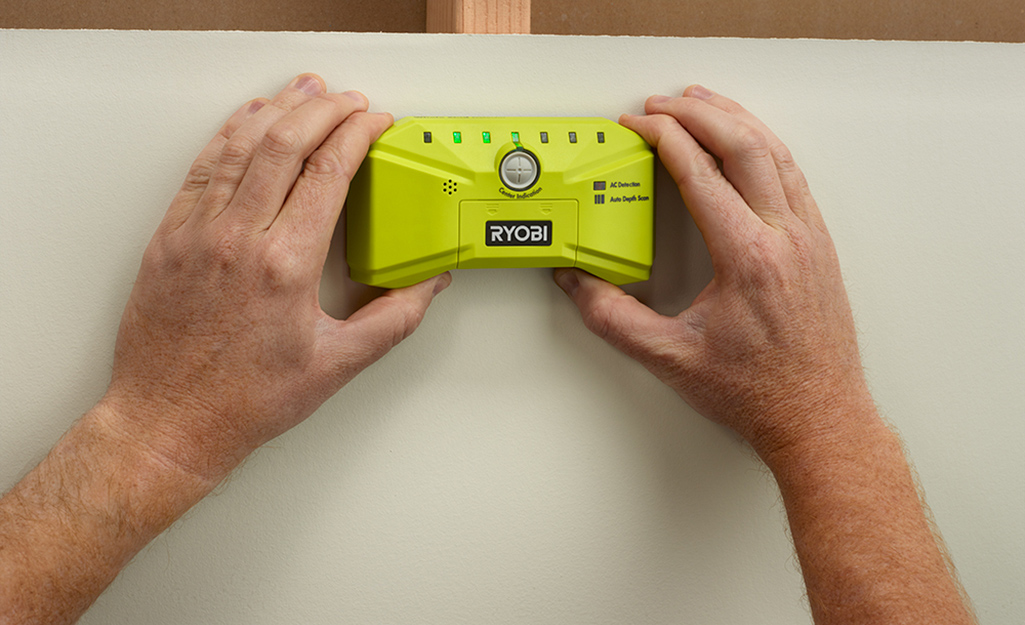
Use a stud finder to locate the studs. Make faint pencil marks high on the wall to guide you as you nail.
Measure and Mark Moulding
Put the moulding against a framing square, noting the distance between the face of the moulding edge and the corner.
Cut a scrap of lumber to the correct dimension and draw layout lines on the wall and ceiling.
When you install the moulding, align it with the layout lines.
Begin placing moulding against the wall opposite the door.
Mark the locations of the studs by holding the moulding in place. Transfer the stud marks onto the moulding.
Set up the Miter Saw
When first learning how to cut crown moulding, position the moulding correctly on the saw.
Set the miter saw to cut at 45 degrees in the general direction of the angle you need. See Step 5 below.
Make sure the ceiling edge is flat on the bottom of the miter box. The wall edge should be tight against the fence.
If the blade and cut line won’t align, try turning the moulding upside down and try again.
Cut close to the end.
Tip: If you do not have a miter saw, cuts can be made with a hand saw and miter box.
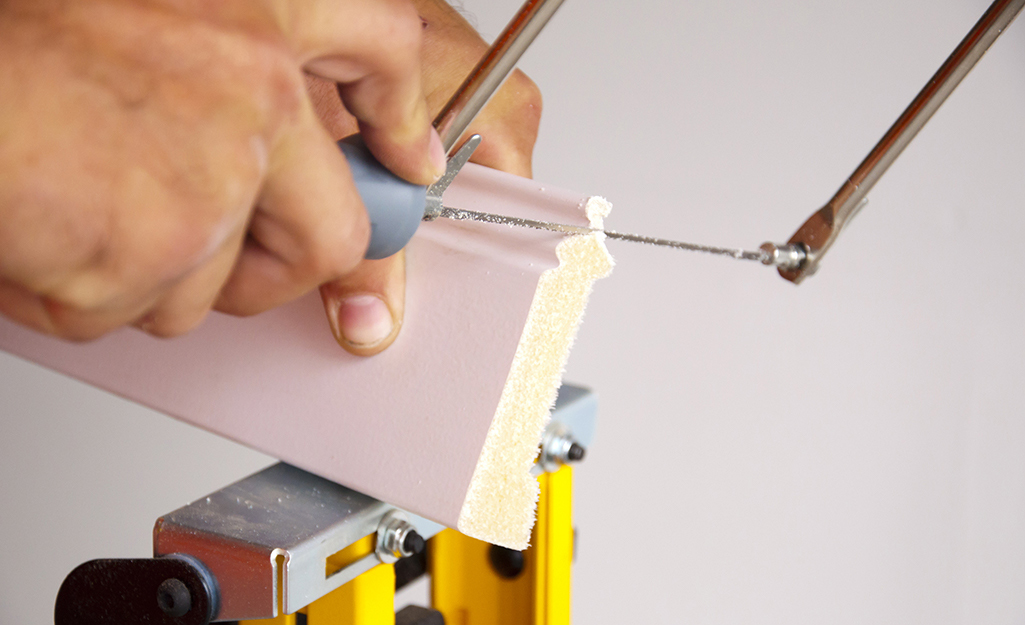
Cut Crown Moulding
Part of learning how to install crown moulding is figuring out which cut to use. You will make inside corner cuts, outside corner cuts and sometimes scarf joint cuts. The most common types of crown moulding cuts are:
Inside corner cuts have a long bottom edge and a short top edge. The cut on the left will angle left. The cut on the right will angle right.
Outside corner cuts have a short bottom edge and a long top. The cut on the right will angle left. The cut on the left will angle right.
Scarf cuts are used to join two pieces of moulding that meet on a wall. The cut will angle in the same direction on both sides of the moulding.
How you cut your crown moulding also depends on what kind of joints will work best. There are two kinds of joints: mitered and coped. Mitered joints meet at the corners in a perfect 90 degree angle. Coped joints work best when a corner isn’t squaring up or is not at 90 degrees.
A coped joint is when you cut the end of the moulding square and install it flush into the corner of a wall. You then cut the next piece of moulding to fit the profile of the first. Most corners are not perfect, so it’s good to know how to make a coped joint.
Lay out the cope joint on a second piece of moulding. Start with a piece that’s a few inches longer than the finished length. Flex it in place.
At the end of the moulding that you will cope, draw a line in the general direction you plan to cut. Cut at roughly a 45-degree angle.
Tip: Cut the inside corner and outside corner moulding upside down on the saw. Place the ceiling side on the bottom and the wall side on the top.
Test and Trim to Fit
You want your cuts to fit snugly together. As you cut each piece of moulding, look closely at each one. See if there is the excess wood beneath the profile. Cut away any excess with a coping saw.
Tilt the coping saw back at a 45-degree angle to create a razor-thin edge where the two mouldings will meet. You want the mouldings to overlap flat.
Check the joint by fitting it against a cutoff.
Be prepared for an imperfect fit. Fine-tune the joint until it fits.
Sand and file any high spots to create a tight fit.
Installing Crown Moulding
Once you’re sure the joints fit, you’re ready to install the crown moulding.
Measure the wall again.
Cut the moulding 1/8-inch longer than measured. The extra length will help push the cope joint closed when installing crown moulding.
Make a square cut on the uncoped end of the crown moulding.
Flex the moulding in place.
Nail or glue the moulding to the wall and ceiling. To prevent splitting, drill pilot holes the diameter of the finishing nails. Drill holes at each mark at the top and bottom of the moulding and nail in place.
Putty any nail holes.
Crown Moulding Installation Tips
Purchase a few extra feet of your crown moulding to make practice cuts.
Before you install it, prime and paint the sides and back of the moulding. This will keep your moulding from warping. You can use stain or varnish instead of paint.
Wear appropriate hearing and eye protection when cutting your moulding.
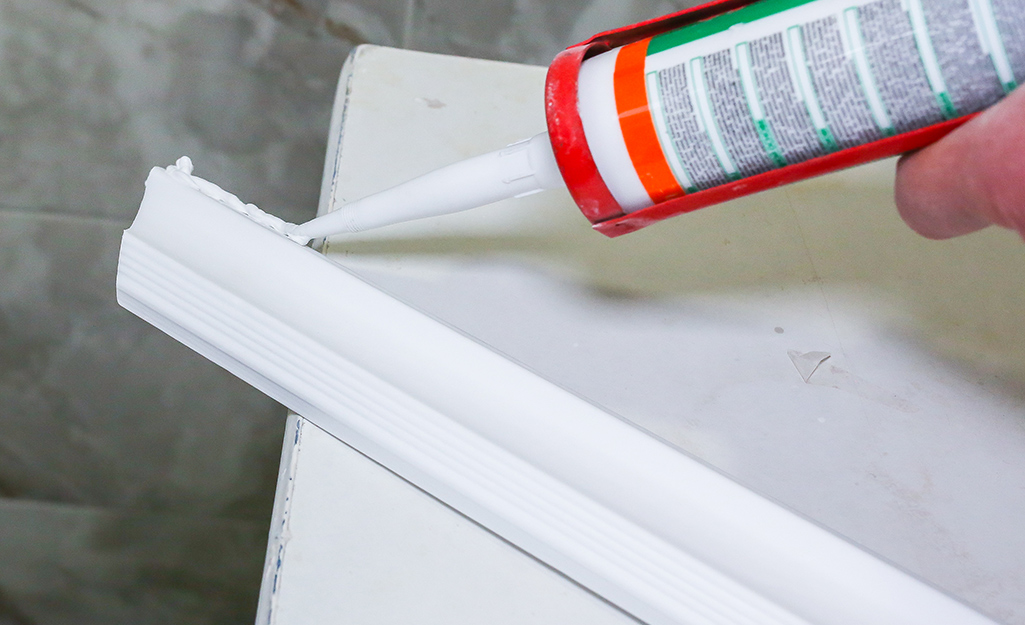
If you’re painting the moulding after installation, run a bead of caulk in the seam. Wipe it smooth with a wet finger or damp rag.
Don’t guesstimate, calculate. Know exactly how much you need with our project calculators.
Now that you know how to install crown moulding, you can improve the look of any wall. Try out different ideas: Use crown moulding to create a picture frame or to border a built-in bookshelf. Use a few different types of moulding together. Different combinations of moulding are called build-ups. Learning how to install crown moulding means you can install build-ups the same way.
Remember to measure and cut accurately for the best look. And don’t worry if you don’t own all of the tools needed to complete this DIY crown moulding project. Rent tools for any project at The Home Depot.
Bookshelves are often overlooked when it comes to designing the interior of a home. The truth is that the right bookcase in the right place can make a world of difference, increasing the beauty of an interior and decreasing the clutter. Here are a few suggestions for different types of book shelves to consider if you’re in the market.
Freestanding Models
You can’t beat a good freestanding bookcase for convenience. Not only are they great places to store books and knick knacks, but they can be attractive furniture additions to your living spaces as well. The beauty of freestanding book shelves is the incredible variety of styles available. Corner bookcases are wonderful for making use of those odd corners in the living room or den, and provide an attractive place to store and display books and other valuables.
Rotating models are also available, and are very handy when used as end tables to store books, magazines, remotes, and other things you want to have within arm’s reach when stretching out on the couch.
If you’re looking for something really distinctive, consider a doored bookcase, a close cousin of the china cabinet. These are great for displaying everything from grandma’s old dishes to that autographed copy of The Old Man and the Sea that you’re always telling everybody about.
The fact is that when you’re talking freestanding book shelves, there’s a model out there that will satisfy just about any space, taste and budget.
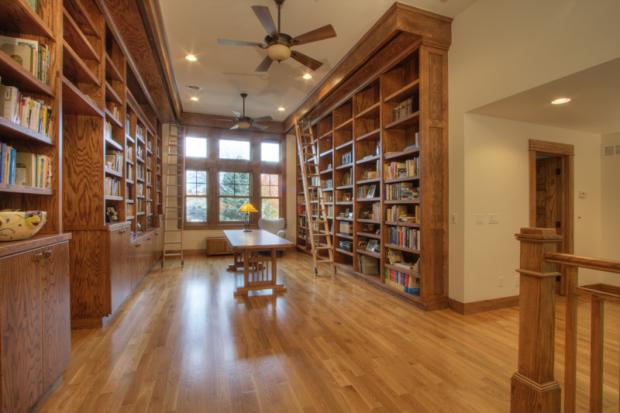
Built-In Bookshelves
If you’re feeling overwhelmed with the amount of furniture you already have, you’ll want to consider having built in bookcases installed instead. These can be custom designed to fit your living spaces, and often can be fitted in out of the way places or recessed into a wall where a freestanding model just wouldn’t work.
Some examples of places where built in bookshelves can really bring a room together include around fireplaces, doors and windows, beneath stairs or running up them, and in odd corners throughout the house. Bookcases have even been built in to serve as a barrier and divide a room into two distinct areas. If you have a space you think a custom built-in bookcase might be the ticket, Highlands Designs can make it happen.
Looking for some new kitchen design ideas for your remodel? We’ve created this handy infographic to help you out along the way! Find out the most popular themed kitchens, most popular kitchen materials, and how to create your favorite kitchen design theme.
Traditional Kitchen Theme: Use raised panel cabinets, granite countertops, marble backsplash, and maple wood flooring.
Transitional Kitchen Theme: Use flat paneled cabinets, marble countertops, ceramic backsplash, and ash wood flooring.
Contemporary Kitchen Theme: Use shaker style cabinets, concrete countertops, stone backsplash, and tile flooring.
Modern Kitchen Theme: Use flat/high gloss cabinets, quartz countertops, glass backsplash, and vinyl/high gloss flooring.
Rustic Kitchen Theme: Use inset/distressed cabinets, butcher block countertops, brick backsplash, and travertine or chipped flooring.
Industrial Kitchen Theme: Use a custom cabinets, stainless steel countertops, ceramic tile backsplash, and concrete flooring.
I truly love to see bookcases in homes because they are the perfect solution for adding storage and style to your surroundings. Books and collectibles on display add warmth and personality to any space, whether it’s a living or dining area, bedroom or home office. To any visitor, a bookcase will communicate what you read, what you collect, and what you love. Bookcases are a window into your passions and pursuits, and an opportunity for you to put your most favorite things on display.
The challenge for most people is how to style a bookcase well. How do you maximize both utility and aesthetic appeal, but also avoid monotony and clutter? Styling a bookcase is an art, but a job easily tackled if you study those done right.
It Starts with the Back
Simple inexpensive bookcases become stunners when their backs are dressed up with paint, fabric or wallpaper. The bookcase below was brought to life with a pattern that accentuates the balanced display of books and collectibles. One of the bookcase options you can get at Highlands Designs is a beadboard back that adds character.
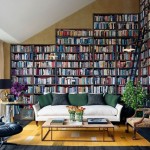
When styled against a backdrop of robin’s egg blue, this collection from the home of model Coco Rochas has visual appeal, and showcases a love of books, antique coffeepots, vases, and glass bottles. Highlands Designs has partition bookcases like this that divides the space into multiple cubes.
Here is a shelf masterfully styled by Emily Henderson. Notice the balance achieved between the books alternating in placement from left to right with the ceramics poised on the opposite side. The middle shelf repeats the books plus ceramics combination, and also provides the opportunity to display smaller collectibles. Different heights and textures also add to the appeal.
Did you know there are 7 ways to stack books? Karen from The Art of Doing Stuff teaches us how she styled hers in her partition bookcases to break up the columns. Notice how she doesn’t just stick to books, she adds art and natural objects too. And don’t you love that reading chair?
Inside this IKEA Expedit, the books are grouped by color, and also displayed both horizontally and vertically. Practical baskets mix with glass bowls, vases and collectibles to form an aesthetically pleasing display on a brightly painted wall.
There’s no rule you have to keep it all inside. Why not add one more layer of interest? Consider using the framing of the bookcases to suspend a dramatic mirror, framed artwork, or sentimental photographs.
Smaller cubbies look simply perfect with a textured or sculptural object placed all by itself. Notice the use of a single vase or shell in the smaller spaces of John & Sherry’s bookcase, and the fantastic contrast with bold blue and crisp white.
Objects tend to look better when gathered in odd numbers, and the basic design principle of the rule of threes is cleverly applied in this bookcase featured in Lonny Magazine. Notice how most of the books are stacked horizontally, but the bookcase becomes so stylish with the varied and perfectly placed decorative objects, prints, and forward facing book covers.
Varied groupings of three or five are always visually appealing. This bookcase from the home of Lisa Martensen is an example of a well edited display from her treasure hunts and travels all around the world.
With airy shelving, it’s best to not overwhelm and allow for plenty of breathing room around objects. Deliberate use of open space keeps the eclectic collection on this bookshelf from appearing too cluttered.
With a little concentration, it’s possible to style a bookshelf well with both books and the things you love. The secret to doing it successfully is truly all in the placement and editing of your favorite objects.