This article describes the steps I took to create a built-in entertainment system using Arthur Brown Face Frame bookcases and cabinets with custom wood moulding used to trim it out and give it a built-in look. The bookcases and cabinets have a simple face frame style so that separate mouldings could be added to fill in the gaps between the cabinets and the wall.
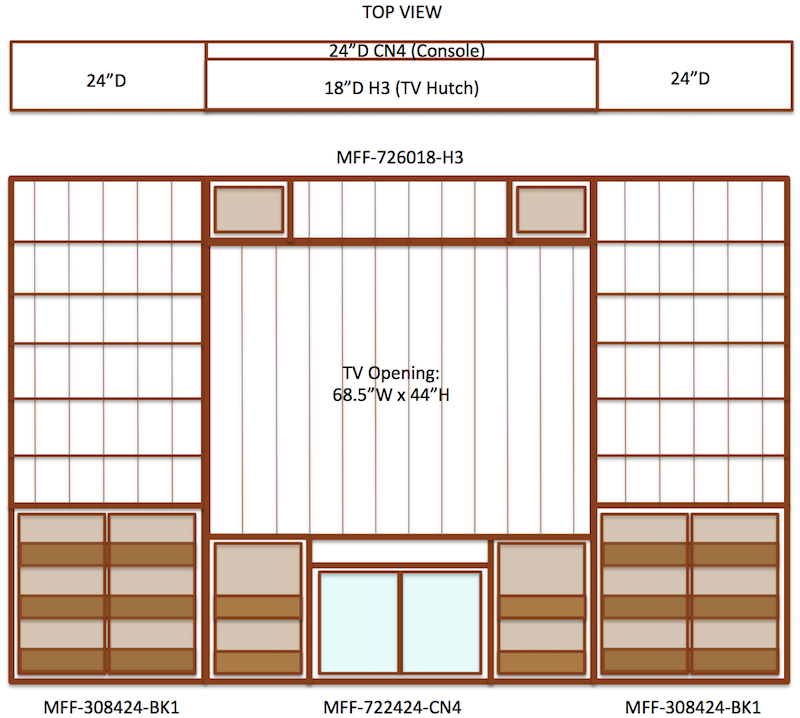
This particular home has a step-down family room with a raised opening in the wall, which isn’t exactly your typical situation. This made it all the more tricky, since the base of the opening is 12 inches off the floor. The top bulkhead is 12 inches from the ceiling, leaving only 7 feet of vertical space to work with for the cabinetry. The opening is about 11.5 feet wide.
Step 1: Design of the Space and Ordering of Components
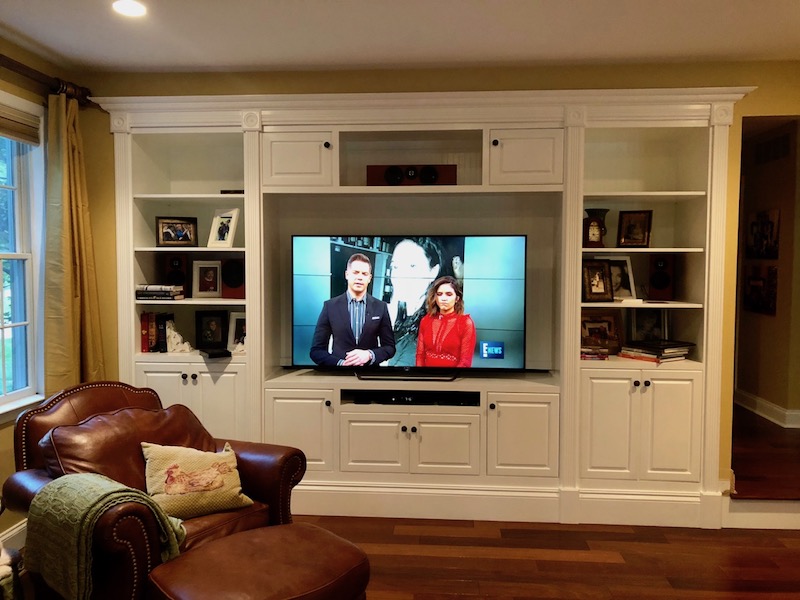
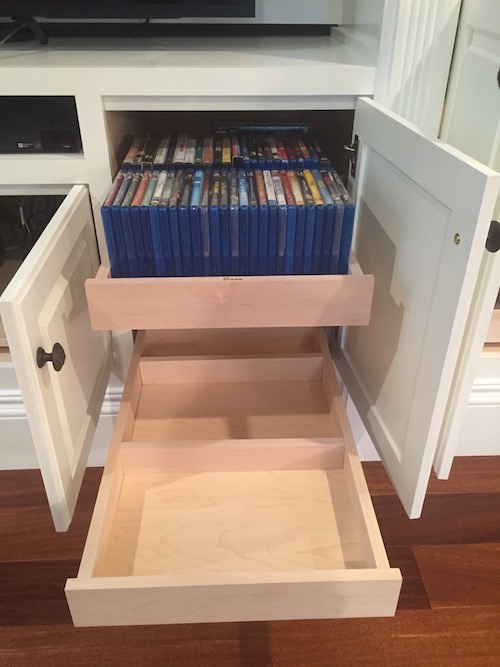
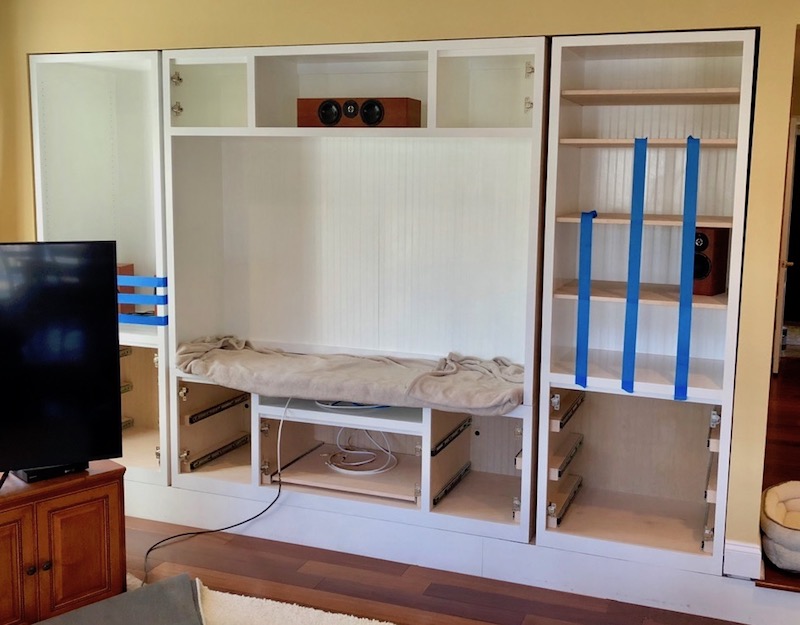
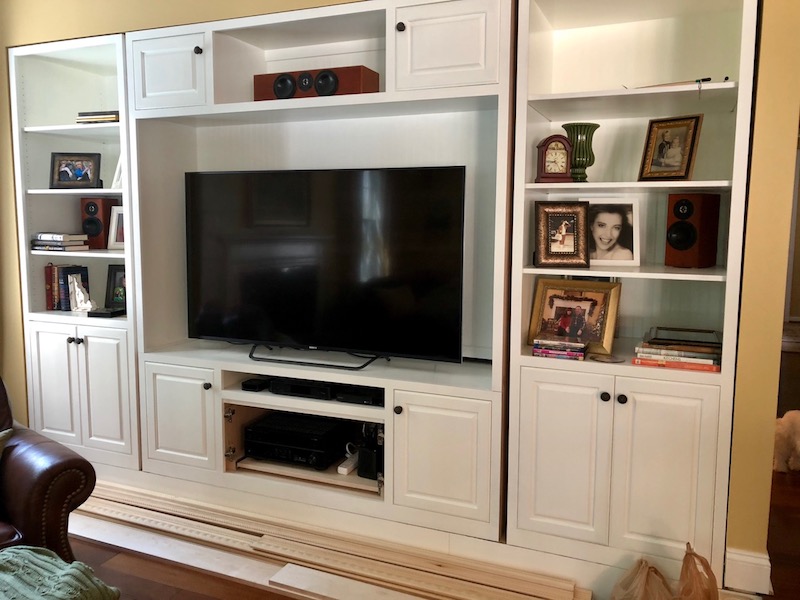
To start the project, I began with a design plan and then choose bookcases and cabinets that would fit comfortably into the space without leaving too much space to fill on the sides and top. Since I wanted this to be used as an entertainment system, I needed a space for a large TV, speakers to the sides and above, media components below, and plenty of storage space for DVDs, books, and other items. The center bottom piece is a CN4 entertainment console with a TV hutch above. The side pieces are Arthur Brown bookcases with doors at the bottom. Each piece has custom pull-out trays behind the doors. They were sized to fit rows of DVDs and Blu-Ray discs. The center console section has a pull-out shelf so that a heavy receiver can be rolled in and out to make it easier to connect the wiring.
Step 2: Preparation of the Area
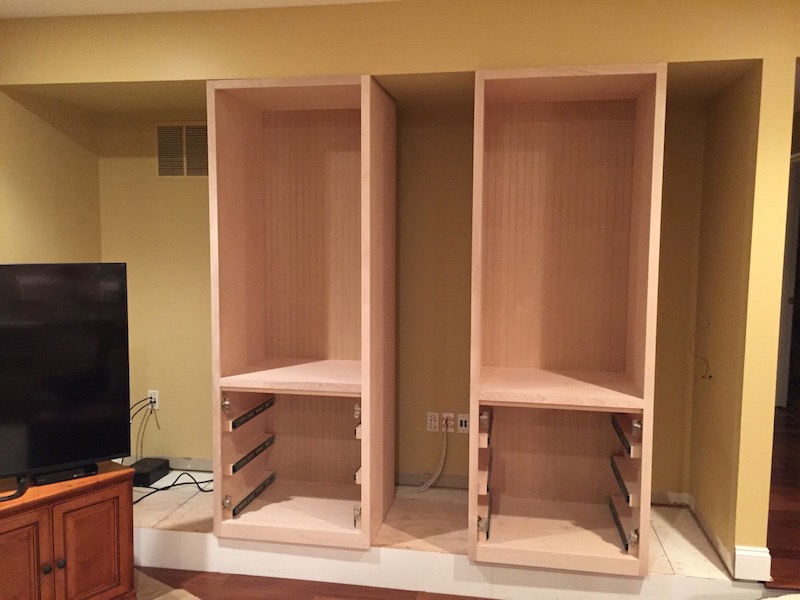
First, I removed the wood flooring from this area since it was no longer needed. Plus, the extra 3/4″ of space gained by removing the flooring made sure the 84″ tall bookcases fit in easily. The photo below shows two 30″W x 84″H x 24″D unfinished bookcases, which just barely fit into the space after having removed the flooring. The bottom section has pull-out trays and doors, but I took these off so that they could be more efficiently painted. The other pieces were moved to another area for painting.
Step 3: Painting and Installation
I painted all the bookcases and other components, shelves, and doors, and then positioned them in the wall space, leaving some gaps between them. They will later be covered with crown, base, and side moulding.
Step 4: Installation of Wiring and Power Access
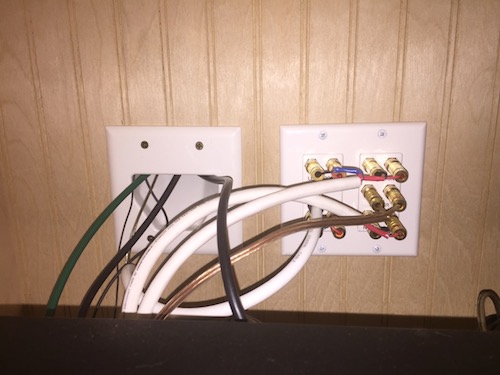
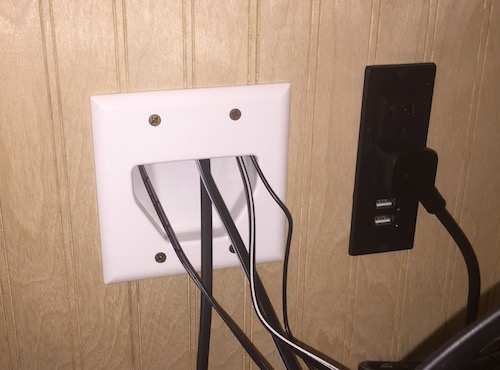
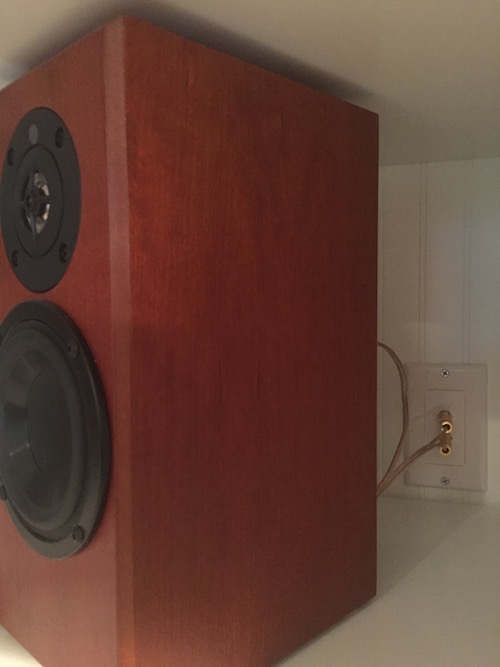
Before I permanently installed the pieces, it was necessary to run wires from where the media components go to where the speakers and TV will go. I cut holes into the back panels and installed connector panels to enable wires to easily pass through from one piece to the next. For some larger cables, like HDMI and power cables, I fed them through an open panel instead of using connectors. I then connected cables to the backs of the panels and fed them into the shelf above so that they could be quickly and easily plugged directly into the front of each panel. I ran power to the bottom cabinet.
Step 5: Finishing the Installation of Doors and Accessories
I screwed the outer two bookcases to the side walls to ensure they were not able to move, and then screwed the center pieces to the side pieces to make it a secure unit. On the floor, you can see the moulding that will be used to frame out the pieces and cover the gaps, thus making it a built in system of shelves and entertainment units.
Step 6: Installation of Equipment
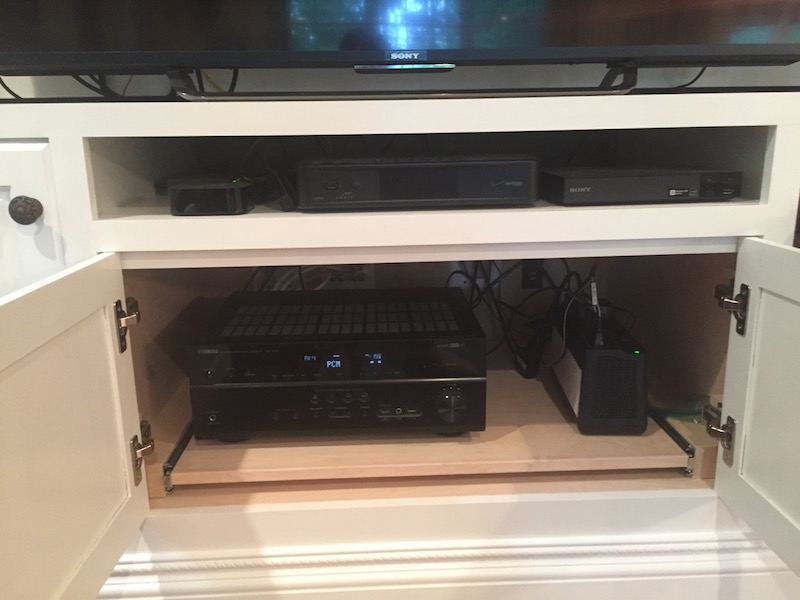
I installed equipment into the entertainment console and connected the cables and power cords. At the bottom center opening of the entertainment cabinet is a battery backup/surge protector and a receiver. I also installed a pull-out shelf to make it easier to slide the receiver in and out while connecting cables. In the short, open shelf above are a cable TV box, Apple TV, and Blu-Ray player.
Step 7: Installation of Moulding Around Frame
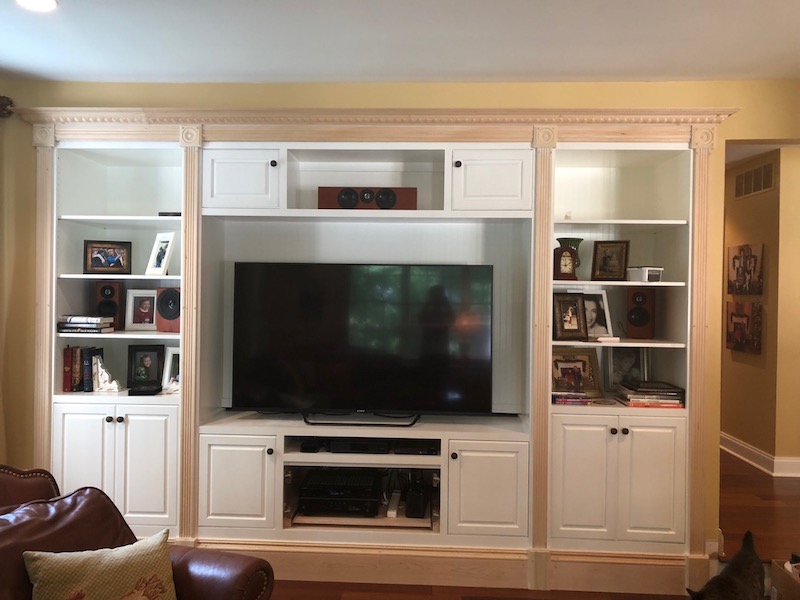
Finally, I nailed unfinished moulding from Home Depot to the wall and face frames of the bookcases and cabinets. In between each piece is a custom-built column consisting of several stacked pieces: a plinth block at the bottom, a piece of fluted column above, and a rosette at the top. In between the plinth blocks are flat pieces of Maple wood with upside down chair rail moulding added to its top. Above the cabinets is an inverted piece of base moulding that was placed in between the columns. Finally, I added a piece of crown moulding at the very top.
Step 8: Painting of Moulding
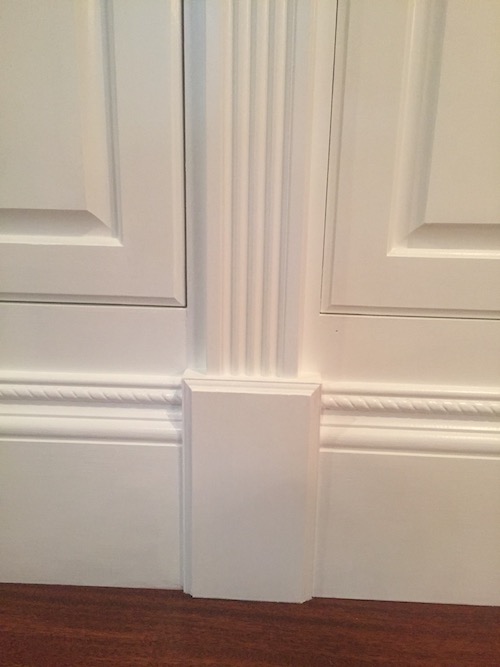
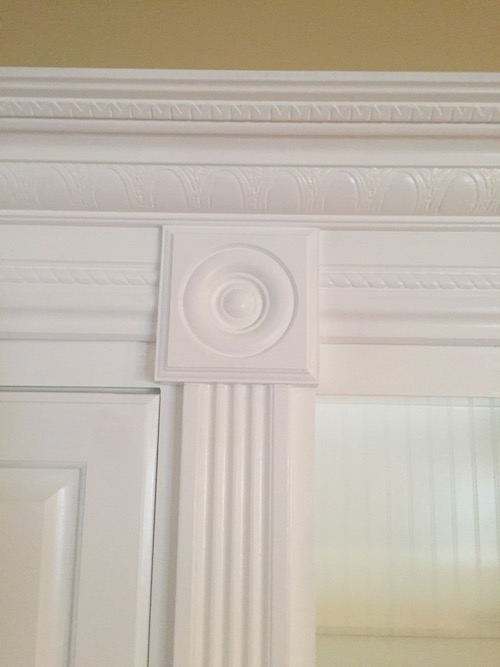
I filled in nail holes in the moulding using wood filler and applied caulk to all gaps. Then I painted the moulding so everything flowed seamlessly together. You can’t even tell which pieces are separate from each other. As far as anyone can tell, it is a custom built in. The first photo below shows the plinth block with fluted moulding stacked on top. To the side are flat pieces of wood with chair rail placed upside down on top. The second photo shows the rosette block at the top of the fluted moulding, with upside down base moulding on each side and crown above.
Step 9: Finishing Touches
Finally, I installed all the rest of the entertainment components, added books, photo frames and other nick knacks to the shelving, and plugged it all in. No more hole in the wall–it now looks completely built in! Inside the taller doors are pull-out trays for DVDs and other items. It was a lot of work, but much simpler than a fully custom job since I was able to use pre-built component bookcases and cabinets from Highlands Designs.