This page consists of two pages reproduced from doityourself.com. One of the articles has been reconstructed here since the original instructions are out of order. You can view the original links here: Preparation Article and Installation Article.
Preparation
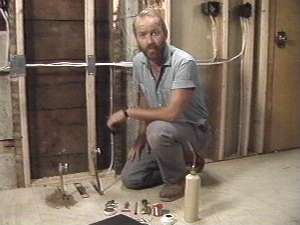
After the demolition phase, there is usually some preparatory work to be done before you can install your new kitchen. If extensive structural, electrical, plumbing, drywall or paneling work is included in your plans it should take place at this time as well.
Walls
- Gouges or holes in the walls must be repaired with wall board compound, spackle, or patching plaster. Stuff larger holes with newspaper or fine wire mesh to hold the compound. If you have gaping holes or many gouges it may be necessary to replace the surface with dry wall.
- Usually, installing new cabinets will call or some changes in the position of the cabinets, requiring that the walls be painted. If drywall or large patches of filler are being used to prepare the walls, a coat of sealer or primer should be applied before the color coat.
- Locate and mark the wall studs on the floor and ceiling as a reference for attaching the new cabinetry.
Floors
 If you plan to replace your floor, the time to prepare for it is BEFORE installing the cabinets and permanent appliances. Ceramic tile floors are usually placed before the installation of cabinets while vinyl flooring can be laid either before or after the cabinets are in place. If the new floor will go directly on top of the existing one, it is very important to fill any areas that may have dipped, buckled or bulged, as well as any holes or gouges, and nail down protruding boards. Remove glue or paint that may have spilled. Countersink nail and screw heads that are sticking up above the surface. If the old floor is embossed or has dips and/or hollows in it, these should be filled in with cement filler using a 5 to 10-inch wide putty knife. If you plan to replace your floor, the time to prepare for it is BEFORE installing the cabinets and permanent appliances. Ceramic tile floors are usually placed before the installation of cabinets while vinyl flooring can be laid either before or after the cabinets are in place. If the new floor will go directly on top of the existing one, it is very important to fill any areas that may have dipped, buckled or bulged, as well as any holes or gouges, and nail down protruding boards. Remove glue or paint that may have spilled. Countersink nail and screw heads that are sticking up above the surface. If the old floor is embossed or has dips and/or hollows in it, these should be filled in with cement filler using a 5 to 10-inch wide putty knife.
Water damaged floors must be repaired before laying down a new floor. You will need to remove the existing flooring to expose the damaged subfloor. Damaged portions of sub-flooring must be replaced. Should you find the entire sub floor to be too badly damaged for salvage, it will be best to lay new one. This can be laid directly on top of the existing floor.
The Order of Installation
These instructions are to be used as a guide but you should always follow the specific manufacturer’s instructions where there are deviations. Putting the kitchen together should occur in a logical sequence.
- Primer and paint
- Ceramic tile, vinyl or hardwood flooring*
- Wall cabinets
- Base cabinets and islands
- Cabinet doors, drawers and hardware
- Plywood base for tile countertops
- Recessed sink
- Counter tops – wood, marble, tile
- Surface mounted sink & fittings
- Disposal
- Dishwasher
- Ice-maker connection
- Over the range hood/vent
- Cook top
- Wall oven and microwave
- Vinyl Flooring*
- Range
- Refrigerator, freezer, trash compactor & icemaker
- Lighting fixtures
- Finishing touches – trim
*Note: Hardwood flooring and ceramic tile are always laid before cabinets are installed while vinyl flooring can be placed after the cabinetry is in place.
Installation
Most Common Mistakes
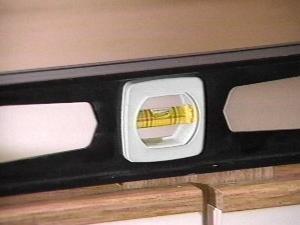
- Not installing level or plumb,
- Not attaching to studs,
- Damaging or marring cabinets,
- Not aligning cabinet doors,
- Damaging the walls during installation,
- Not cutting sink opening to proper dimension,
- Drop-in appliances not properly fitted and installed,
- Not making exact fits and cuts, or
- Not installing all needed utilities.
Whenever installing stock cabinets, accurate measurements are critical to assure a snug fit. Custom made cabinetry is usually sold with a warranty conditional on having the cabinets installed by the dealer. In fact, the dealer will probably send someone out to make their own measurements.
 Most ready-made cabinets come with a scribe allowance at the edges to allow you to adapt them to irregular walls. Scribing simply involves running a strip of masking tape along the side to be scribed; then, positioning the cabinet. (See Fig. J) Set the points of a pencil compass to the width of the widest gap between the side of the cabinet and the wall. Run the compass down the wall and the irregularities will be pencil marked on the tape. Now you can plane or sand down to the line so the cabinet will rest flush against the wall. If the scribe edge is not included on your cabinets or if your cabinets go all the way to the ceiling, plan on trimming the edges with a small piece of molding. Most ready-made cabinets come with a scribe allowance at the edges to allow you to adapt them to irregular walls. Scribing simply involves running a strip of masking tape along the side to be scribed; then, positioning the cabinet. (See Fig. J) Set the points of a pencil compass to the width of the widest gap between the side of the cabinet and the wall. Run the compass down the wall and the irregularities will be pencil marked on the tape. Now you can plane or sand down to the line so the cabinet will rest flush against the wall. If the scribe edge is not included on your cabinets or if your cabinets go all the way to the ceiling, plan on trimming the edges with a small piece of molding.
It is easier to install the upper wall cabinets first because you have room to work with them. Since they will hang from the wall, you must make certain they are securely attached.
 Before installing any of our new cabinets, remove all the drawers, doors and hardware and label them as to their original locations for quick reassembly. This will make the units much lighter and more manageable. Before installing any of our new cabinets, remove all the drawers, doors and hardware and label them as to their original locations for quick reassembly. This will make the units much lighter and more manageable.
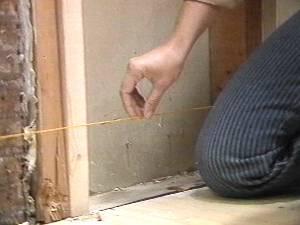
- Use a chalk line to mark the position of the wall studs on the walls from ceiling to floor.
- Measure the height of the base cabinets. If your floor is not level, measure from the highest point. Add to that measurement the thickness oft e counter top. Measure this distance up from the floor and draw a horizontal line across the wall. Use a level to assure this line will be true horizontal. This will indicate the surface of the counter top.
- Measure to another point above the line to where the bottom of the upper cabinet will rest (usually 18′ to 19″ above your 1st line) and draw another horizontal line across the wall. This line (approximately 54 inches above the floor) should also be made with a level to assure it is true horizontal and parallel to the line for the counter top.
- Nail a temporary l x 2 ledger board to the wall so that the top of the board is even with the line for the upper cabinets. Be sure you are nailing into the studs. Now mark the cabinet widths along the length of the ledger strip.
- You will need to make a few temporary jacks to support the wall cabinets while you attach them to the wall. The total length of the jack should reach from the floor to the bottom of the upper cabinets. Wide blocks of wood nailed to both ends of a 2 x 4 work well for this purpose. Put the jacks into position near the ledger.
 When readying the cabinets for installation, we recommend you first prepare those cabinets that will house a hood/vent, ducts and plumbing: Place the cabinet upside down on the floor with the hood in position upside down on the (bottom of the) cabinet. Trace the outline of the vent hole onto the base of the cabinet. Drill a starter hole for your sabre saw, then, cut around the outline and remove the cutout, Next, make a paper template of the ceiling or wall where the cabinet will be placed that shows where the end of the duct will enter. Place the template into position on the cabinet top or back and outline the duct hole. Again, drill a starter hole and cut out the circle with your sabre saw. Mark the location of the Wall studs on each cabinet’s hanging cleats; then, drill pilot holes for screws at these points. Self-drilling bugle head screws can also be used. These require no pre-drilling, except when using at face frames. With the doors removed, lift the first cabinet into position onto the ledger board and the temporary jacks. Check to see that the cabinet is both level and plumb in position and, if needed, add shims at the back of the cabinet to bring it into a plumb position. When readying the cabinets for installation, we recommend you first prepare those cabinets that will house a hood/vent, ducts and plumbing: Place the cabinet upside down on the floor with the hood in position upside down on the (bottom of the) cabinet. Trace the outline of the vent hole onto the base of the cabinet. Drill a starter hole for your sabre saw, then, cut around the outline and remove the cutout, Next, make a paper template of the ceiling or wall where the cabinet will be placed that shows where the end of the duct will enter. Place the template into position on the cabinet top or back and outline the duct hole. Again, drill a starter hole and cut out the circle with your sabre saw. Mark the location of the Wall studs on each cabinet’s hanging cleats; then, drill pilot holes for screws at these points. Self-drilling bugle head screws can also be used. These require no pre-drilling, except when using at face frames. With the doors removed, lift the first cabinet into position onto the ledger board and the temporary jacks. Check to see that the cabinet is both level and plumb in position and, if needed, add shims at the back of the cabinet to bring it into a plumb position.
 Screw the 2-1/2 inch No. 8 flathead wood screws through the cleat at the back of the cabinet and into the wall studs – two at the top and two at the bottom. Use longer screws if needed to assure at least 1 -1/4″ to 1-3/4″ penetration into the studs. Each unit should be attached to a minimum of two studs. If only one stud is located behind a unit, add a toggle bolt as an additional fastener. Screw the 2-1/2 inch No. 8 flathead wood screws through the cleat at the back of the cabinet and into the wall studs – two at the top and two at the bottom. Use longer screws if needed to assure at least 1 -1/4″ to 1-3/4″ penetration into the studs. Each unit should be attached to a minimum of two studs. If only one stud is located behind a unit, add a toggle bolt as an additional fastener.
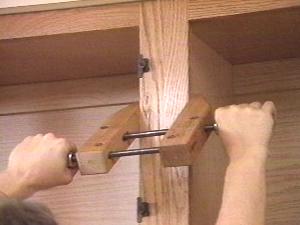
- Attach each of the upper cabinets in this manner. Then, go back and screw the adjacent units together. When connecting adjoining cabinets, it may be necessary to loosen wall screws to allow the faces of the cabinet to be attached flush to each other. Use hand screws or a C clamp with soft wood screws between the jaws of the clamp and the face frame often cabinet to hold the units flush while you screw them together.
- Recheck all for level and plumb.
- Remove the jacks and the ledger board and repair any holes in the wall.
 If your lower cabinets have freestanding bases, set the bases in position and level them, shimming if necessary. Also, use a framing square to square them where your base cabinets meet in a comer. When placing shim material, place a block of wood between the shim and the hammer so as not to damage the flooring. Then anchor them to the floor and place the cabinet units on top of them. Those cabinets without freestanding bases must be leveled and anchored in position as a unit. As you set the base cabinets in place, measure and leave room for our appliances, adding a 1/4 inch for clearance – more if you will be adding end panels. Check the position of your base units against the line on the wall, making certain the tops are equally below the line by the thickness of your counter top. If your lower cabinets have freestanding bases, set the bases in position and level them, shimming if necessary. Also, use a framing square to square them where your base cabinets meet in a comer. When placing shim material, place a block of wood between the shim and the hammer so as not to damage the flooring. Then anchor them to the floor and place the cabinet units on top of them. Those cabinets without freestanding bases must be leveled and anchored in position as a unit. As you set the base cabinets in place, measure and leave room for our appliances, adding a 1/4 inch for clearance – more if you will be adding end panels. Check the position of your base units against the line on the wall, making certain the tops are equally below the line by the thickness of your counter top.
 Attach the cabinet units together so that the faces are flush. Slide a level down the entire length of the cabinets, adding a shim where there is a gap or to bring it up to level. Place your level front to back on the top of the cabinet to check for plumb – a again shimming if necessary. Then, screw the entire length o cabinets into the wall with the 2 – inch screws through the top cleat and into the wall studs. often, due to some unevenness in the wall, there will be gaps between the back of the cabinet and the wall. To avoid pulling your cabinets out of kilter as you position them to the wall, shim the gaps at the fastening point (where the stud is located) before screwing the cabinet into place. Attach the cabinet units together so that the faces are flush. Slide a level down the entire length of the cabinets, adding a shim where there is a gap or to bring it up to level. Place your level front to back on the top of the cabinet to check for plumb – a again shimming if necessary. Then, screw the entire length o cabinets into the wall with the 2 – inch screws through the top cleat and into the wall studs. often, due to some unevenness in the wall, there will be gaps between the back of the cabinet and the wall. To avoid pulling your cabinets out of kilter as you position them to the wall, shim the gaps at the fastening point (where the stud is located) before screwing the cabinet into place.
- Island cabinets must have the individual units screwed together and laced into position before leveling and plumbing on all four sides. I the base is separate, level and plumb it. Then, fasten it to the floor With toe nails or angle brackets. Place and anchor the cabinets to the base. When installing an island unit, it is important to square it to the cabinets along the wall and to the wall itself, as well as lining it up properly with the overhead fixtures (stove vent or lighting). Measure off on both ceiling and floor to determine the exact location.
|
