Step-by-Step Tutorial
From bare wood to a beautiful, lasting finish — everything you need to know before you open a can.
Unfinished cabinets and bookcases are a blank canvas — a rare opportunity to make a piece uniquely yours. But reaching that beautiful end result takes more than a brush and a can of stain. The difference between a finish that lasts decades and one that peels, blotches, or fades almost always comes down to preparation.
Whether you're painting kitchen cabinets for a fresh, modern look or staining a new bookcase to bring out the natural warmth of the grain, this guide walks you through every stage of the process. We'll cover choosing the right product for your project, mastering the prep work that most beginners skip, and applying your finish like a professional.
The good news: with the right materials and a methodical approach, this is a highly achievable weekend project for any dedicated DIYer.
Before you open anything, assemble everything you'll need. Running to the hardware store mid-project — with wet primer drying unevenly on your doors — is a frustration easily avoided.
Pro Tip
If possible, remove cabinet doors from their hinges and lay them flat to work on. You'll get a much smoother, drip-free result than trying to work on vertical surfaces. Use a sawhorse or prop doors up on paint cans to allow the edges to stay accessible.
This is one of the most consequential decisions you'll make — and it applies whether you're painting or staining. Both product types have genuine advantages and real trade-offs. The right choice depends on your wood species, your workspace, and how you want the final piece to look and perform.
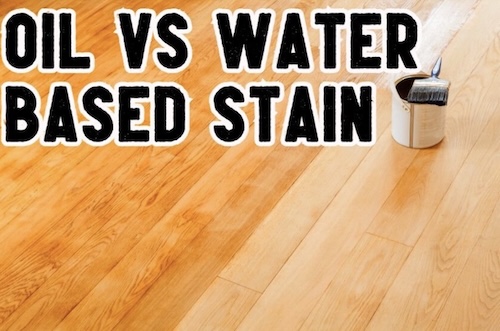
Side-by-side comparison: Water-based stains (left) tend to produce a cooler, truer-to-color tone, while oil-based stains (right) impart a warmer, amber-enriched depth to the wood grain.
| Factor | Water-Based | Oil-Based |
|---|---|---|
| Dry Time | 1–2 hours between coats; ready to use in 24–48 hrs | 6–8 hours between coats; 3–7 days full cure |
| Durability | Excellent with modern formulas; good scratch resistance | Traditionally harder and more scuff-resistant when cured |
| Color & Appearance | Truer color; less yellowing over time; brighter whites | Rich amber warmth; deeper grain enhancement |
| Cleanup | Soap and water | Mineral spirits or paint thinner required |
| Odor & VOCs | Low odor; low VOCs; safer for indoor use | Strong fumes; requires good ventilation; higher VOCs |
| Grain Raising | Can raise wood grain; light sanding after first coat needed | Penetrates without raising grain |
| Best For | Painted cabinets, light-colored stains, low-ventilation spaces | Dark stains, pine/soft woods, heirloom furniture |
For most homeowners painting cabinets today, a high-quality water-based alkyd or acrylic paint is the smart choice. The technology has improved dramatically — modern water-based cabinet paints are extremely durable, level beautifully, and won't yellow the way traditional oil paints did over white or light colors.
For staining, if you're working with a soft, porous wood like pine or alder and want rich, deep color with maximum grain enhancement, an oil-based stain is hard to beat. For harder woods like oak, maple, or poplar, water-based stains perform excellently and give you a faster workflow.
Important Note on Compatibility
Never apply an oil-based topcoat over a water-based stain that hasn't fully cured — and vice versa — without testing a small hidden area first. Incompatible layers can cause wrinkling, poor adhesion, or a cloudy finish. When in doubt, stick with the same base chemistry throughout your entire project.
Ask any finishing professional what separates a great result from an average one, and almost every answer will come back to prep — specifically, sanding. Even on brand-new, "ready-to-finish" unfinished cabinets, the surface typically has mill marks, raised grain, slight roughness, and sometimes light surface contamination from handling and storage.
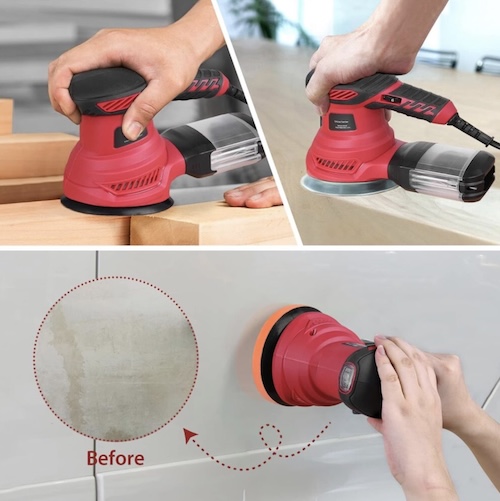
Start with 120-grit: An orbital sander makes quick work of flat surfaces. Always sand in the direction of the grain to avoid cross-grain scratches that will show through your finish — especially under stain.
Proper sanding is done in stages, progressing through finer grits. Skipping grits is tempting but counterproductive — each grit removes the scratches left by the previous one. Here's the standard sequence for unfinished cabinetry:
Start with 120-grit to knock down any rough spots, mill marks, planer tracks, or surface imperfections. Don't skip this step even if the wood looks smooth — new lumber frequently has invisible tool marks that catch stain or paint unevenly.
Move to 150-grit to refine the surface and remove the scratches from 120-grit. This is your primary sanding stage for most new, unfinished wood. Work systematically — complete one face, then move to the next.
Finish with 220-grit for a silky-smooth surface before staining or priming. This final pass opens the wood pores evenly and creates the ideal tooth for your finish to adhere to.
Sand profiles and moldings by hand using a sanding sponge or folded sandpaper. Orbital sanders can't reach inside coves and details, and these areas are often the ones that look rough under a finish. Take your time here.
After water-based primer dries (if painting), do a very light 220-grit pass — called a "scuff sand" — to knock down any grain raise from moisture in the primer. This is what gives painted cabinets that furniture-grade smoothness.
Tool Tip
A random orbital sander is ideal for flat panels — it leaves a more consistent scratch pattern than straight-line sanders and minimizes swirl marks. For interior corners and edges, a detail sander or simply folded sandpaper works best. Always wear a dust mask; fine wood dust is a respiratory hazard.
Most unfinished cabinetry is assembled with finishing nails or brad nails, which leave small holes that must be filled before any finish is applied. Left unfilled, these holes remain visible even through multiple coats of paint or stain — especially in a raking light. Filling them correctly is quick work, but the sequence matters.
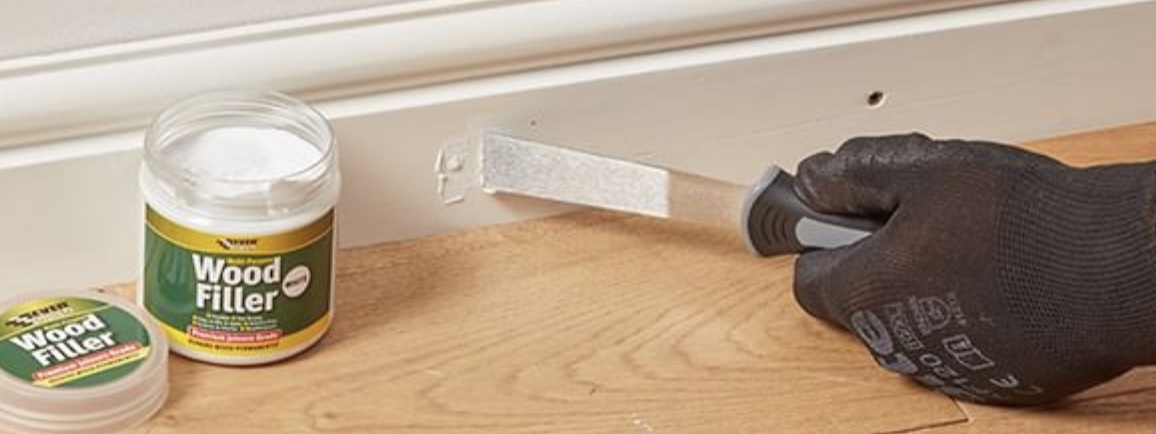
Slightly overfill each hole: Wood filler shrinks as it dries. Apply it so it mounds slightly proud of the surface, then sand flush once fully dry for a seamless repair.
If you're painting, use a lightweight spackle, vinyl spackling compound, or a standard pre-mixed wood filler. These products take paint well and are very easy to sand. Apply with a flexible putty knife, pressing the material firmly into the hole, and leave a slight crown above the surface. Once dry (typically 30–60 minutes for small holes), sand flush with 150-grit followed by 220-grit.
If you're staining, the situation requires more care. Stain will reveal mismatches in wood tone, so you need a stainable wood filler — one that is explicitly labeled to accept stain. Even then, filled holes often look slightly different from the surrounding wood grain because filler has no grain structure. For a best-possible result with stained pieces, choose a color-matched putty that closely approximates your target stain tone. Some craftspeople prefer to fill holes after staining, using a wax-based putty stick to match the final color precisely.
Staining Tip
When staining, it's worth doing a test on scrap wood first: apply your wood filler, let it dry, sand it, then apply conditioner and stain. See how the fill blends before committing to the full piece. This 20-minute test can save you significant heartbreak on a visible surface.
For cracks along joints, knot-related gaps, or dents larger than a nail hole, use a two-part wood filler (such as Minwax High Performance Wood Filler or a similar epoxy-based product). These harden very firmly, don't shrink, and can be sanded, drilled, and shaped once cured. They're overkill for a nail hole but ideal for structural or aesthetic repairs on larger imperfections.
After all your sanding is done, your cabinet or bookcase will be coated in fine wood dust. This dust absolutely must be removed before any finish — stain, primer, or paint — is applied. Dust trapped under a finish causes texture, reduces adhesion, and creates visible specks in the dried film.
The most effective tool for the job is a tack cloth — a slightly sticky cheesecloth-like material that captures and holds fine dust rather than just redistributing it. Wipe the entire surface systematically, turning the cloth frequently to present a fresh surface. For large pieces, you may go through two or three tack cloths.
Alternatively, a clean microfiber cloth slightly dampened with mineral spirits (for oil-based finishes) or water (for water-based finishes) also works well. Allow the surface to dry completely before proceeding.
Don't Use a Dry Rag
A regular dry cloth will move dust around without capturing it, and can leave lint behind. Avoid blowing dust off with compressed air inside — it will settle back onto the piece and onto wet finishes elsewhere in your workspace. Use a tack cloth or, at a minimum, a vacuum with a soft brush attachment followed by a wipe-down.
Achieving a beautiful, even stain result on wood is partly about the stain itself, and largely about what you do before you open the can. Soft, porous woods — pine, alder, birch, and poplar — are notorious for blotchy staining. This happens because different parts of the grain absorb stain at different rates, creating dark, splotchy patches and light, uneven areas.
The solution is a pre-stain wood conditioner, and it makes a dramatic difference on problematic species.
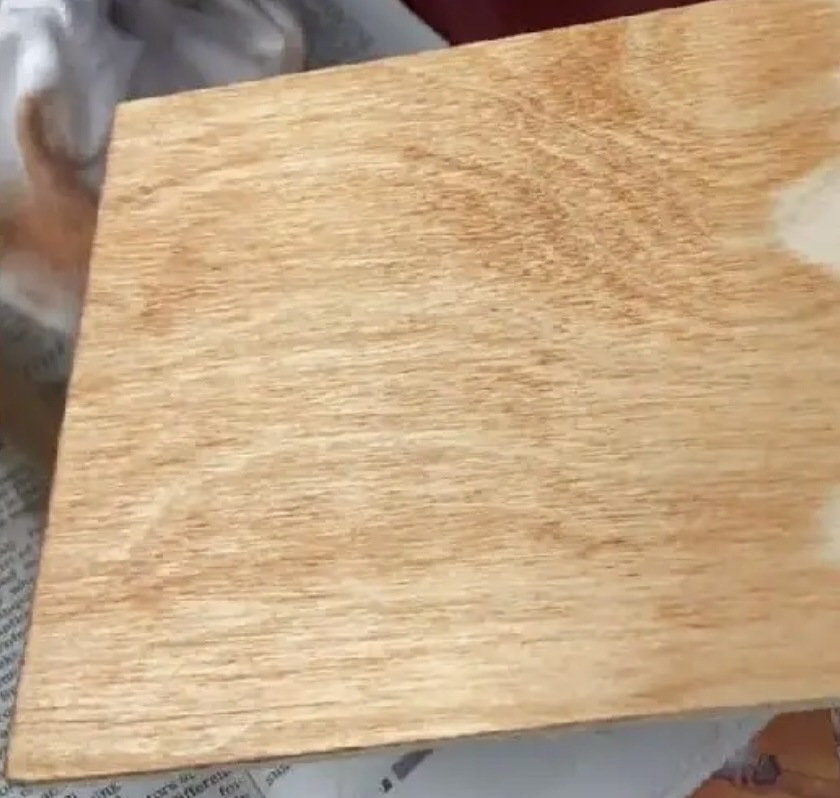
Without conditioner: Pine and soft woods can stain very unevenly, showing dark blotches at the porous end-grain areas.
With conditioner: Pre-stain conditioner partially seals the pores so stain is absorbed more evenly across the surface.
After sanding to 220-grit and cleaning thoroughly, apply wood conditioner liberally with a clean rag, foam brush, or bristle brush. Cover the entire surface, including edges.
Allow it to penetrate for the time specified on the label — usually 5 to 15 minutes. Don't let it dry completely; it should still be slightly damp when you proceed.
Wipe off any excess conditioner with a clean cloth. Then apply your stain within 2 hours. If you wait too long, the conditioner's effect diminishes and you'll need to reapply.
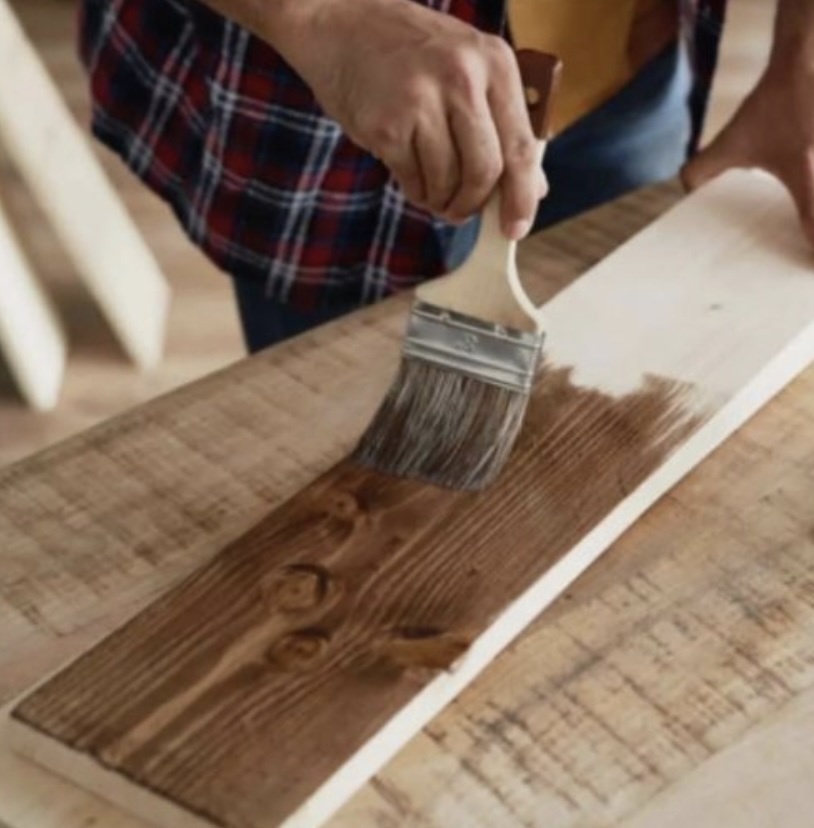
Apply the stain with a brush or lint-free rag, working with the grain. Allow it to penetrate for 2–5 minutes (or as the product directs), then wipe off the excess with a clean cloth, again working with the grain.
For a deeper color, apply a second coat after the first has dried (usually overnight). Each additional coat adds richness but also reduces the visibility of the grain pattern.
Grain Direction
Always wipe stain on and off with the grain — never across it. Cross-grain wiping can leave streaks that look obvious once the stain dries. On panels with complex grain patterns, follow the dominant direction of the grain and use long, even strokes from end to end.
Beautiful results: A properly conditioned and stained piece shows rich, even color with the natural grain character visible throughout — not hidden or blotched by uneven absorption.
Pine: Always use wood conditioner. Pine is the most blotch-prone common wood. Consider gel stain as an alternative — it sits on the surface rather than penetrating deeply, giving much more control and evenness on soft woods.
Oak: Has a very prominent, open grain. Takes stain beautifully and evenly. If you want to minimize the grain texture, apply a grain filler before staining. Otherwise, no conditioner is typically needed.
Maple & Birch: Tight-grained and can blotch. Use conditioner, or consider a gel stain for best results.
Poplar: Stains unevenly and can look greenish under some stain colors. It's often better painted than stained.
Painting unfinished wood is, in many ways, more forgiving than staining — you're not relying on the wood's grain pattern to carry the look. But the process still requires careful attention to primer, application technique, and drying time if you want a finish that looks truly professional.
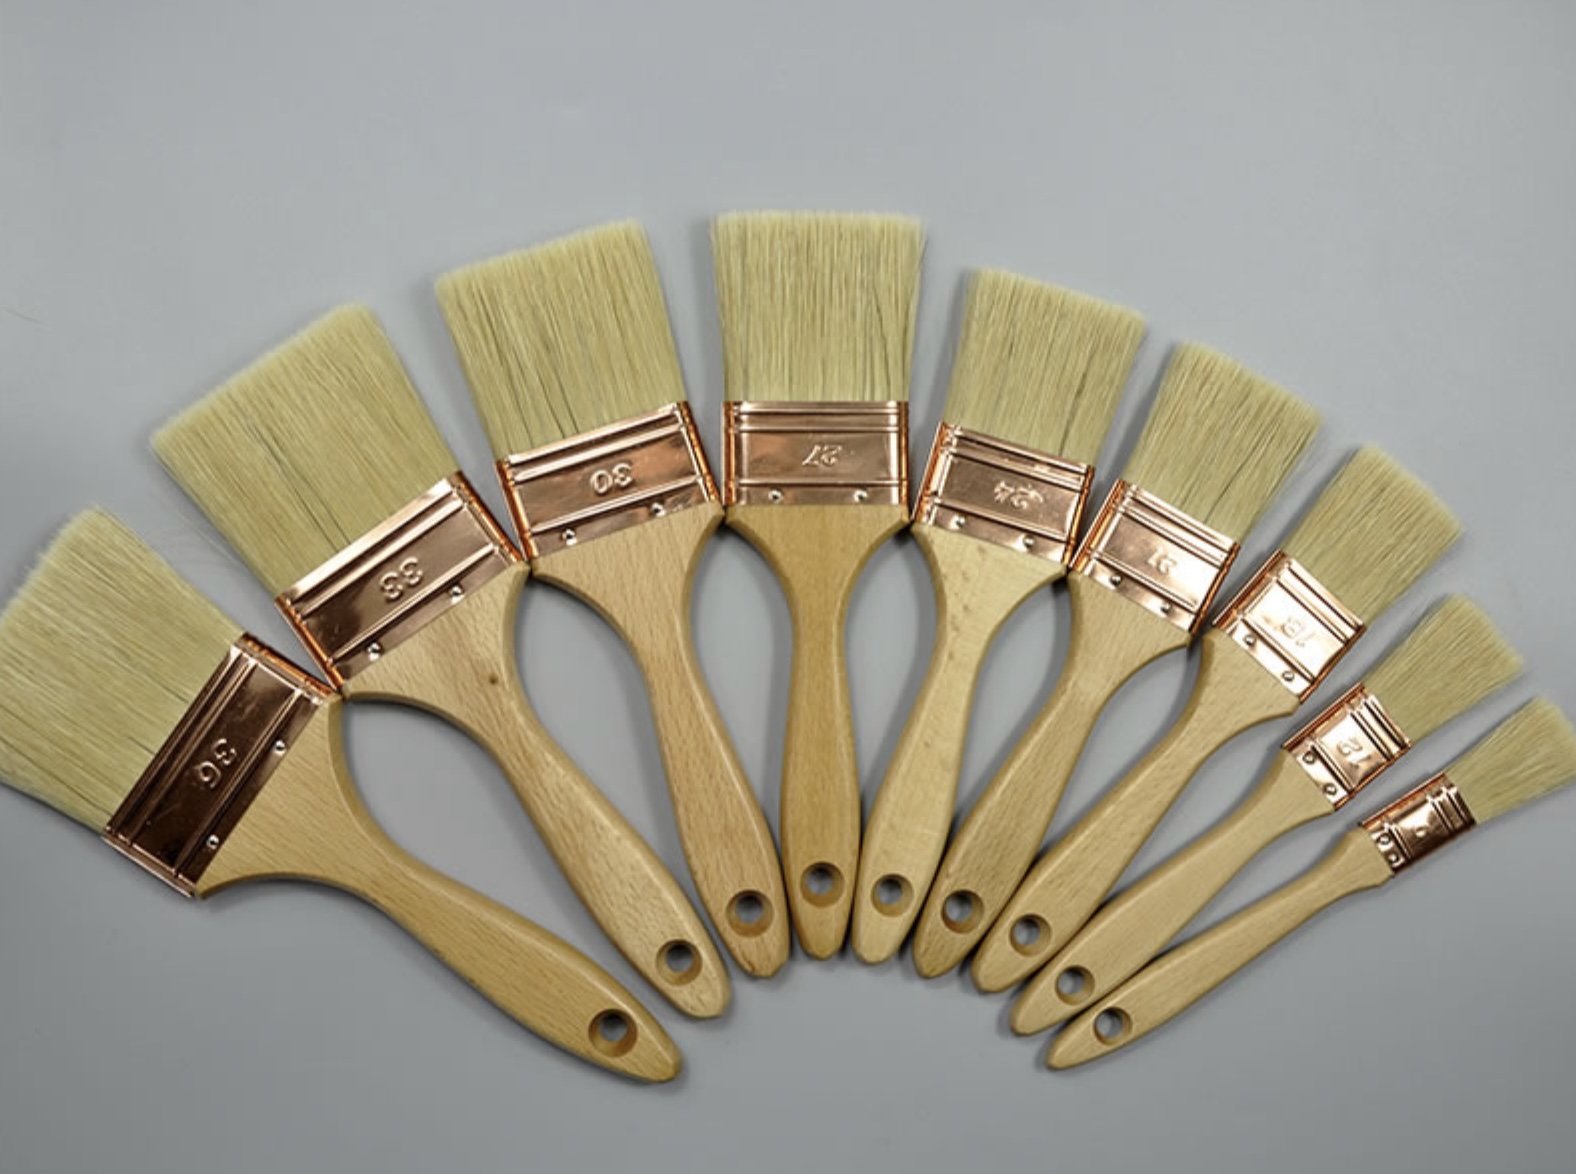
Brush selection matters: For water-based paint, use a high-quality synthetic bristle brush. For oil-based, a natural-bristle brush levels more smoothly. A small foam roller on flat panels followed by a brush to "tip off" brush marks gives excellent results.
Primer serves three essential functions on unfinished wood. First, it seals the porous wood fibers so the topcoat doesn't soak in unevenly — without primer, you'd need many more coats of paint and still might not achieve even sheen. Second, it creates a uniform surface that the topcoat can bond to — dramatically improving adhesion and chip resistance. Third, it raises and stiffens the wood grain, which you then sand back for an ultra-smooth painting surface.
For unfinished cabinets, a shellac-based primer (like Zinsser BIN) or a quality water-based primer (like Zinsser Bulls Eye 1-2-3) are both excellent choices. Shellac-based primer provides the best stain-blocking and adhesion but requires denatured alcohol for cleanup. Water-based primer is easier to work with but may require a second coat on very porous or tannin-rich woods like oak.
Apply a full coat of primer to all surfaces, including the backs and insides of doors. Don't skimp on the primer — thin coverage defeats its purpose. Allow to dry completely per the label.
Scuff-sand with 220-grit after the primer dries. This knocks down any raised grain and smooths out brush marks. The surface should feel like satin — not rough, not glossy, but beautifully smooth. Wipe clean with a tack cloth.
Apply a second coat of primer if the wood grain is still visibly prominent or if you see any bleed-through. This is especially important with oak, whose open grain can "telegraph" through paint even after one coat of primer.
Apply your first topcoat of cabinet paint. Work in thin, even coats — resist the temptation to load the brush heavily. Thin coats dry faster, level better, and build to a stronger film than thick coats that sag and wrinkle.
Allow to dry, lightly scuff with 320-grit, wipe with a tack cloth, and apply a second coat. Most cabinet paints achieve their full durability rating in two topcoats. Three coats are appropriate for high-traffic areas or if you want extra protection.
"The secret to glass-smooth painted cabinets isn't the paint — it's the number of times you sand between coats. Patience in prep pays off in the finish."
Application Method
For the smoothest possible painted finish, use a small 4-inch foam roller on flat panel faces, then immediately "tip off" by lightly dragging a barely-loaded brush in one direction across the wet surface. The roller lays down paint quickly and evenly; the brush eliminates any roller texture. This is how professional painters achieve a spray-like smoothness without spray equipment.
Stain, unlike paint, provides no meaningful protection to the wood on its own. It must always be followed by a clear protective topcoat, or the color will fade quickly and the surface will be vulnerable to water damage, scratches, and everyday wear.
The most popular topcoat options for stained cabinetry and bookcases are:
Polyurethane — The most common and widely available protective finish. Available in both water-based and oil-based formulas. Oil-based polyurethane is extremely durable and imparts a warm amber tone; water-based poly is crystal clear and dries fast but is slightly less hard. Apply in thin coats, sanding lightly with 320-grit between each one. Three coats are standard for tabletops and cabinet interiors; two coats may suffice for a bookcase.
Polycrylic — A water-based finish that's slightly softer than polyurethane but very clear and easy to apply. Excellent for lighter stain colors where you don't want any amber tone. Not suitable for surfaces that will see heavy heat or moisture, such as near a stove.
Lacquer — Extremely hard and durable, favored by furniture manufacturers. Typically sprayed, which makes it less practical for DIY application but achievable with a spray can version for smaller pieces.
Danish Oil / Penetrating Oil Finishes — Not a surface film but a penetrating finish that soaks into the wood. Gives a beautiful, natural, low-sheen look. Less protective than film finishes but easy to repair by reapplying. Excellent for bookcases and furniture where a natural feel is desired.
Sheen Level
Choose your topcoat sheen based on the look you want and how the piece will be used. High gloss is the most durable and most dramatic but shows every fingerprint and imperfection. Satin is the most popular choice — it's attractive and practical. Matte finishes look modern and natural but are slightly less durable and harder to clean. For kitchen cabinets, satin or semi-gloss is the recommended choice for cleanability.
Both paint and stain are sensitive to temperature and humidity. Most products perform best between 50°F and 85°F (10°C–30°C) with relative humidity below 70%. Working in extreme cold makes finishes thick and slow-drying; excessive heat causes the finish to skin over before it can level, leaving brush marks. On humid days, water-based finishes may take significantly longer to dry. When possible, work indoors in a controlled environment.
This cannot be emphasized enough. Before committing to the full piece, apply your complete finishing sequence — conditioner if using, stain or primer, topcoat — on a piece of the same wood species and mill. Stain colors in particular look dramatically different on different species and under different light conditions. This 30-minute test protects you from expensive and heartbreaking mistakes.
For multi-piece assemblies (cabinet box + doors + drawer fronts), always finish the interiors and less-visible surfaces first, then work your way to the face frames and most visible surfaces. That way any technique practice or minor mistakes happen where they'll be least visible. Remove hardware — hinges, knobs, pulls — before finishing. Tape or remove hardware mounting plates. Paint or stain will show around hardware if it's left in place.
Not sanding enough between coats. This is the single most common reason painted or finished surfaces look amateurish. Every coat of primer and paint should be lightly sanded when dry to remove dust nibs, brush marks, and grain raise. It adds time, but the result is dramatically smoother.
Using cheap brushes. A cheap brush holds less paint, applies it unevenly, and sheds bristles into your finish. A quality synthetic brush ($12–$20) makes a significant difference and, if cleaned promptly, will last years.
Applying thick coats. "More is not more" with finishes. Thick coats run, sag, take forever to dry, and actually end up weaker than multiple thin coats once fully cured. Apply thin coats and build up gradually.
Skipping the final wipe-down before finishing. Dust and oils from your hands will prevent proper adhesion. Always wipe with a tack cloth immediately before applying any finish, even if you wiped 20 minutes ago.
Rushing reassembly. Most finishes require 24–72 hours of dry time before light handling, and up to 30 days to reach full hardness. Rehang cabinet doors and reinstall hardware as early as the manufacturer recommends for handling, but be gentle. Avoid washing newly painted surfaces for at least a week.

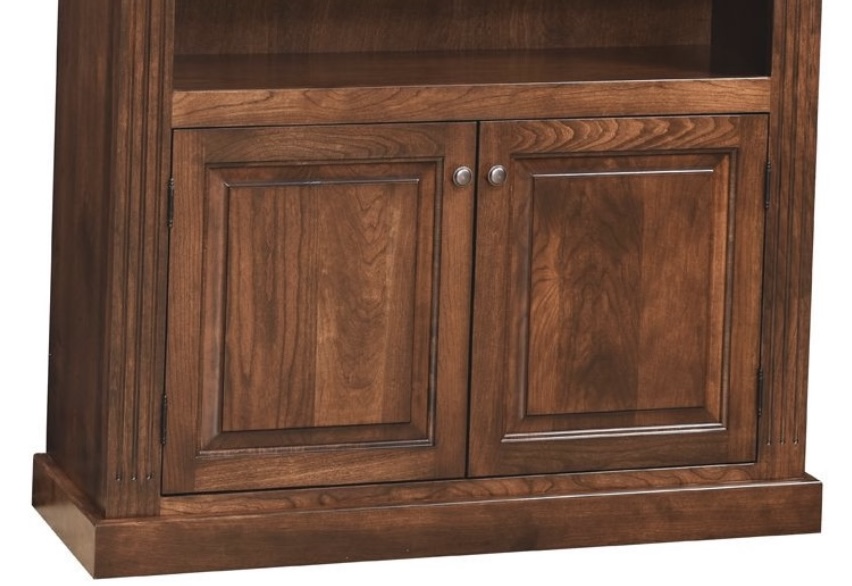
The finished result: A properly prepared and finished bookcase — with careful sanding, conditioner, and an even stain application — shows off the natural beauty of the wood in a way that factory-finished pieces rarely achieve.
Final Thought
The most important investment you can make in this project is time — specifically in the preparation stages. The actual application of stain or paint is quick. It's the sanding, filling, cleaning, priming, and patience between coats that determines whether your finished piece looks like it came from a craftsman's workshop or a hurried weekend project. Do the prep work well, and the finish will reward you for years.