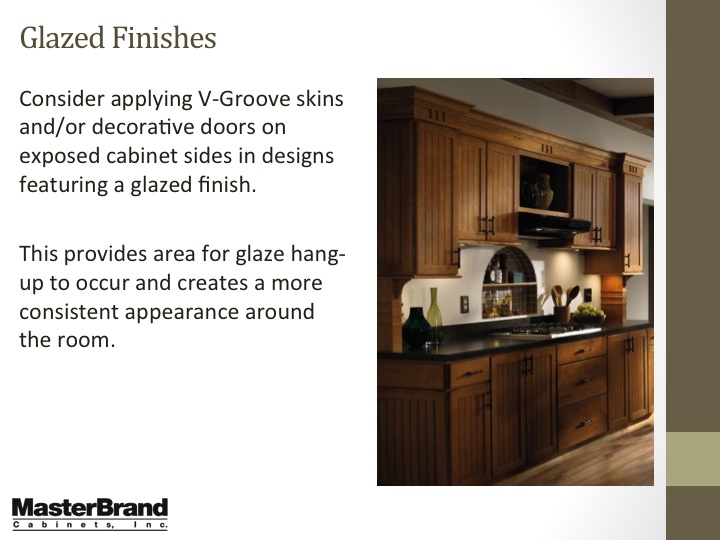
So you want to save money by buying our unfinished or custom-finished kitchen cabinets. Can you also save money on the installation, which often doubles your overall costs? There are many projects and do-it-yourself (DIY) jobs in the average home that do not require bringing in a professional. Who doesn’t like saving money when we can successfully accomplish a project on our own, on our own schedule?

However, there are home projects that require the services of a trained, experienced, and licensed contractor. A project in the hands of someone that is not qualified could end up costing much more than hiring the correct professional in the first place. You can almost always save time (and possibly money) when the job is done correctly the first time. And you are better off handling dangerous or risky conditions with an expert. 

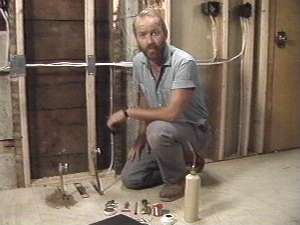
This rule of thumb is a good basic starting point: Do you have mechanical, electrical, or plumbing issues in your project? You might be skilled and knowledgeable enough to tackle one or more of these issues, and perhaps bring in a professional for the other items. 

I just need kitchen cabinets, do I need a contractor?

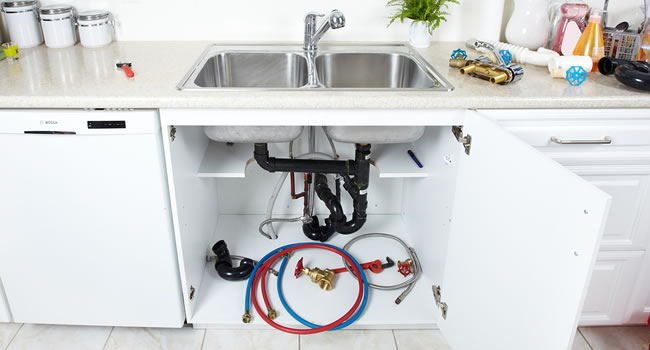
If you are only removing and replacing your existing cabinets, you might not need a contractor. This is often the case with very simple kitchen renovations. For example, if you can disconnect and reconnect the plumbing under your sink, your electrical outlets are staying and you’re not adding any new ones, you’re not changing your type of range, not adding a dishwasher, then you might not need a contractor.

Why would my renovation affect anything mechanical, electrical, or involve my plumbing?

Are you considering taking a wall down in your kitchen to create more space? Does your kitchen design include a new island that will need an electrical outlet? Are any of your appliance locations changing? At the very least, your plumbing will need disconnecting and reconnecting. While some of these items are usually straightforward tasks, there can certainly be more involved things that come up. 

If mechanical, electrical, or plumbing issues are involved, the rule of thumb is that these concerns should be handled by an expert who knows how to tackle any issues that may arise. Investing in this particular aspect of your project can avoid major costs required to fix DIY mistakes or gaps. And we are talking about your home, where your family lives; another reason your investment is well spent.

Kitchen Plumbing

What exactly is a contractor?

A contractor is an individual who helps you with either part of your new construction/remodeling project or who coordinates every aspect of your project. A contractor has knowledge of town permit requirements, available tradesmen for the particular jobs to be done, or may have his/her own skill set to accomplish your project.

As you approach your project in the planning stages, it’s a good idea to prepare a list including:

  1. Your project goals from top to bottom, ceiling to floor
  2. Your timeline, ideal start and finish dates
  3. Budget
  4. DIY items you would like to keep for yourself

Hiring a contractor for your kitchen project may save a significant amount of time and money in reaching your ultimate goal, leaving you to finish other projects in your home that are perfect for your level of DIY expertise.

Are you remodeling your kitchen, bathroom, or other rooms with new cabinets or bookcases? Installing them yourself can save money and allow you to spend your money on even better products. If you buy unfinished cabinets and paint or stain them yourself, you can save even more. Here is what you need to get the job done.

Depending on your level of carpentry skills and how many home improvement projects you do, you may already own some of the tools in this list. Not all items will be needed but many will be helpful depending if you are working alone or have assistance.

It is also important for your budget to consider the cost of the needed tools over hiring a professional. If the rate to hire is less than or equal to the cost of new tools, it may be worth it to leave the job to the pros.

Investing in the right tools will enhance the quality of your installation, reduce debris, and save you money. All of which every Do-It-Yourselfer is looking for.

Required Tools


Tool or supply

Purpose/Reason for Tool or Supply
Cabinet claw/clamps A cabinet clamp is a helpful tool that will hold the face frame together securely while you are assembling your cabinet. It also keeps everything in place while screws are installed.
Tape Measure A tape measure will be needed to identify several measurements for your installation including where the cabinets will be hung, openings for appliances, distances between structures, locations of outlets, etc.
Pencil A pencil will be needed to mark measurements taken while installing, and maybe to take notes as you go.
Printed Layout Print your Prime Cabinetry design, provided by our design team, for ease of installation. Having the layout to work from will ensure you remember exactly where each cabinet is meant to be installed while you are working.
Power Drill A power drill is commonly used for assembling cabinets, hanging cabinets, installing knobs and pulls on cabinet doors, etc.

Laser Level or standard 72” level
A level or laser level is a control tool that provides a reference for ensuring your cabinets are perfectly horizontal to the floor. This is needed for countertop installation to run smoothly as well.
Stud Finder As the name implies, this handheld device helps you locate the framing studs behind the drywall. It can also help you locate plumbing and electric lines in some cases so you avoid running into those.
Touch Up Kit/Putty A touch up kit can be purchased from Prime Cabinetry when you order your cabinets. It is used to cover any small dings that occur during assembly and install and nail holes.
Trim Nailer A trim nailer is most often used to install crown molding, toe kick, scribe molding, light rail molding, base moldings, etc. You could use brads and a hammer but most installers would say this tool is a necessity for cabinet installation.
Miter Saw A miter saw is required to cut cabinet trim and crown molding at precise angles. It is also used to cut filler strips and some skin panels.
Wood Block A wood block is used for installing crown molding. When working with full overlay cabinets the ¼” reveal of the face frame is not enough for the crown to be nailed to. The wood block is installed first, then the crown is nailed to the block.
Table Saw A table saw is an electric woodworking tool with a circular blade mounted on an axel. The blade protrudes through the top of a table and provides support for the wood being cut.
Philips Screwdriver A screwdriver designed to to be used with a phillips-head screw. This type of screw has an X shaped top and is what we use most in our cabinet assembly.

Optional Tools

Tool or Supply Purpose/Reason for Tool or Supply
Jigsaw A jig saw is ideal for cutting curves and complex shapes into wood or drywall. For cabinet installation it is commonly used for cutting outlet and plumbing holes, modifying universal cabinets, making short crosscuts on a board, etc.
Cabinet Jack
A cabinet jack is made for holding upper cabinets in place while hanging. This is an ideal tool to have on hand if you are limited on manpower or are working alone. If you have a crew installing the cabinets one may not be needed.
Cabinet Hardware Jig A cabinet hardware jig is a great tool that helps you install your cabinet knobs or pulls to the doors perfectly every time. This tool is not required as there are other tricks out there to install your cabinet hardware but it is certainly useful.
Hearing Protection Avoid ear damage from saws and nailers. Noise reducing headphones or earplugs are nice to have because construction sites are always loud.
Shop Vac Anytime you are removing cabinets and sawing wood there is bound to be dust. A shop-vac is simply more durable for this type of use and with its five gallon size tends to clean debris best.
Wood Glue Wood glue is a great option for assembling your cabinets. However, it is not required for assembly because our cabinets are sold with the needed brackets and screws.
Staple Gun Staples and a staple gun is another great option for assembling your cabinets. However, it is also not required for assembly because our cabinets are sold with the needed brackets and screws.
Crown Moulding Jig A crown molding jig is used to simplify difficult inside and outside crown molding cuts. Angles are tough so this handy tool really helps you master mitered corners and other angles.
Multitool/Oscillating Tool A multitool is a power tool that oscillates allowing you to sand, saw, and cut different materials. It is helpful for a number of tasks with cabinet assembly and installation including trim cutting, grout removal, cabinet modifications, drywall cutouts, etc.
Shims Cabinet shims are slender pieces of wood, cut into a wedge shape, that are used as a solution for things like leveling base cabinets on an uneven floor or flushing side panels for decorative door application.

What is a Blind Corner Base Cabinet?

If you buy our unfinished or custom cabinets online and plan to install them yourself, you need to know how to handle the corners where two rows of cabinets meet. One option is to install a diagonal corner cabinet, such as a Lazy Susan, with a door in the corner. However, a more standard approach is to have the two rows meet at a 90 degree angle. With this approach, a blind corner base cabinet is installed such that a portion of the corner cabinet is hidden by the one adjacent to it. The hidden section provides storage without giving up space in a corner.

What is the Cabinet “Pull”?

Blind base corner cabinet installation requires a minimum and maximum “pull.” You must “pull” the blind cabinet a certain number of inches from the wall to create proper clearance for the door and drawer to open without interfering with the adjacent cabinet.

Measure the pull distance from the wall to the opposite edge of the blind corner base. The number of inches left over between the wall and the cabinet is known as dead space. The need to pull a blind base cabinet from the wall is what makes it unique in how it functions, since no other cabinet type requires this.

Cabinet pull diagram

In addition, you usually need to add a 3” filler strip to join an adjacent cabinet to the blind corner base while leaving enough room for the doors and drawers to open properly. Without this filler, the doors and drawers that meet in the corner may be too close and will hit each other when opening.

Attach the filler to the stile of the blind corner cabinet. The stile is the vertical strip of wood that extends beyond the door and drawer in the direction of the open blind side.

In the aerial view below, you will see an example of a blind base cabinet installed and labeled with what is required for it to function properly. Here we have shown both the minimum and maximum pulls.

Blind cabinet layout.

Minimum vs Maximum Pull

The amount of stile that is visible depends on how far the corner cabinet is pulled from the wall. See below a visual of how much stile will be seen based on the respective minimum and maximum pulls applied. If the blind base is installed at minimum pull, you will see less of the stile. Alternatively, if it is installed at maximum pull, you will see more of the stile.

Blind cabinet at minimum and maximum pull distance.

In the images below you will see examples of blind bases with built in clearance installed and what is required for them to function properly. Most blind base cabinets are not made this way, but it is possible to have them made to extend all the way to the wall to make maximum use of corner storage space. However, it may be hard to reach all the way into the corner.

Diagram of blind cabinet with filler strip.
Blind base cabinet installation layouts.

This post describes the steps needed to paint or stain unfinished cabinets or bookcases, which you can order online on our website to save money and get the custom finish you want.

Unfinished cabinets prepped for staining.

1. Remove the doors and drawer fronts

Mark them with a number or location, so you know where each cabinet door or drawer front goes when you complete the job. Remove the hinges and hardware with a screwdriver. To remove the drawer front, take a screwdriver, and remove the screws from the back of the wood panel.

2. Prepare the surfaces

Unfinished cabinets might have some unfilled nail holes or imperfections, so they may need a little wood putty. If you plan to stain, use a stainable putty. If you plan to paint, a white putty would be good. You might need to lightly sand and prepare the surface before applying your first coat of stain or paint.

Most manufacturers will have already done the majority of sanding. Some light sanding with fine-grit sandpaper (about 200-400 grit) will help you get the smooth finish you desire. If the surface is not already smooth or you have to remove imperfections, start with 120 grit sandpaper and then switch to a more fine grit. As you start to prep your drawer fronts and cabinet doors, there are a couple of things you’ll want to focus on:

  • Wear protective glasses and a mask to protect you from getting the fine sawdust in your eyes or lungs.
  • Always sand with the grain, whether it’s vertical or horizontal.
  • Sand gently by hand. You’re trying to get a clean, smooth finish.
  • If you prefer to use a powered hand sander, be very careful. You don’t want to sand unevenly or leave some indents or scratches on your door surface.
  • Make sure you wipe off all the wood dust on the cabinet doors and drawer fronts once completed. Wipe the cabinet components with a damp cloth to remove any dirt or debris.
  • Each time you sand the panels, use a hand vacuum and a tack cloth to remove the dust left over from sanding.

3. Choose a finish or paint color

Choose a finish color for your cabinets and drawer or enhance the natural pattern in the wood grain with a colorless polyurethane finish.

  • Leave your existing wood unfinished: If you like the current natural wood color of your cabinets, you could apply a finish without painting or staining them. A colorless polyurethane finish protects your wood cabinetry from moisture and stain damage.
  • Complement the color of your rooms: Most kitchens and bathrooms are monochromatic for a clean, modern look. You can add a mix of colors to change up the look of your living space. Consider making your cabinet doors a contrasting color to your cabinets. You could also choose different colors for high and low cabinets.
  • Choose between natural wood or a different paint color: One natural wood panel is different from others that look like it. If you’d rather have a bold, uniform look, use any color paint you want on your wood cabinet doors and drawer fronts. White cabinets add a modern, clean look to your bathroom or kitchen. Before you choose a paint color, check the paint’s label to find out if you can use it on wood.
  • Consider the texture of your finish: You could choose between matte, semi-gloss and glossy. A matte finish creates a more opaque appearance. A glossy finish adds a reflection to your wood cabinet doors and drawer fronts. How you want to stain unfinished drawer fronts depends on your style.

4. See below for details about painting or staining.

What is the best way to paint unfinished kitchen cabinets?

The best way to paint kitchen cabinets is with a paintbrush and a small roller. Spray painting is also an option if you want the process to move more quickly, but it can be tricky. Done improperly, you can have thicker spots that will not sand evenly or thin spots where the paint does not evenly cover the surface. 

Start by removing all of the hinges, hardware, doors and drawers from your cabinets. Label each door with masking tape so you’ll remember which one goes where and put all of the hardware in plastic bags so you don’t lose anything. If you can fit a worktable in your kitchen, it will be much easier to paint the doors. 2×4 wood boards propped on buckets, boxes, or work horses will also do. If you don’t have those materials, work on top of a drop cloth.

You’ll want to prep all of the doors and drawers properly to ensure your paint will stick. Start this process by scrubbing your cabinets to get rid of any grease or residue. If you’re planning to use new hardware, cover the current holes with wood filler. Next, use 100-grit sandpaper to make all of the surfaces smooth and make sure to wipe away any dust with a tack cloth before drilling your new holes. To ensure a nice finish, use caulk to fill in any gaps or seams.

If you want professional-style results, it’s imperative to prime the boxes, door fronts and drawers before you begin painting. Once your primer has dried, use an angled brush and a mini foam roller to apply your paint. A latex satin finish works well on kitchen cabinets and it isn’t as hard to work with as oil paint. Start working in sections with your angled brush and go over your work with the roller for a perfect finish. When you’re done painting, you can also use very fine grit sandpaper for a final sanding and even a coat of a satin polycrylic for extra durability as well. Once your paint has dried, reinstall the doors and drawers and install your hardware.

Spray paint is another option for painting kitchen cabinets, but this process is best done outside or in a designated workspace so you don’t have to worry about overspray. If spray painting your cabinets, you’ll follow the same process as above but instead of working with a paint brush and roller you’ll use spray paint instead.

What is the best way to stain unfinished kitchen cabinets?

There are liquid and gel-based stains. Liquid stains are applied similar to how you paint. Start by sanding and conditioning the wood, then apply the stain with a bristle or foam brush. After that’s dry, put on two coats of polyurethane and your cabinets will look just as good as any professional could have done for you.

  • After sanding, apply a wood conditioner to seal the wood and allow it to better accept the stain.
  • Apply liquid stain with a bristle or foam brush or a rag.
  • Use a rag to work stain down into the pores of the wood.
  • Make a final pass working in the grain of the wood.
  • Once the stain has dried, lightly sand again with a very fine sandpaper.
  • Apply a clear polyurethane top coat with a brush, taking care not to brush too quickly, which could create bubbles in the finish. Use an oil-based polyurethane with an oil-based stain or a water-based product with water-based stain.
  • Once the polyurethane has dried, lightly sand again with a very fine sandpaper.

Gel Stains

Instead of a traditional liquid stain, try a gel stain, which is thick like pudding. Gel stain is applied to the surface of the wood but not rubbed-in like traditional stains; the application is more comparable to painting on multiple thin layers.

  • While gel stain does go on thick and sit on the surface of the wood, I found that you can still see and feel the natural wood grain beneath, unlike paint.
  • Gel stain will not require you to sand the product to a raw wood finish. It can be applied over only lightly sanded pieces just as well.
  • The condition of the wood does not play as big of a role in the finished result of the gel stain. For instance, the knots in your knotty pines will look less pronounced when the job is done.
  • Gel stain is more forgiving. Because you will need to do multiple coats, you can even out the finish over time.
  • The first coat of stain is an important one. Specialists and makers of the product advise one to apply a thick first coat — so thick that you could theoretically finger paint in it. Do not wipe it clean like you would a normal stain, but also do not leave it so heavy that it is inclined to drip. Wipe the excess gel off with a rag after it has had time to soak in. 
  • Apply 3-4 coats of gel stain. Each coat of stain needs about 24 hours to dry, so plan accordingly. Continue doing daily layers of stain in the same way until you can no longer see streaks in the finish.
  • Once the final coat of stain is dry, you may want to apply a polyurethane finish to seal the stain. Roughly 1-2 coats will do.

Cabinet finishing – whether you’re using, paint, stain, oil, urethane or something else – is an easy, fun job that doesn’t require a ton of tools or years of experience. There are a few common tricks and techniques that will help you get that perfect factory finish. In fact, with the great deals that you can find on unfinished cabinetry, there is really no reason not to tackle the finishing job yourself! If you want to try painting, staining or varnishing unfinished cabinets, here are some of the things you’ll need to know to do a flawless finishing job.

Unfinished Oak Cabinets

Unfinished Oak Cabinets

Sanding and Surface Preparation

The biggest mistake that you can make is failing to prepare the surface of the cabinet properly, or neglecting to sand your finish between coats. On an unfinished base cabinet or wall cabinet, the manufacturer will have already done most of the sanding. However, one more light sand with a fine sandpaper – at least 200 grit, although 400 grit is even better – will help you get a silky-smooth finish.

As you sand, there are two things to remember: Always sand with the grain, and sand gently so that you don’t damage the veneer. Avoid power sanders, because the rotational or back-and-forth motions that these tools use can cause scratches across the wood grain.

Sanding between coats is even more important than sanding before the first coat. As you apply the finish, tiny bubbles will form and small bits of dust and debris will adhere to the surface, leaving the initial coats with a somewhat rough texture. Use 400-grit sandpaper or steel wool to open up those bubbles and remove any roughness.

Painting From the Can

Painting From the Can

Less is More

Another key to success is remembering that less is more. When you apply the first coat or two to an unfinished wall cabinet, it’ll be tempting to apply a thick coat simply because the finish will soak into the wood and look extremely patchy. However, thick coats of finish come with several problems:

• Heavy layers of finish tend to bubble more than thin coats.

• They take longer to dry, which means the wet finish has more time to collect dust and debris.

• Thick coats of finish are prone to drips, runs and other flaws.

If you want smooth paint or a perfectly glossy urethane finish, shoot for at least three to five thin coats rather than one or two thick coats of finish.

Staining By Hand

Staining By Hand

Which Tools are the Best Tools?

The beauty of cabinet finishing is that it doesn’t require lots of expensive or complicated tools. You’ll need brushes, cloths, sandpaper and something to clean up the mess – water for water-based finishes and paint thinner or mineral spirits for oil-based finishes. But how do you decide when to use a brush and when to use a cloth for the finish? Here’s a run-down of the best way to apply a variety of finishes:

• For stain, use a cloth. Traditional stains are very thin and runny, which means it will be difficult to get an even coating with a brush. Gel stains are too thick for a brush – you’ll just push them when you should be rubbing them into the wood grain.

• Urethane, polyurethane, varnish and other oil-based clear coats can be applied with either a brush or a cloth. However, cloths are generally the preferred method because they allow you to apply the thinnest, most even coating.

• Oils – like teak oil or tung oil – are somewhat thin, so they should always be applied with a cloth.

• Paints – both latex paint and oil paint – need to be brushed on. Use a soft brush for the thinner latex paints and a stiffer brush for oil paints.

As you can see, most finishes are best applied with a clean, lint-free cloth. Use either cheesecloth or old t-shirts. If you go the t-shirt route, cut them up into rags and then run them through the washing machine at least twice to remove any loose threads or fuzzy bits from the edges.

Unfinished Birch Cabinets

Unfinished Birch Cabinets

Finishing your own cabinets is an easy, rewarding job. These tips and techniques will give you that perfect showroom look no matter what finish you choose. So the next time you see a great deal on unfinished kitchen cabinets, don’t hesitate to take them home and give DIY finishing a shot!

A designer checklist for avoiding installation problems

A designer checklist for avoiding installation problems in the field

Verify refrigerator dimensions

Provide sufficient clearance

Verify type of range

Verify type of range 2

Dishwasher placement

Dishwasher placement 2


Dishwasher placement 3


Cooktops and built-in ovens


Check ventilation needs


Ensuring proper clearance


Ensuring proper clearance 2

Heat shield requirements

Appliance considerations

Microwave placement

Microwave placement 2


Sink sizes


Clearances around doors and windows


Clearances around doors and windows 2


Clearances around doors and windows 3


Clearances around doors and windows 4


Fillers for cabinets

Staggering heights of corner cabinets

Varying cabinet depths

Varying cabinet depths 2

Working with square corners and blind cabinets


Cabinet clearances


Ensuring proper cabinet clearance


Calculate correct moulding quantities


Note hardware location


Glazed finishes


This article provides some quick and easy directions on the basic steps needed to paint kitchen cabinets. If you buy our unfinished cabinets, you can skip the first step as well as several others if you paint them before installation. We recommend Maple wood since it has the least amount of grain to show through light colored paint.

Follow these 10 basics for beautifully painted kitchen cabinets.
  1. Clean dirt and grease off cabinets using a good wood cleaner or TSP (trisodium phosphate) found at your local home or hardware store. Be sure to wear gloves when handling caustic cleaners!
  2. Remove cabinet faces, drawers, and hardware using a screw driver. Number and group each so you know which pieces belong together or take photographs. You will thank yourself for this foresight when reassembling.
  3. Sand cabinet base, drawers, and faces so that your paint will adhere better to the surfaces. Make sure to wipe down with a tack cloth after to remove residue.
  4. Repair any cracks or other damages in wood by using wood filler. Be sure to sand down so there are no rough spots, and clean residue thoroughly.
  5. Tape off the ceiling, counter, and other adjacent cabinets and lay plenty of drop cloths where needed.
  6. Apply one coat of good-quality primer on all wood surfaces.
  7. Apply two coats of gloss or semi-gloss interior latex paint or high-quality acrylic paint specifically made for kitchen and bath woodwork (to withstand moisture and wear). Allow several hours to dry between coats.
  8. Once your two coats are applied, scout for needed touch-ups and let paint dry for at least 24-48 hours.
  9. Apply two coats water-based polyurethane to act as a seal; again, allow at least 24 hours to dry before putting cabinets back together.
  10. Reattach hardware and cabinets and reload all your displaced contents. Then, enjoy your new, colorful, and stylish kitchen!
painting-cabinets


This page consists of two pages reproduced from doityourself.com. One of the articles has been reconstructed here since the original instructions are out of order. You can view the original links here: Preparation Article and Installation Article.

Preparation

After the demolition phase, there is usually some preparatory work to be done before you can install your new kitchen. If extensive structural, electrical, plumbing, drywall or paneling work is included in your plans it should take place at this time as well.

Walls

  1. Gouges or holes in the walls must be repaired with wall board compound, spackle, or patching plaster. Stuff larger holes with newspaper or fine wire mesh to hold the compound. If you have gaping holes or many gouges it may be necessary to replace the surface with dry wall.
  2. Usually, installing new cabinets will call or some changes in the position of the cabinets, requiring that the walls be painted. If drywall or large patches of filler are being used to prepare the walls, a coat of sealer or primer should be applied before the color coat.
  3. Locate and mark the wall studs on the floor and ceiling as a reference for attaching the new cabinetry.

Floors

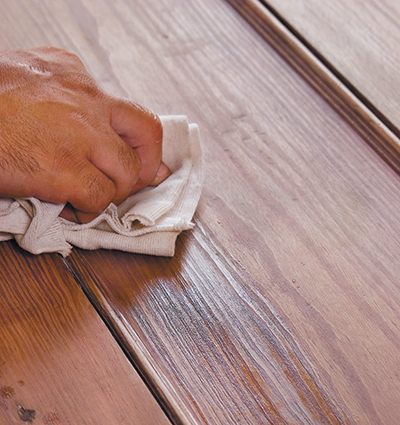
If you plan to replace your floor, the time to prepare for it is BEFORE installing the cabinets and permanent appliances. Ceramic tile floors are usually placed before the installation of cabinets while vinyl flooring can be laid either before or after the cabinets are in place. If the new floor will go directly on top of the existing one, it is very important to fill any areas that may have dipped, buckled or bulged, as well as any holes or gouges, and nail down protruding boards. Remove glue or paint that may have spilled. Countersink nail and screw heads that are sticking up above the surface. If the old floor is embossed or has dips and/or hollows in it, these should be filled in with cement filler using a 5 to 10-inch wide putty knife.

Water damaged floors must be repaired before laying down a new floor. You will need to remove the existing flooring to expose the damaged subfloor. Damaged portions of sub-flooring must be replaced. Should you find the entire sub floor to be too badly damaged for salvage, it will be best to lay new one. This can be laid directly on top of the existing floor.

The Order of Installation

These instructions are to be used as a guide but you should always follow the specific manufacturer’s instructions where there are deviations. Putting the kitchen together should occur in a logical sequence.

  1. Primer and paint
  2. Ceramic tile, vinyl or hardwood flooring*
  3. Wall cabinets
  4. Base cabinets and islands
  5. Cabinet doors, drawers and hardware
  6. Plywood base for tile countertops
  7. Recessed sink
  8. Counter tops – wood, marble, tile
  9. Surface mounted sink & fittings
  10. Disposal
  11. Dishwasher
  12. Ice-maker connection
  13. Over the range hood/vent
  14. Cook top
  15. Wall oven and microwave
  16. Vinyl Flooring*
  17. Range
  18. Refrigerator, freezer, trash compactor & icemaker
  19. Lighting fixtures
  20. Finishing touches – trim

*Note: Hardwood flooring and ceramic tile are always laid before cabinets are installed while vinyl flooring can be placed after the cabinetry is in place.

Installation

Most Common Mistakes

  1. Not installing level or plumb,
  2. Not attaching to studs,
  3. Damaging or marring cabinets,
  4. Not aligning cabinet doors,
  5. Damaging the walls during installation,
  6. Not cutting sink opening to proper dimension,
  7. Drop-in appliances not properly fitted and installed,
  8. Not making exact fits and cuts, or
  9. Not installing all needed utilities.

Whenever installing stock cabinets, accurate measurements are critical to assure a snug fit. Custom made cabinetry is usually sold with a warranty conditional on having the cabinets installed by the dealer. In fact, the dealer will probably send someone out to make their own measurements.

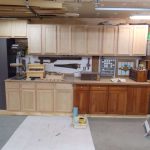
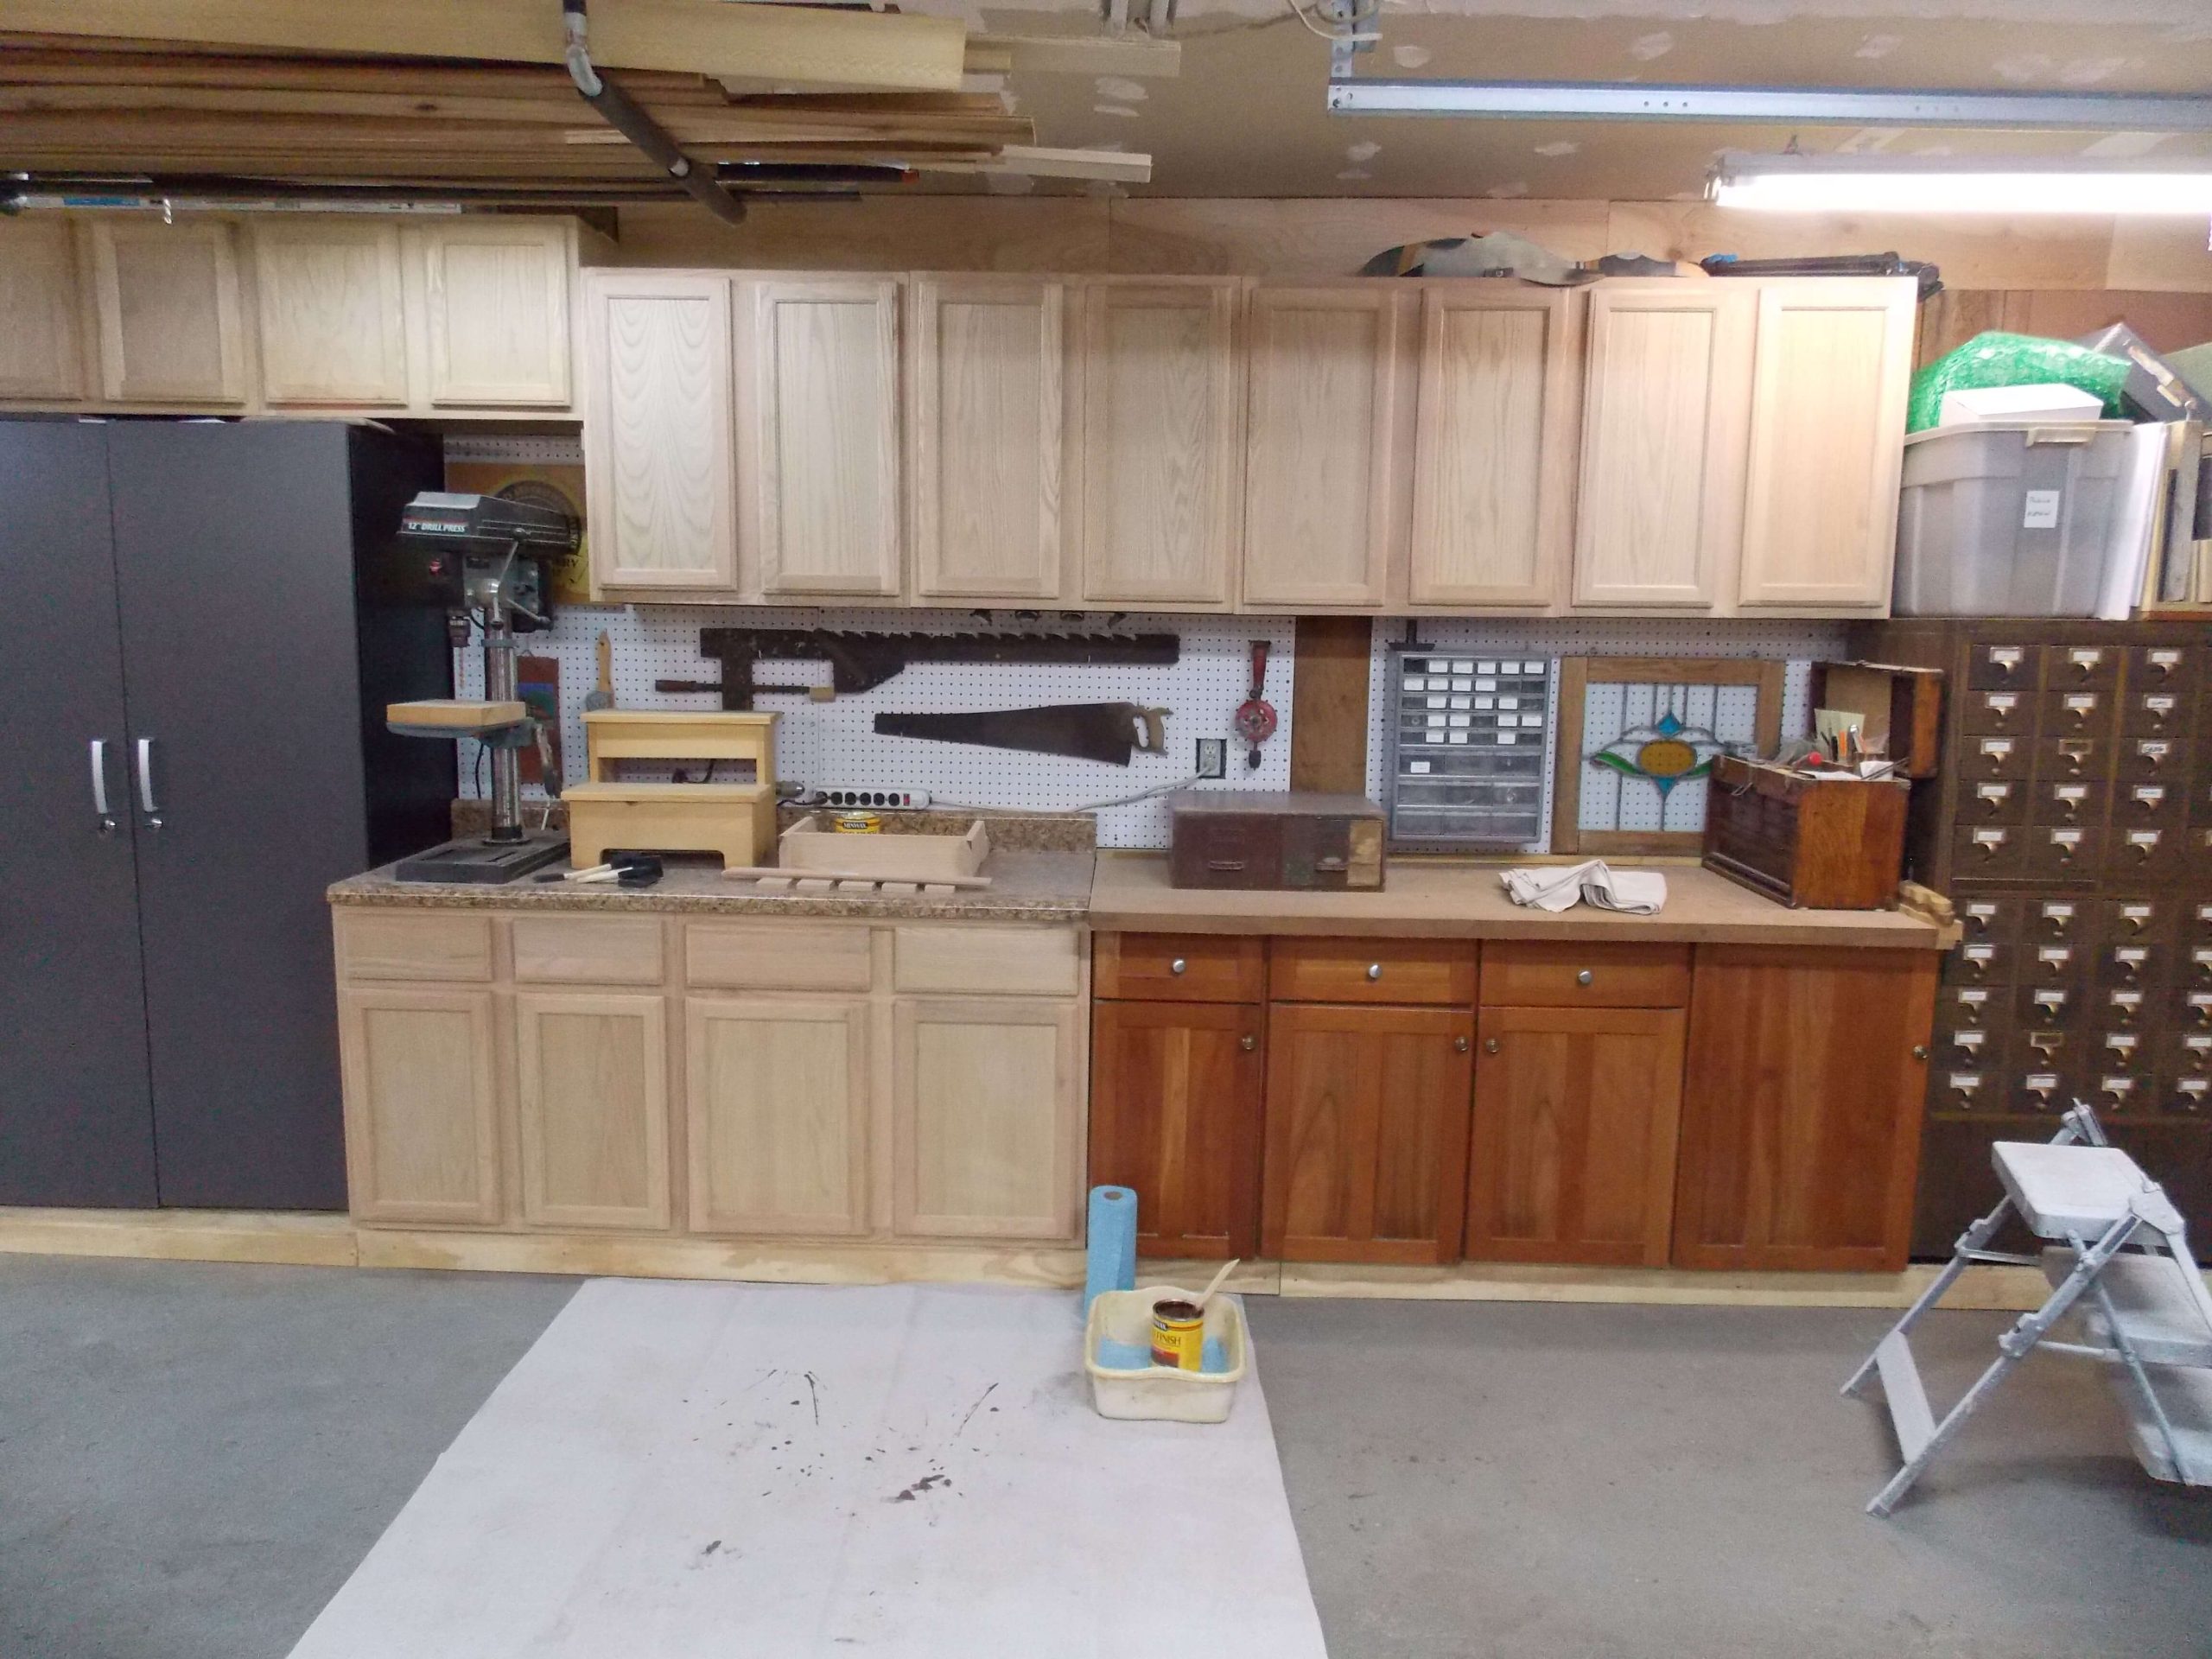
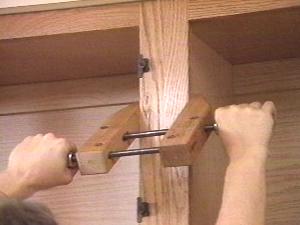
Most ready-made cabinets come with a scribe allowance at the edges to allow you to adapt them to irregular walls. Scribing simply involves running a strip of masking tape along the side to be scribed; then, positioning the cabinet. (See Fig. J) Set the points of a pencil compass to the width of the widest gap between the side of the cabinet and the wall. Run the compass down the wall and the irregularities will be pencil marked on the tape. Now you can plane or sand down to the line so the cabinet will rest flush against the wall. If the scribe edge is not included on your cabinets or if your cabinets go all the way to the ceiling, plan on trimming the edges with a small piece of molding.

It is easier to install the upper wall cabinets first because you have room to work with them. Since they will hang from the wall, you must make certain they are securely attached.


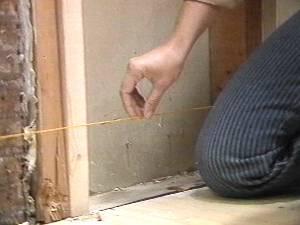
Before installing any of our new cabinets, remove all the drawers, doors and hardware and label them as to their original locations for quick reassembly. This will make the units much lighter and more manageable.

    1. Use a chalk line to mark the position of the wall studs on the walls from ceiling to floor.


    1. Measure the height of the base cabinets. If your floor is not level, measure from the highest point. Add to that measurement the thickness oft e counter top. Measure this distance up from the floor and draw a horizontal line across the wall. Use a level to assure this line will be true horizontal. This will indicate the surface of the counter top.


    1. Measure to another point above the line to where the bottom of the upper cabinet will rest (usually 18′ to 19″ above your 1st line) and draw another horizontal line across the wall. This line (approximately 54 inches above the floor) should also be made with a level to assure it is true horizontal and parallel to the line for the counter top.


    1. Nail a temporary l x 2 ledger board to the wall so that the top of the board is even with the line for the upper cabinets. Be sure you are nailing into the studs. Now mark the cabinet widths along the length of the ledger strip.


    1. You will need to make a few temporary jacks to support the wall cabinets while you attach them to the wall. The total length of the jack should reach from the floor to the bottom of the upper cabinets. Wide blocks of wood nailed to both ends of a 2 x 4 work well for this purpose. Put the jacks into position near the ledger.


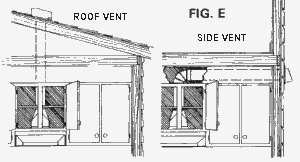
    1. When readying the cabinets for installation, we recommend you first prepare those cabinets that will house a hood/vent, ducts and plumbing: Place the cabinet upside down on the floor with the hood in position upside down on the (bottom of the) cabinet. Trace the outline of the vent hole onto the base of the cabinet. Drill a starter hole for your sabre saw, then, cut around the outline and remove the cutout, Next, make a paper template of the ceiling or wall where the cabinet will be placed that shows where the end of the duct will enter. Place the template into position on the cabinet top or back and outline the duct hole. Again, drill a starter hole and cut out the circle with your sabre saw. Mark the location of the Wall studs on each cabinet’s hanging cleats; then, drill pilot holes for screws at these points. Self-drilling bugle head screws can also be used. These require no pre-drilling, except when using at face frames. With the doors removed, lift the first cabinet into position onto the ledger board and the temporary jacks. Check to see that the cabinet is both level and plumb in position and, if needed, add shims at the back of the cabinet to bring it into a plumb position.


    1. Screw the 2-1/2 inch No. 8 flathead wood screws through the cleat at the back of the cabinet and into the wall studs – two at the top and two at the bottom. Use longer screws if needed to assure at least 1 -1/4″ to 1-3/4″ penetration into the studs. Each unit should be attached to a minimum of two studs. If only one stud is located behind a unit, add a toggle bolt as an additional fastener.


    1. Attach each of the upper cabinets in this manner. Then, go back and screw the adjacent units together. When connecting adjoining cabinets, it may be necessary to loosen wall screws to allow the faces of the cabinet to be attached flush to each other. Use hand screws or a C clamp with soft wood screws between the jaws of the clamp and the face frame often cabinet to hold the units flush while you screw them together.


    1. Recheck all for level and plumb.


    1. Remove the jacks and the ledger board and repair any holes in the wall.


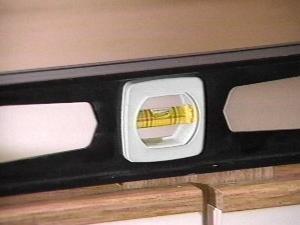
    1. If your lower cabinets have freestanding bases, set the bases in position and level them, shimming if necessary. Also, use a framing square to square them where your base cabinets meet in a comer. When placing shim material, place a block of wood between the shim and the hammer so as not to damage the flooring.  Then anchor them to the floor and place the cabinet units on top of them. Those cabinets without freestanding bases must be leveled and anchored in position as a unit. As you set the base cabinets in place, measure and leave room for our appliances, adding a 1/4 inch for clearance – more if you will be adding end panels. Check the position of your base units against the line on the wall, making certain the tops are equally below the line by the thickness of your counter top.


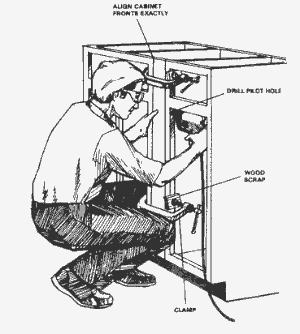
    1. Attach the cabinet units together so that the faces are flush. Slide a level down the entire length of the cabinets, adding a shim where there is a gap or to bring it up to level. Place your level front to back on the top of the cabinet to check for plumb – a again shimming if necessary. Then, screw the entire length o cabinets into the wall with the 2 – inch screws through the top cleat and into the wall studs. often, due to some unevenness in the wall, there will be gaps between the back of the cabinet and the wall. To avoid pulling your cabinets out of kilter as you position them to the wall, shim the gaps at the fastening point (where the stud is located) before screwing the cabinet into place.


    1. Island cabinets must have the individual units screwed together and laced into position before leveling and plumbing on all four sides. I the base is separate, level and plumb it. Then, fasten it to the floor With toe nails or angle brackets. Place and anchor the cabinets to the base. When installing an island unit, it is important to square it to the cabinets along the wall and to the wall itself, as well as lining it up properly with the overhead fixtures (stove vent or lighting). Measure off on both ceiling and floor to determine the exact location.