 |
|
Original Link: http://design.hgtv.com/kitchen/Article_detail.aspx?id=121 |
Goodbye Dresser, Hello Kitchen IslandDecorating and Design expert Nancy Golden gives step-by-step directions for creating your own kitchen islands.A great way to achieve a warm look in your kitchen is to incorporate wooden furniture into the design. An oak desk, an Amish pie safe or a pine hutch are possibilities for bringing warm wood tones into the kitchen. Another option that's both functional and attractive is to turn an old buffet (see image 1) into a kitchen island. DIY Decorating & Design host Nancy Golden explains how. A buffet is normally is used against a wall, so the back is often unfinished. Bead-board (see image 2) paneling is an inexpensive and suitable option for finishing the back of an old-fashioned buffet like the one shown. Nail the bead-board panels in place on the back of the buffet, and finish the exposed corners with corner molding (see image 3). Create a work-surface top for the island with a piece of plywood cut about 3" longer on all sides than the top of the buffet to form a lip. Edge the top with molding that will match the depth of the countertop surface. Finish the top of the island as you would any countertop — with laminate, butcher block, tile or stone. Nancy chose marble tile for the top of the island because it's relatively inexpensive, durable and easy to install. To install tile, spread an even layer of tile mastic (see image 4) on the wood top with a notched trowel, and set the tile in place. Butt the tiles against each other, and when finished, seal the seams with a line of clear silicone caulk. To increase the island's functionality, install a towel bar at one end. Add a designer look to your island with decorative knobs — match the rest of the knobs in your kitchen, or find a coordinating style that complements your island. Make a super-simple kitchen island with two short bookshelves placed
back to back and topped with a work surface — or easier still, use a
regular wooden table. |
|
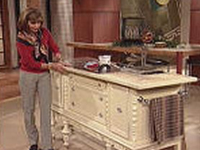 Image 1: Convert an old buffet into a country-style kitchen island. |
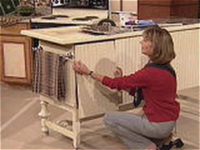 Image 2: Finish the back of an old dresser with bead-board paneling. |
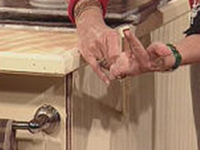 Image 3: Corner molding adds a finishing touch. |
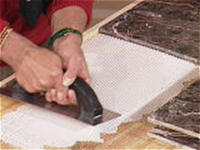 Image 4: Make sure you buy mastic specifically for tile. |
 Image 5: Caulk all seams to keep out water. |
|