|
Tips: Step-by-Step Cabinetry Painting Guide
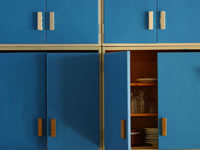
Step-by-Step Guide: Painting Cabinetry
Follow these 10 basics for beautifully painted kitchen cabinets.
- Clean dirt and grease off cabinets using TSP (trisodium phosphate) found at your local home or hardware store. Be sure to wear gloves when handling!
- Remove cabinet faces, drawers, and hardware using a screw driver. Number and group each so you know which pieces belong together — you will thank yourself for this foresight when reassembling.
- Sand cabinet base, drawers, and faces so that your paint will "take" — make sure to wipe down with a tack cloth after to remove residue.
- Repair any cracks or other damages in wood by using wood filler — be sure to sand down so there are no rough spots and clean residue thoroughly.
- Tape off ceiling, counter, and cabinets and lay plenty of drop cloths where needed.
- Apply one coat of good-quality primer on all wood surfaces.
- Apply two coats of gloss or semi-gloss interior latex paint or high-quality acrylic paint specifically made for kitchen and bath woodwork (to withstand moisture and wear) — allow several hours to dry between coats.
- Once your two coats are applied, scout for needed touch-ups and let paint dry for at least 24-48 hours.
- Apply two coats water-based polyurethane to act as a seal; again, allow at least 24 hours to dry before putting cabinets back together.
- Reattach hardware and cabinets and reload all your displaced contents. Then, enjoy your new, colorful, and stylish kitchen!
|
|
|